If you’re a Microsoft 365 admin, you can use the Exchange admin center or Windows PowerShell to add photos on behalf of users.
Use the Exchange admin center
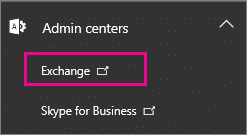
- Go to the Microsoft 365 admin center, and then open the Exchange admin center.
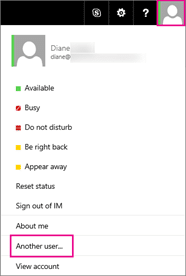
- Choose your own profile photo, and then choose Another user.
- Select the user you want to update, and then choose OK.
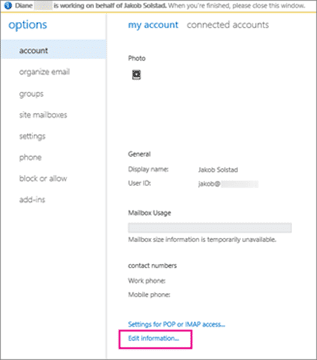
- Under Account, choose Edit information.
- Choose Change.

- Browse to the photo you want to upload, select it, and then choose Save.
Use Windows PowerShell
- You can also use the Set-UserPhoto PowerShell cmdlet to change a user’s photo. For example:
Set-UserPhoto "username" -PictureData ([System.IO.File]::ReadAllBytes("C:\Users\Administrator\Desktop\photo.jpg"))