Source: https://www.connectix.nl/make-your-own-lamp-for-less-than-10-dollar/
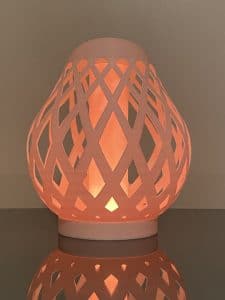
What’s more fun than making your own colorful lamp. This lamp can be made very cheap (even less than 7.50 dollars if you find the right deal!) and a little patience. Many knowledge of electronics is not mandatory because I will explain how to make this lamp in a few easy steps. All you need are a few components and some patience to wait for the print to finish. It can be a nice project to do with children to let them get comfortable with making nice things at home or for school.
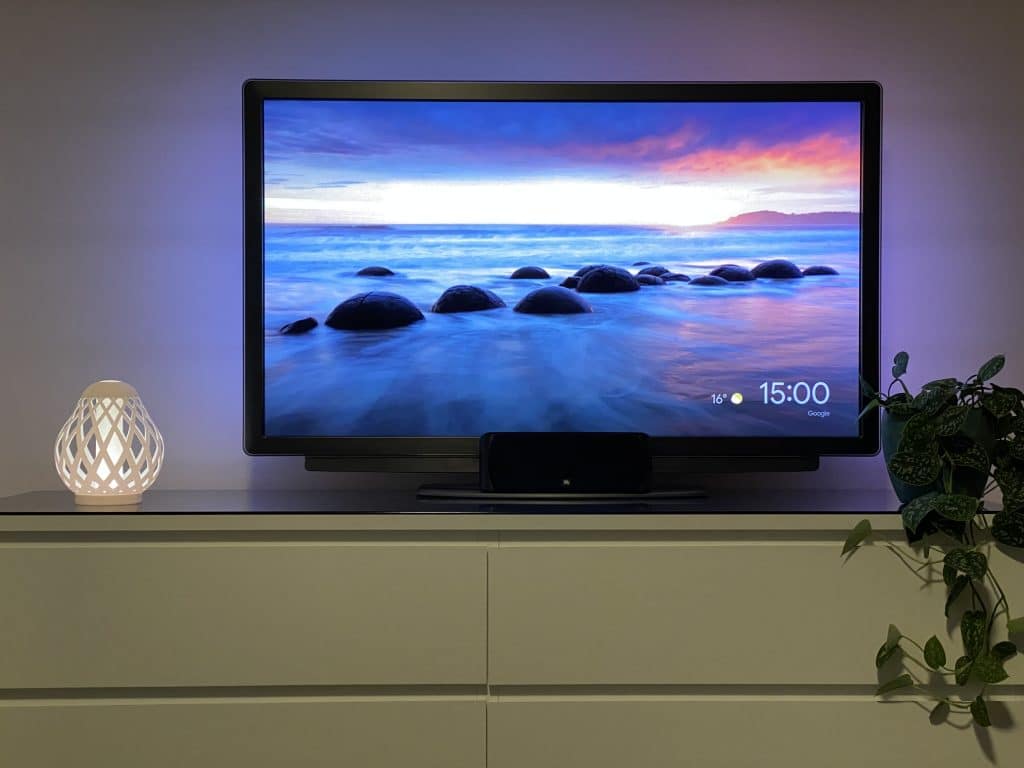
Since a year or two I own a 3D printer. That lead me to learn designing things to print. I have a background in electronics so I decided to make a little project. This resulted in this little lamp which can be remotely controllerd via an app on your phone. You can give it the color you want and even some fancy effects. You can even use it to make schedules and wake-up with a nice light next to your bed.
What you need are these few very cheap components which you can buy everywhere. The cheapest way is to buy them from AliExpress but it will take some time to get at your doorstep. Here is the list:
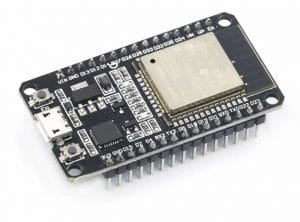
- ESP32 – Link
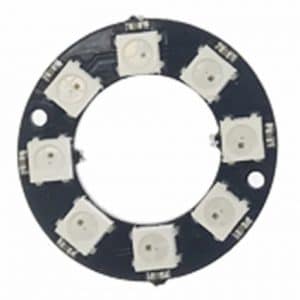
- LED Ring with eight leds – Link
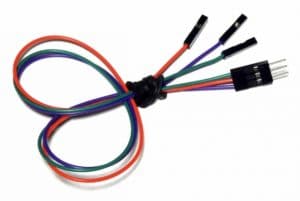
- 10 cm dupont cable male/female (you can use an old telephone cable with 3 pairs laying around) – Link
- 3D Printer
- White PLA filament to print
- Soldering Iron with tin
- Glue
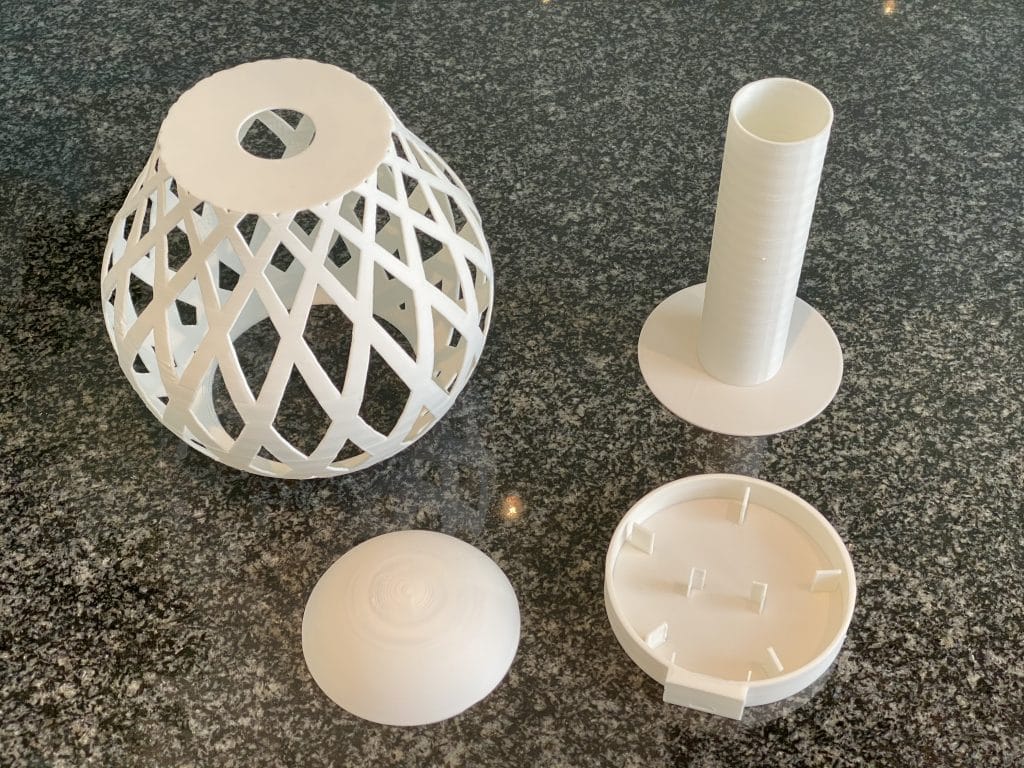
Downloading and printing the enclusure
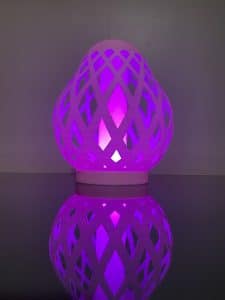
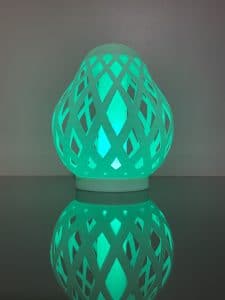
When you have all these components at hand you can begin printing the lamp enclosure. The print consists of 4 pieces which you can print together if your printer is big enough. If your printer is not big enough you can print each peace seperately. I uploaded them on Thingiverse where you can download them for free. Printing can take 15 hours so you can do this in advance. My advice is to print the encluse in white PLA because the light can shine easily through and the colors of the lamp will be better represented.
The files can be downloaded on Thingiverse: Download Here!
Programming the ESP32
In the mean time you can begin program the ESP32. You have to program it with the WLED software. This can sound very intimidating but it’s really very easy. You just have to download a .bin file and upload it to the esp with programming software.
- Click this for the link to the .bin file
- Click here for the link to the esp-home-flasher programming software
Now connect the esp32 to your computer and start the esphome-flasher executable. If windows gives you a waring you can click “run anyway”. The software doesn’t harm your computer. This is how the screen looks like:
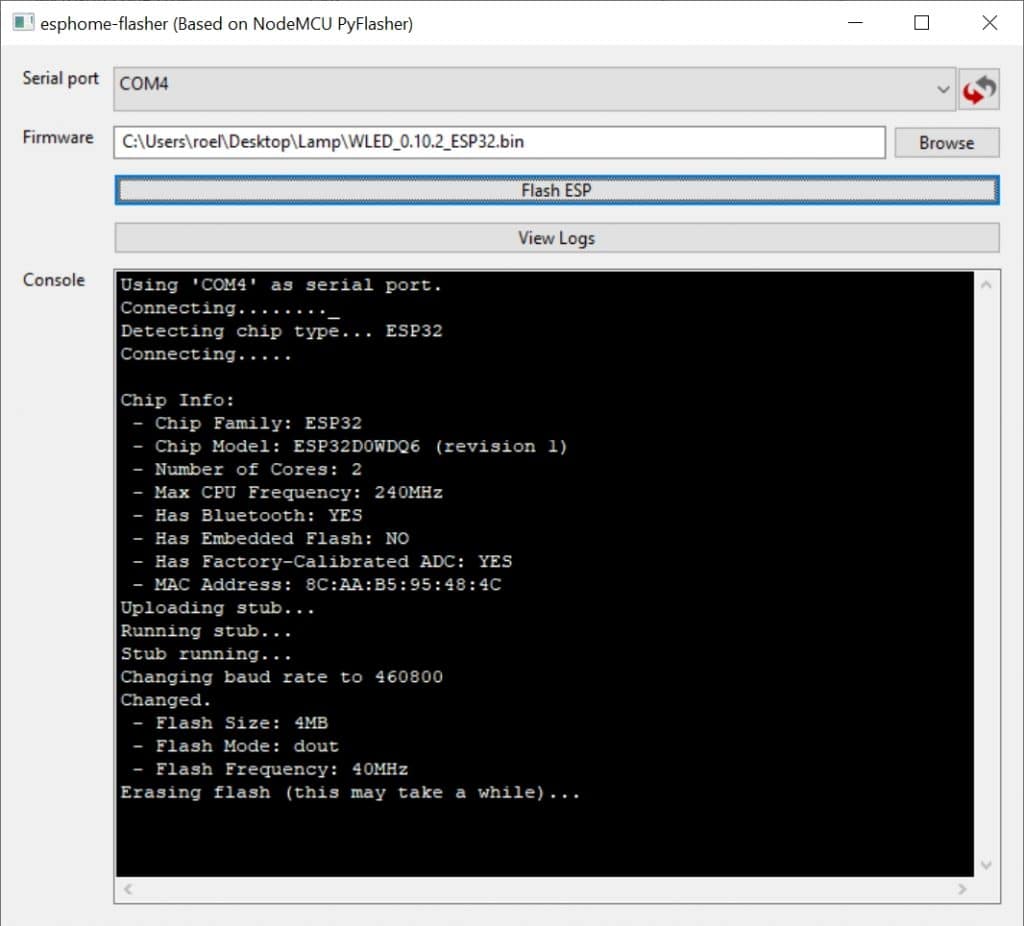
If your esp32 is connected it will display as a Serial Port in the software. If it is not displayed you can click the refresh button with the arrows on the right. Select the COM port where the esp is connected.
Now Click the Browse button to browse to the .bin file you downloaded before. The last step is to upload the .bin file to the board. You can click “Flash ESP” to do this. This can take a a minute.
If you get an error when uploading the file, you have to press the “Boot” button on the ESP32 to put the ESP into download mode. Just try again till the upload is successfull. The best is to press the boot button till the uploading begins.
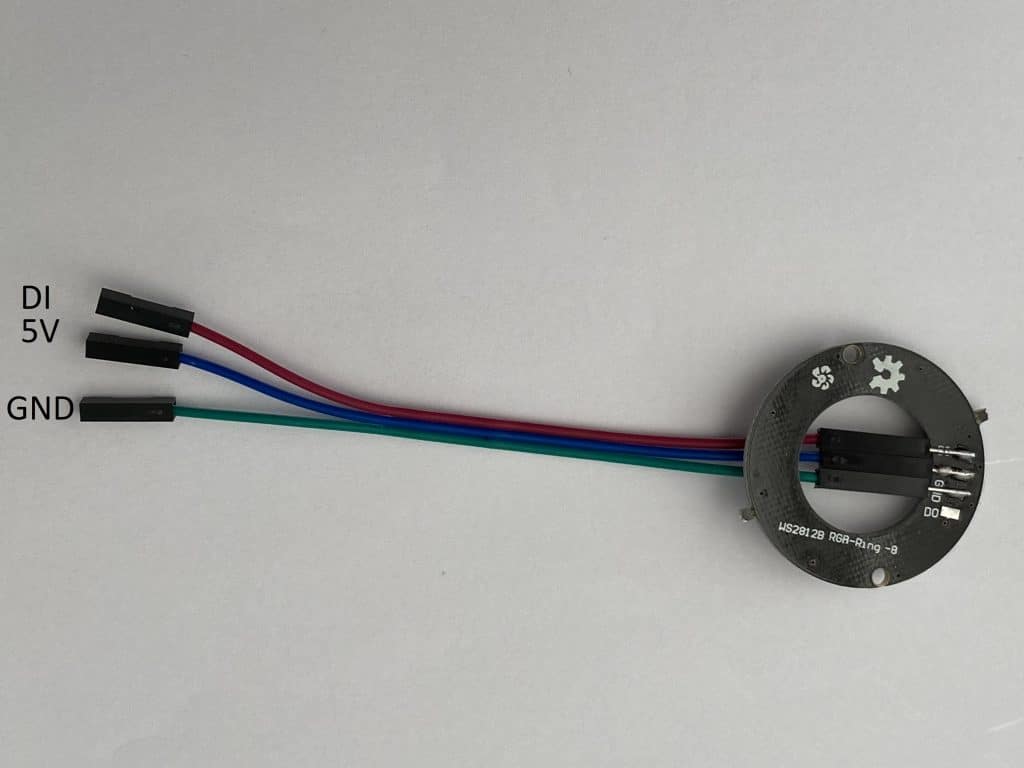
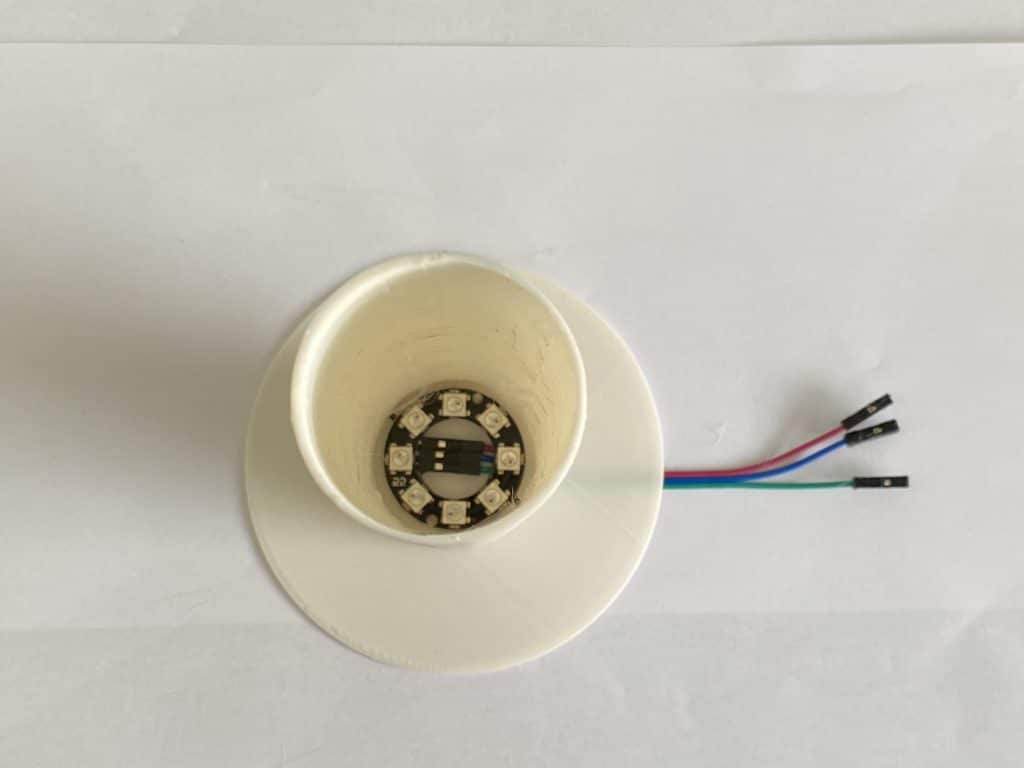
Soldering the jumper wires to the led-ring
Now it’s time to solder the three jumper wires to the led ring. You don’t have to use the DO pin, only the 5V, GND and DI. You can use a random cable color, just remember which color you soldered on which pin.
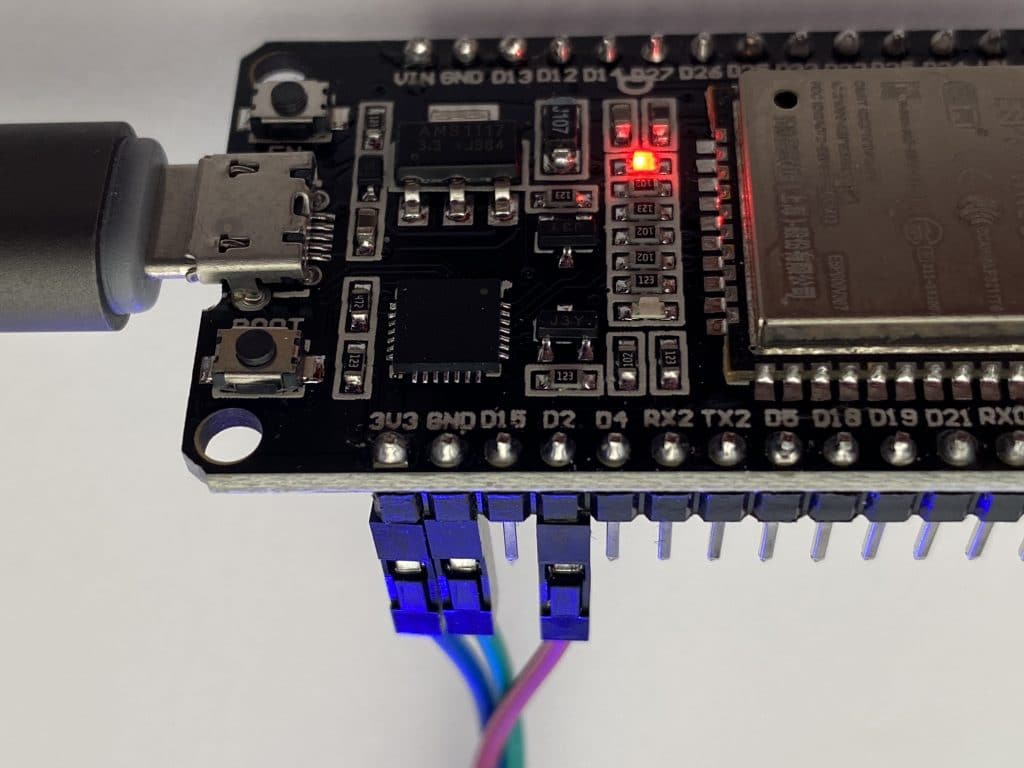
Now you can connect the pins to the ESP32. It’s very easy. Just put the 5V jumper wire to the 3.3V pin on the esp. Don’t worry, the leds work perfect on 3.3V too. Connect the GND from the led-ring to the GND pin on the ESP and the DI to ESP pin 2.
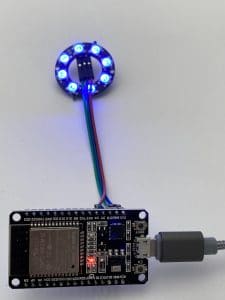
Power on the ESP with a micro usb cable. If the leds start shining everything is connected correct. It doesn’t matter if the colors are random, we will look to this later.
Putting everything together
Now it’s time for the fun part, putting everything together. At this point your four part print is finished and your led ring is tested.
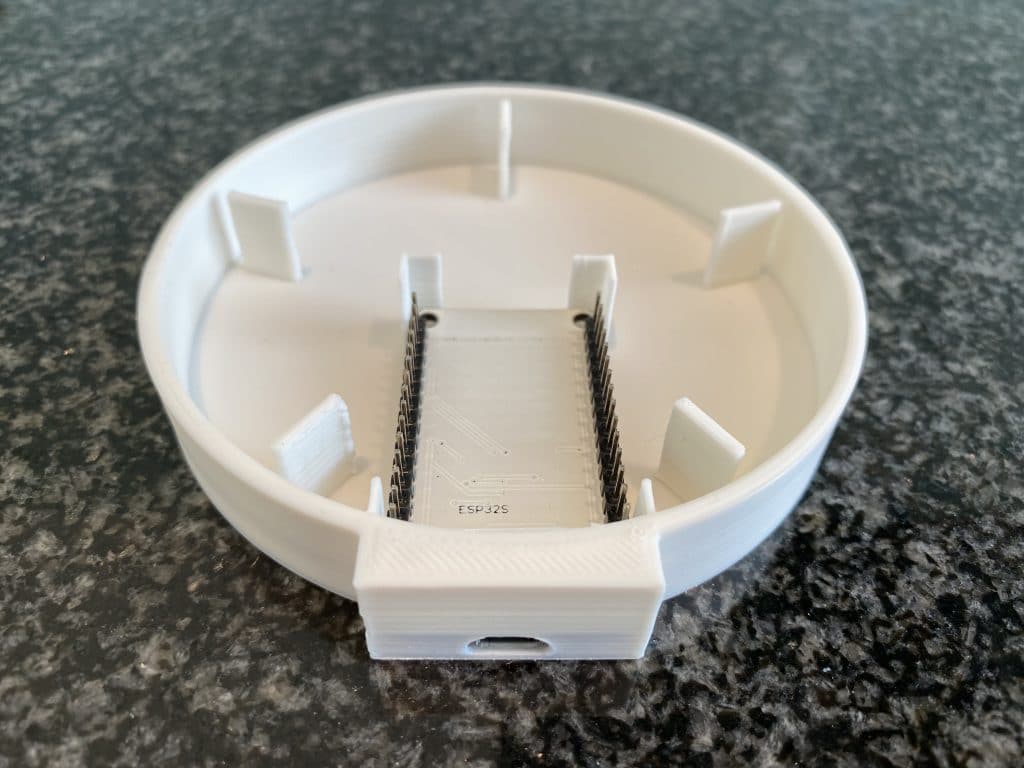
Put your ESP32 in the bottom enclosure so the usb connector faces outward. Use some glue to bind it to the bottom plate.
Now take your led ring and glue it to the inside of the centre cylinder. It’s important to put the wires througe the hole on the bottom!
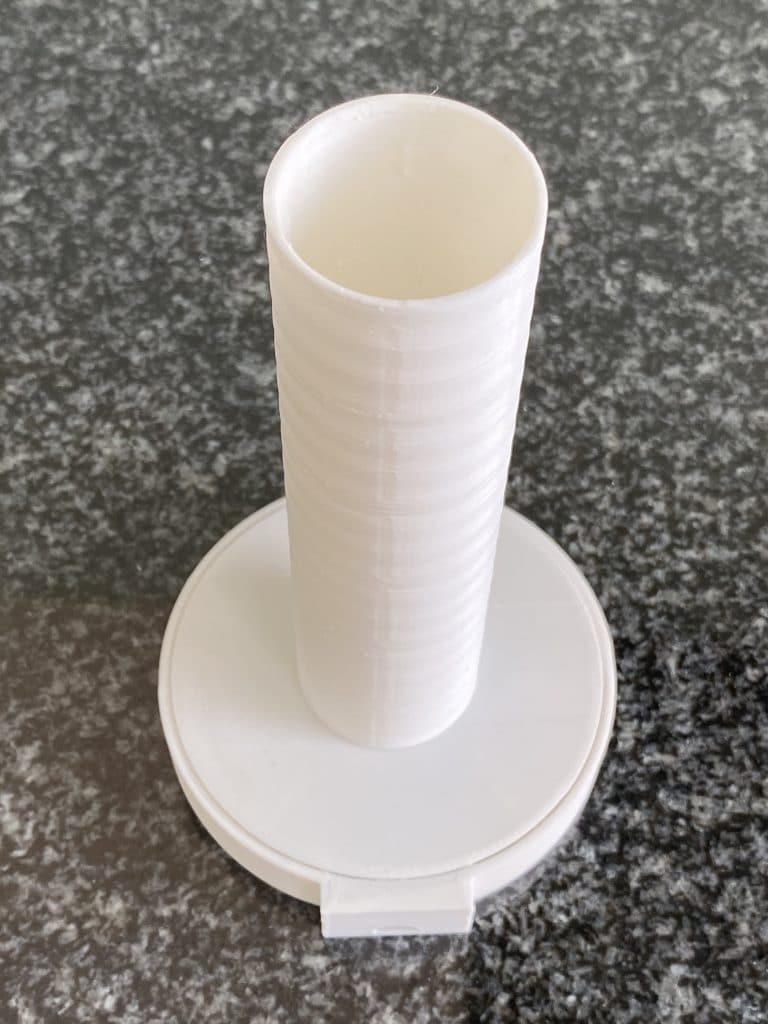
Put the jumper wires back to the pins on the esp32. They will stick out a bit so you have to bend the pins on the esp to let everything fit together nicely. It’s time to glue the cylinder to the bottom plate. Put some glue to either side for better sticking. Let it dry for some time. You can glue the upper sphere to the middle part too.
When those parts are dry, you can glue the bottom plate to the middle part. Let it dry again for some time.
Configure the lamp
That sounds strange doesn’t it. Well, if you want to control this light with your phone you have to connect it to your wifi network. That’s easier than it sounds. Just connect the lamp with the micro usb cable. An old phone charger will do. The lamp will light up and will broadcast a wireless network. You have to connect to this network with your phone or computer.
- network: WLED-AP
- password: wled1234
A configuration page will automatically come up where you can configure the wifi network. If it doesn’t show you can browse to http://4.3.2.1
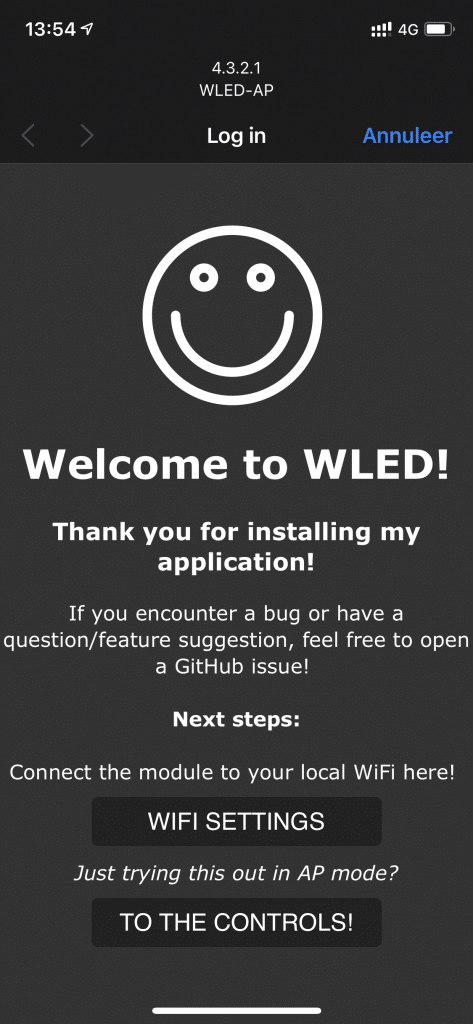
Select “WIFI SETTINGS”. The following page will show.
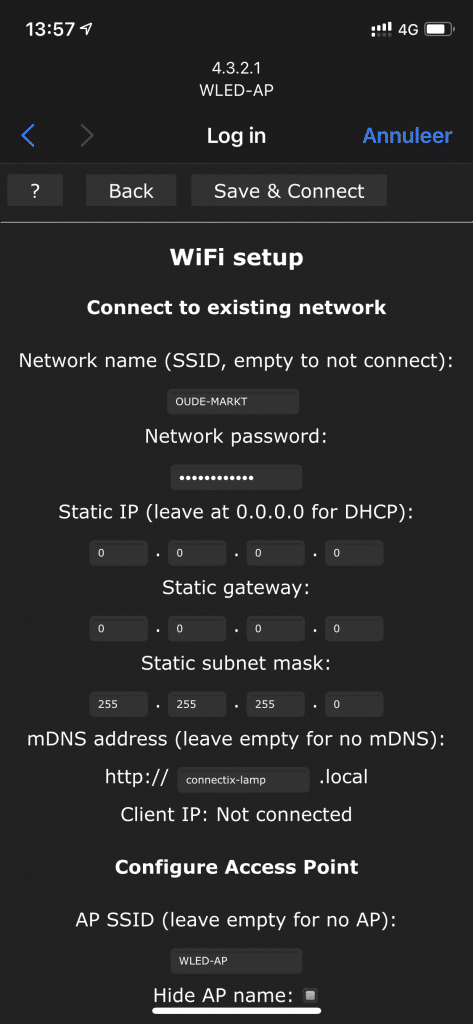
Just enter your wifi network in the SSID field. Don’t forget to enter the password. Optionally you can give it a meaningful name in the mDNS field. A static ip address is not nessecary. Select “Save and Connect” in the bottom part of the screen. Your lamp will now connect to your wifi network. Don’t worry if it can’t connect. It will broadcast the WLED-AP again where you can change the settings if it can’t connect.
Downloading and using the App
You can control the Lamp with an ap. The IOS and Android apps are available using the following links:
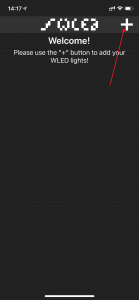
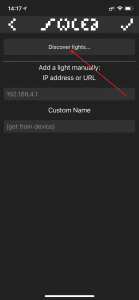
Start the app and connect to your new beautiful lamp using the discover function. Use the “+” sign on the upper right corner of the screen. Now select “Discover Lights” and wait till it finds your lamp. Click the “V” sign in the upper right corner to save your new lamp.
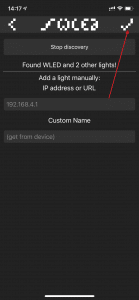
Your new lamp will show up with the assigned ip address. It’s time to put some light into your room!
Using the app
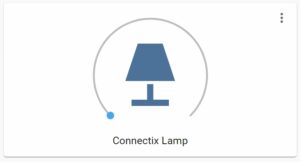
You can turn on and off your new self made lamp by tapping the power button, easy isn’t it? If you want to put some nice colors on it, tap the ip address.
The following page will show up. Just pick a color from the color wheel. You can adjust the brightness woth the slider on the top.
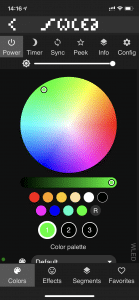
Use the effects button on the bottom of the page to display some fancy effects.
Integration with Home Assistant
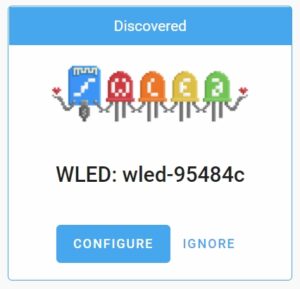
This lamp is based on WLED software. It integrates nicely into Home Assistant. One connected to the wireless network it will be automatically discovered.
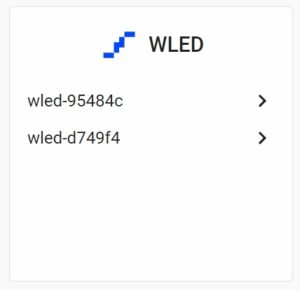
It will show up under the Integrations page. Just click the configure button
Select the newly discovered lamp (I have two)
Select Add to Lovelace
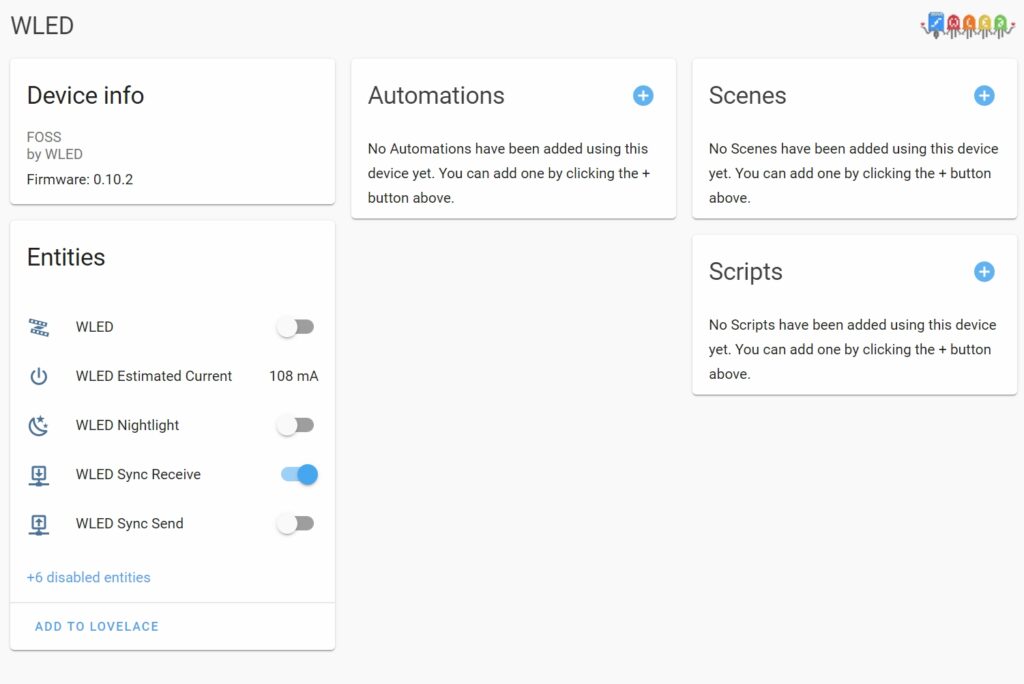
Enter the information as shown below and modify at wish

SHOWTIME!