Some organizations — smaller ones in particular — will have one SharePoint team site where everything (i.e., important and confidential company documents) is stored. However, it’s potentially risky having all your site members able to access everything within a site in any scenario, which is why we see a lot of organizations asking if they can restrict access to specific folders in SharePoint.
It is possible to break permission inheritance on a folder in SharePoint and set unique permissions, letting you prevent users from accessing a specific folder in SharePoint. The steps below walk you through the process:
- Navigate to Office.com and sign in using your Microsoft 365 credentials
- Open the app launcher and click SharePoint
- Open the SharePoint team site you’re wanting to edit permissions for
- Click Documents
- Hover over the folder you want to restrict access to and click the 3 vertical dots (⋮)
- Click Manage access
- Click Advanced
- Click Stop Inheriting Permissions
- Select the groups that you want to revoke access from and click Remove User Permissions
- OPTIONAL: Grant permissions to extra users by clicking Grant Permissions, invite people by entering names/email addresses, select/deselect Share everything in…, select a permission level, then click Share
In this blog post, I’m going to demonstrate the entire process given above so you can easily follow along. Please note that your Microsoft 365 user must have the appropriate roles assigned to follow this process. You must be either a global admin or SharePoint admin.
We’ve also created a video that walks you through all the steps given above. You can give it a watch here:
Step-by-step (with screenshots): How to restrict access to a specific folder in SharePoint
You can restrict access to a specific folder in SharePoint following this relatively easy process. The only thing to bear in mind is you need to have the appropriate privileges assigned to your Microsoft 365 user. You need to be either a global admin or a SharePoint admin to make these changes.
- Navigate to Office.com and sign in using your Microsoft 365 credentials
- Open the app launcher and click SharePoint
- Open the SharePoint team site you’re wanting to edit permissions for
- Click Documents
- Hover over the folder you want to restrict access to and click the 3 vertical dots (⋮)
- Click Manage access
- Click Advanced
- Click Stop Inheriting Permissions
- Select the groups that you want to revoke access from and click Remove User Permissions
- OPTIONAL: Grant permissions to extra users by clicking Grant Permissions, invite people by entering names/email addresses, select/deselect Share everything in…, select a permission level, then click Share
These screenshots are a walkthrough of the entire process. Even though it might seem a little complex, it’s nowhere near as complicated as it looks. Follow along with the screenshots and it’s relatively simple.
1. Navigate to Office.com and sign in using your Microsoft 365 credentials
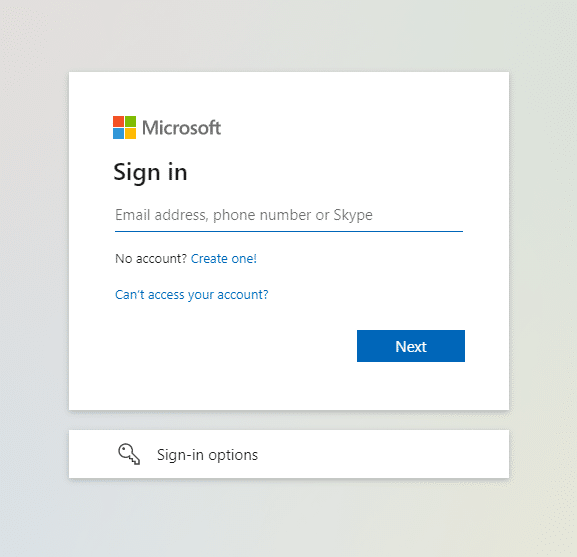
Sign in using your Microsoft 365 credentials. These are likely the login details you use to sign in to your computer (your business email and password).
Bear in mind that you need the correct admin roles assigned to your user: either global or SharePoint admin.
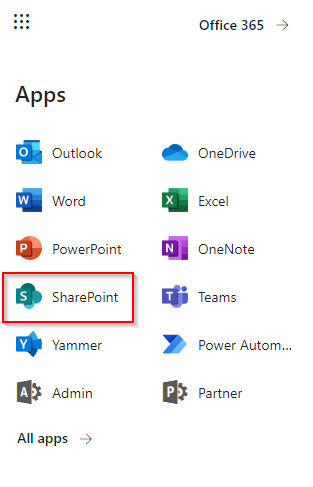
2. Open the app launcher and click SharePoint
3. Open the SharePoint team site you’re wanting to edit permissions for
Open the SharePoint site that the folder is stored in.
4. Click Documents
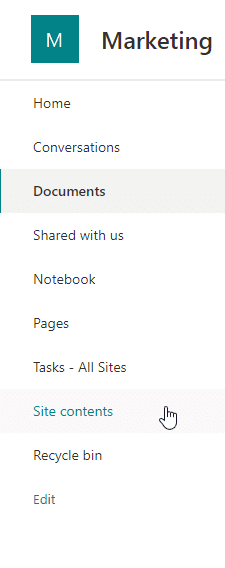
Click Documents to open up the document repository.
5. Hover over the folder you want to restrict access to and click the 3 vertical dots (⋮)

Locate the folder that you want to restrict access to. Hover over the folder with your cursor and three vertical dots will appear — as shown in the screenshot above. Click the 3 vertical dots and a menu will open up.
6. Click Manage access
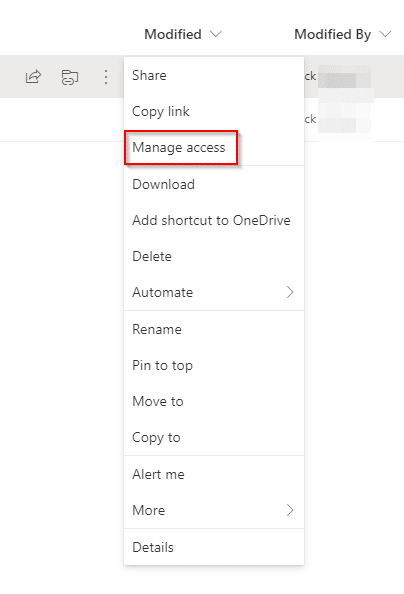
After you’ve clicked the 3 vertical dots, a menu will appear. On this menu, click Manage access (highlighted in the screenshot above).
7. Click Advanced
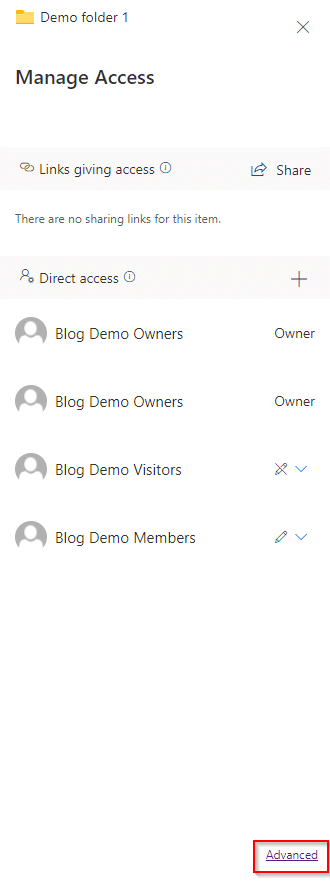
This is very easy to miss, as it’s hidden in the bottom right corner when you open the menu to manage folder access. I’ve highlighted it in the screenshot above.
8. Click Stop Inheriting Permissions
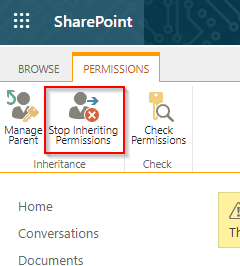
Once the new page loads, you’ll see a bottom on the ribbon menu that says ‘Stop Inheriting Permissions’.
With default settings, a folder within your document repository will ‘inherit’ the permissions of the root/parent folder. The default parent folder permissions let any member of a team site access all the folders and files stored within.
When you click ‘Stop Inheriting Permissions’, this lets you set permissions for the folder you’ve selected alone. So while members of the team site can still access the rest of the folders and files as before, you can stop them from accessing the folder that is no longer inheriting permissions.
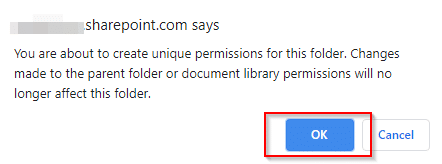
Note that when you click ‘stop inheriting permissions’, you may get a browser pop-up similar to the one in the screenshot below. The appearance will differ from browser to browser, but click ‘OK’ or the equivalent option displayed in your browser.
9. Select the groups that you want to revoke access from and click Remove User Permissions
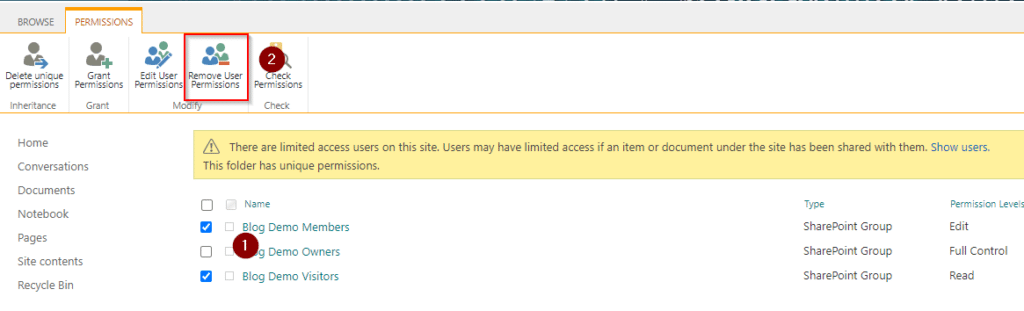
After following the previous step, you can now set unique permissions for this folder. To revoke access:
- Select the groups you want to remove access privileges for
- Click Remove User Permissions
The process is as simple as that. After clicking Remove User Permissions, the users within those groups can no longer access the folder.
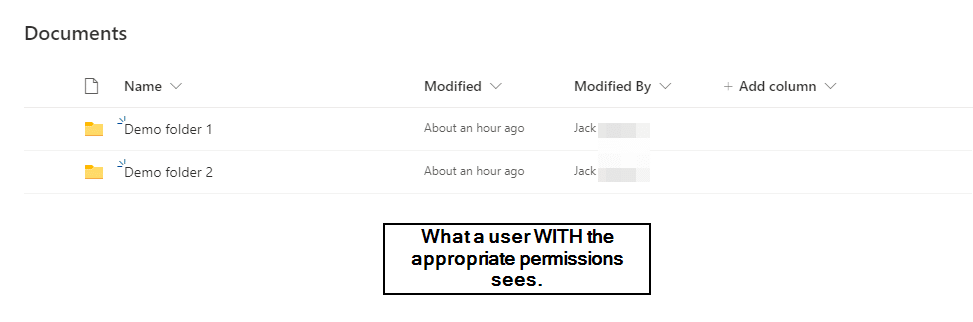
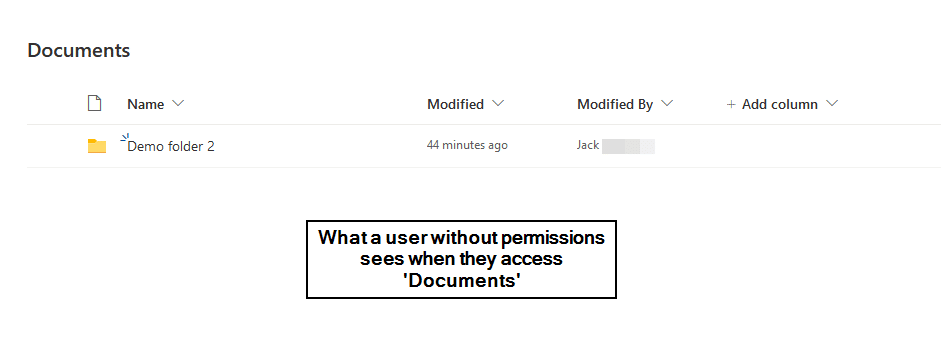
In the first screenshot below, you can see what a user with permission to access the folder can see. In the second screenshot, you can see what a user without permission to access the folder can see or — to be more precise — can’t see! As the screenshots show, the folder isn’t visible to users that don’t have access permission.
Move on to the next step if you want to see how to grant users permission to access the folder in question. Otherwise, thank you for reading and we hope you found the blog post useful.
10. OPTIONAL: Grant permissions to extra users by clicking Grant Permissions, invite people by entering names/email addresses, select/deselect Share everything in…, select a permission level, then click Share
If you want to give extra people permission to access the folder rather than revoke access, the screenshots below walk you through the process.
1. Click Grant Permissions
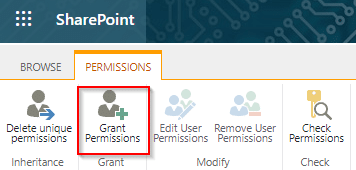
2. Enter names/email addresses, select/unselect Share everything…, select a permission level, and click Share
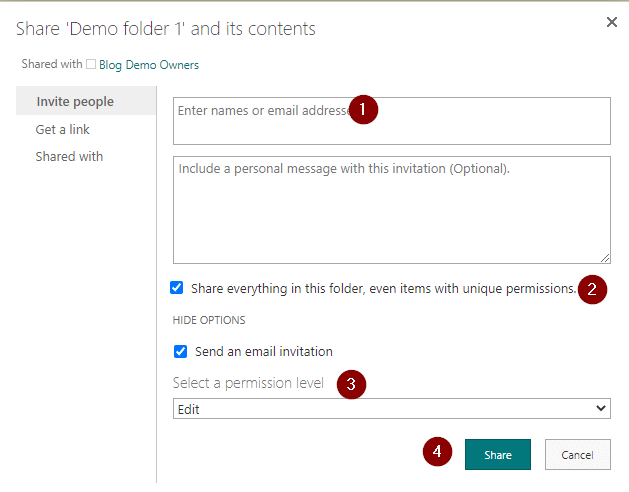
I’ve marked each step you need to take 1 – 4 in the screenshot above. Firstly, enter the names or the emails of the people you want to have access to the folder. Next, select whether you want them to access everything within the folder — even items with unique permissions. Lastly, select a permission level — do you want them to edit items within the folder or have view-only access?
To complete the process click Share. If you left ‘Send an email invitation’ ticked, the users you’ve invited will get an email. They can click the link within the email to access the folder you’ve granted them access to.