Source: https://www.prajwaldesai.com/deploying-windows-7-using-microsoft-deployment-toolkit-part-2/
In this post we will see the steps to deploy windows 7 using Microsoft Deployment Toolkit. We would be making use of WDS and MDT in deploying windows 7 to a client machine.
In the previous post we saw the steps to integrate Windows Deployment Services with Microsoft Deployment Toolkit.
Before you start deploying windows 7 using Microsoft Deployment Toolkit please go through my previous posts on Installing and Configuring Windows Deployment Services, Integrating WDS with MDT, Importing Operating System to MDT and Creating Task Sequence.
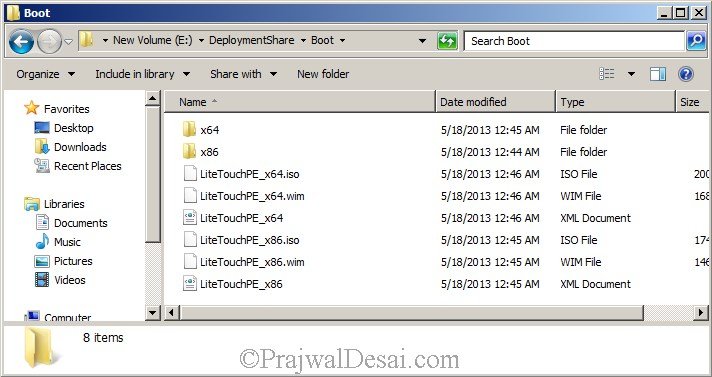
For deploying windows 7 to the client machine we have to import the boot images to WDS server. The boot images can be imported from the location DeploymentShare/Boot. The boot images that we need to import to WDS server are LiteTouchPE_x64.iso and LiteTouchPE_x86.iso.
On the WDS services console, right click on Boot Images and click on Add Boot Image. Import the boot images LiteTouchPE_x64.iso and LiteTouchPE_x86.iso.
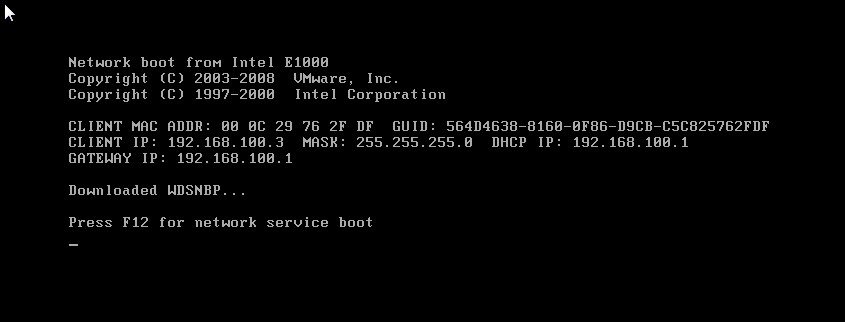
Create a blank virtual machine and set the virtual machine to boot from the network. Press F12 key for network service boot.
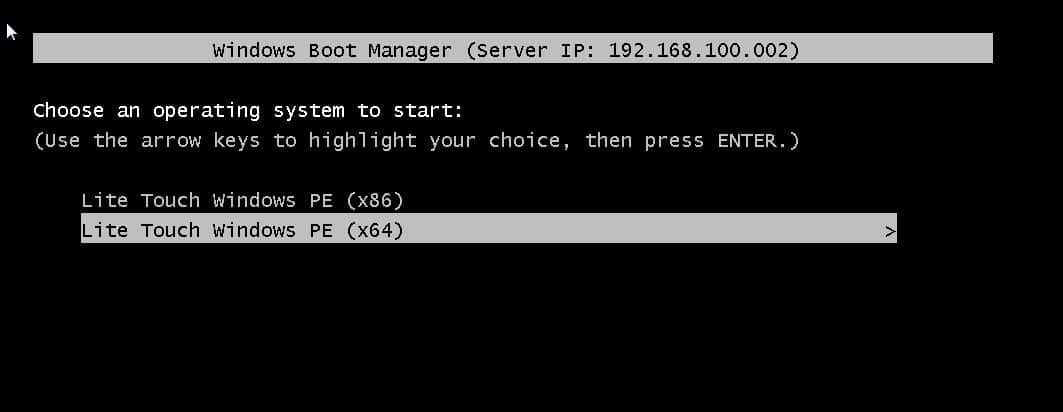
Select the Lite Touch Windows PE (X64) and hit enter key.
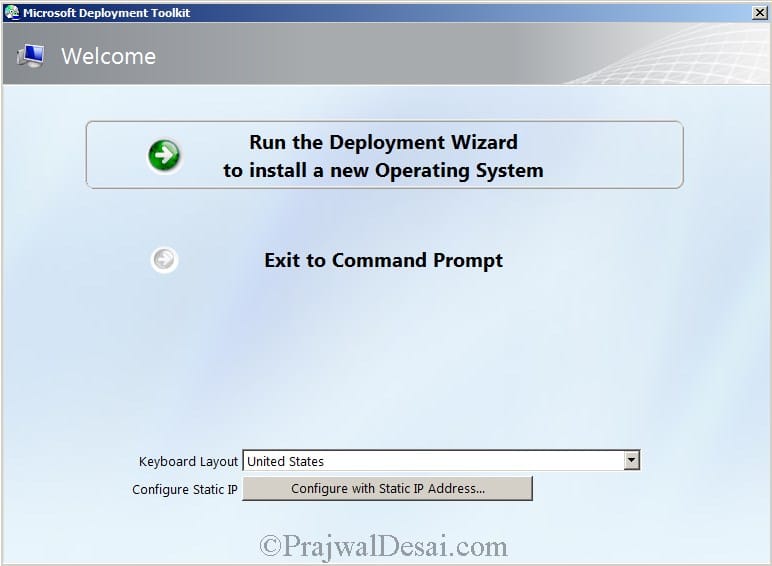
On the Welcome page, click on Run the Deployment Wizard to install a new Operating System.
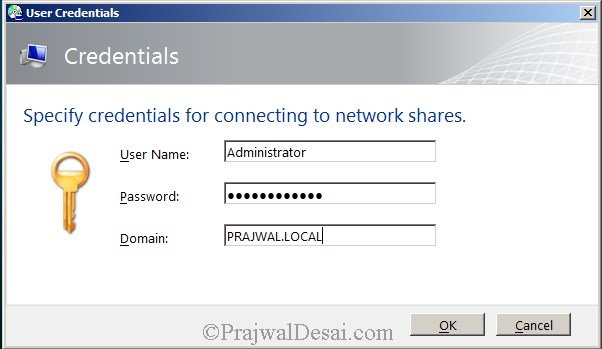
Provide the Credentials to connect to the deployment share. Click on OK
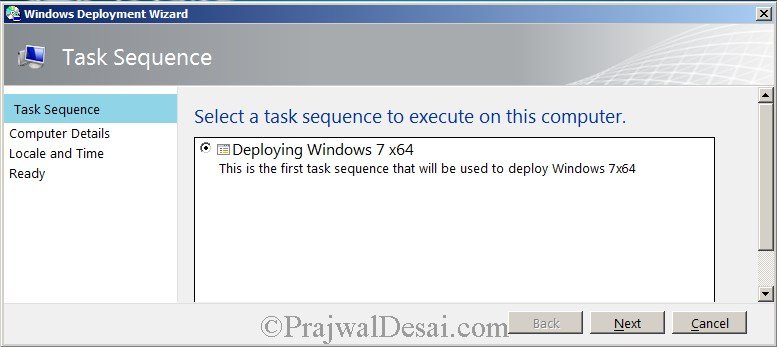
Choose the task sequence and click on Next.
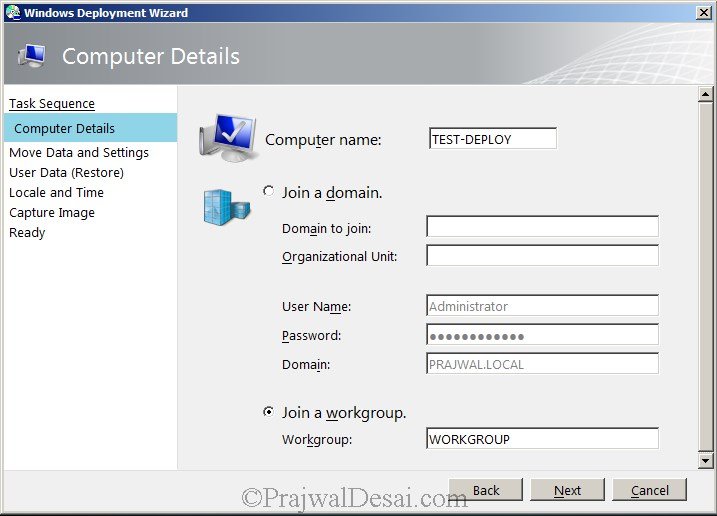
Provide the Computer Details which includes Computer name, you can choose this machine to be part of your domain by selecting Join a domain and providing the credentials. We will select the computer be in WORKGROUP. Click on Next.
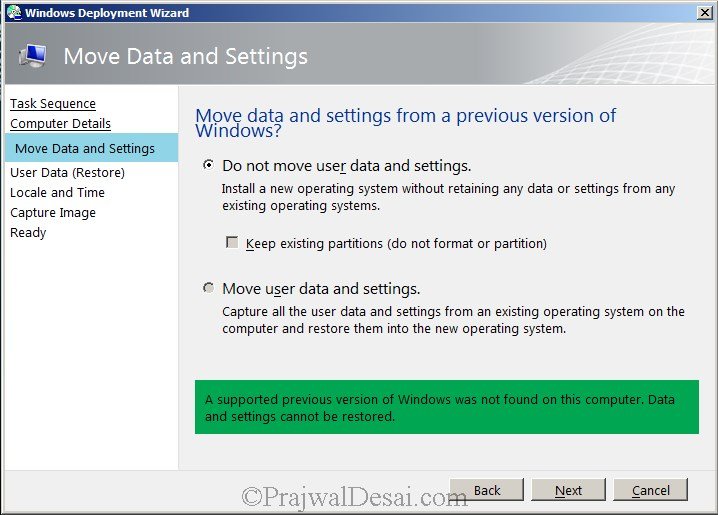
Click on Do not move user data and settings. Click on Next.
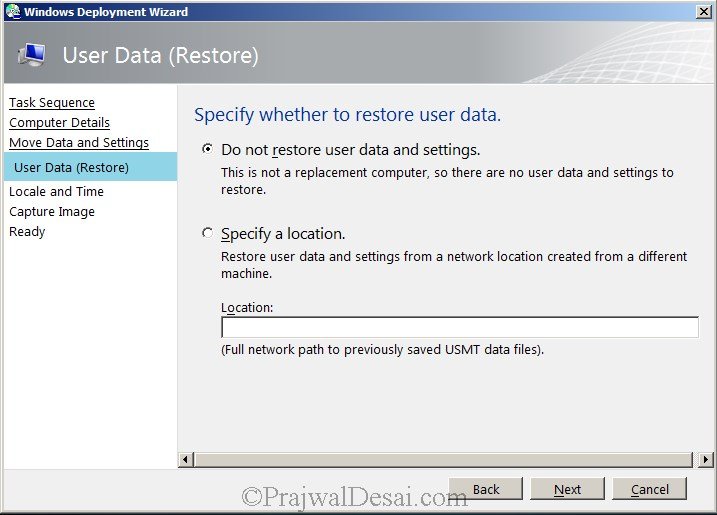
Click on Do not restore user data and settings. Click on Next.
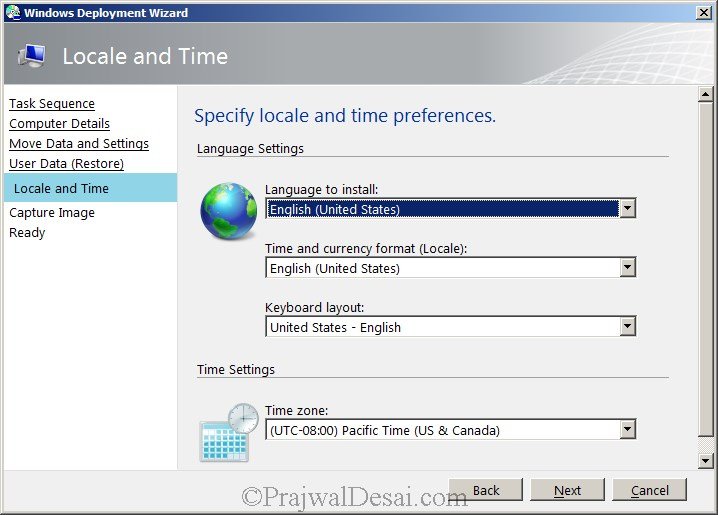
Specify locale and time preferences and click on Next.
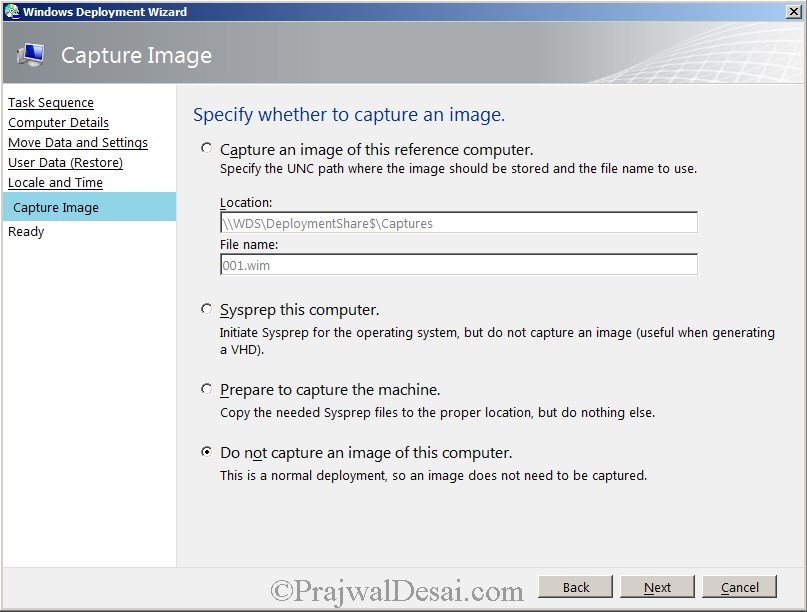
If you wish to capture an image of the OS that is going to be deployed, then select Capture an image of this reference computer. Provide the location where you want to store the captured OS as .wim file. For this post we will select Do not capture an image of this computer and click on Next.
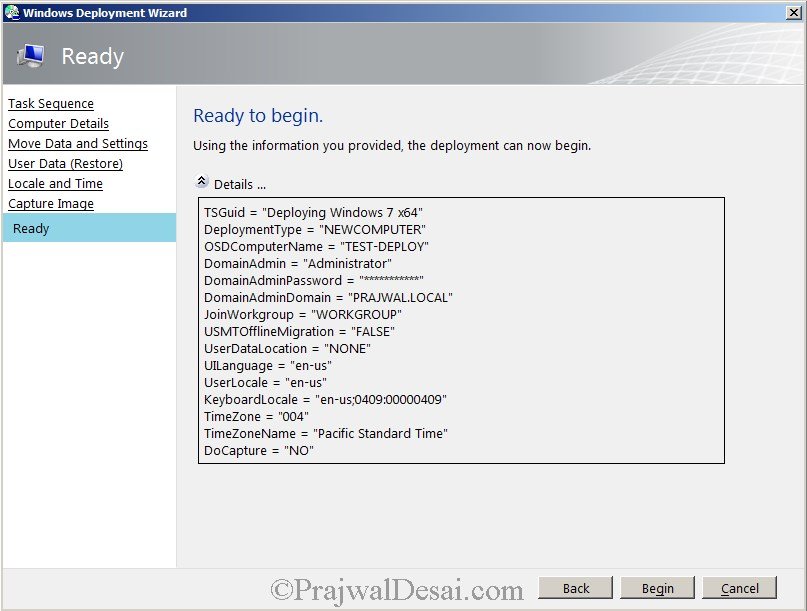
Click on Begin.
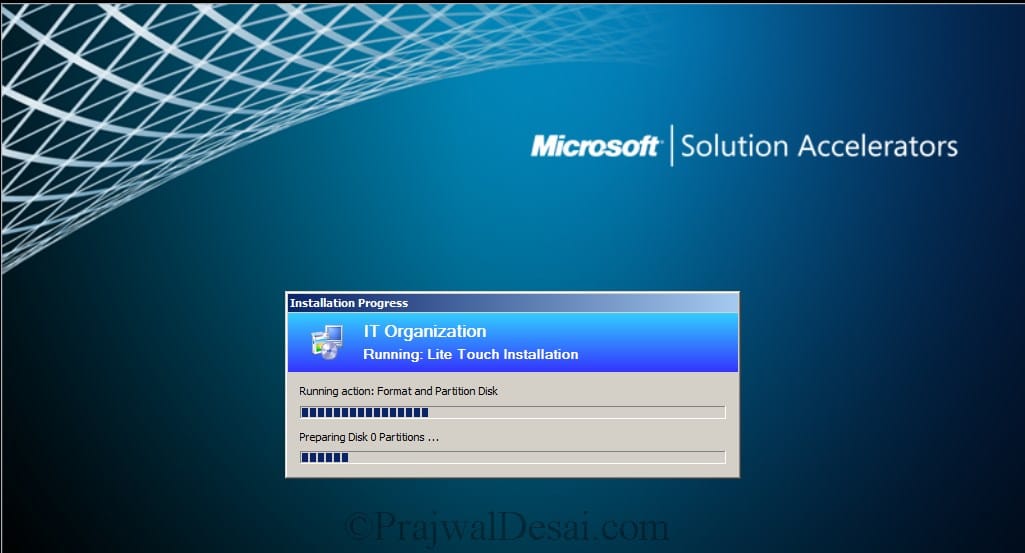
We can see that the task sequence is being executed, the operating system will be installed in few minutes.
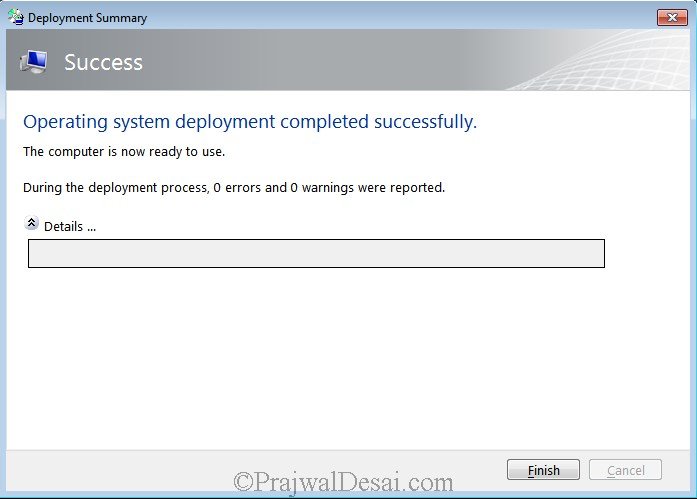
The operating system deployment has been completed successfully. Click on Finish.
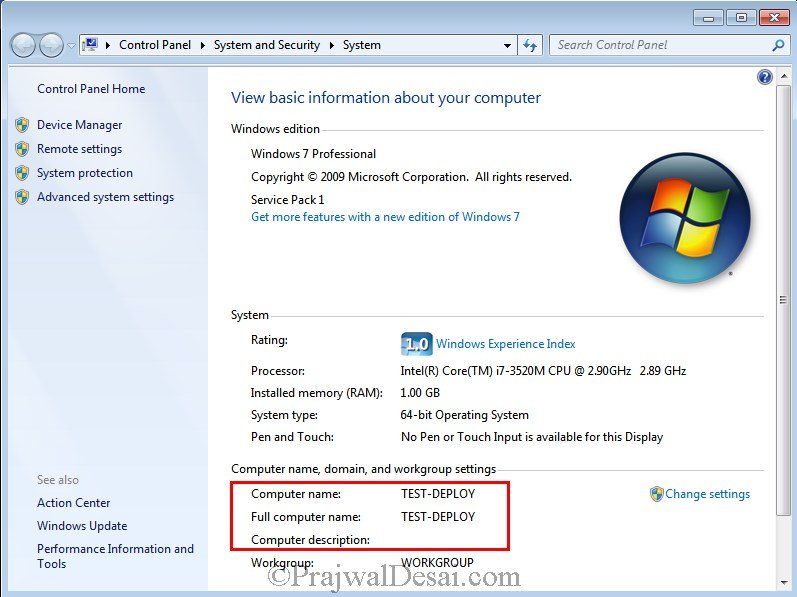
The details of the operating system that we just deployed.
