Source: https://lazyadmin.nl/home-network/unifi-adoption-failed/
Adopting an Unifi Access Point in the controller should be really straightforward. But sometimes it just won’t work. You keep getting Adoption Failed, or maybe even not able to adopt your access point at all.
The first step is to make sure that the inform URL is set correctly in the access point. But if that is set correctly then we need to take a different approach to fix the Unifi Adoption Failed issue.
In this article, I will explain different solutions to will help you to fix the adoption issue.
Why is the Unifi Adoption Failing
First a little bit of background information about why the adoption could be failing. There are a couple of things required to successfully adopt an Unifi Access Point in your controller:
- The access point must not be managed by another controller
- Inform url should be set correctly – read more about it here
- Access Point firmware version should not be to old
- Controller should be up-to-date
The most common issue is a firmware mismatch. The access point is for example running the latest firmware version, but the controller is maybe 10 releases behind. This could cause problems with adopting the access point.
Fix Unifi Adoption Failed
Method 1 – Factory Reset the Access Point
To make sure that the access point isn’t managed by another (old) controller, we are first going to factory reset the access point. Make sure that the access point is powered on and press the reset button for 10 seconds.
Another way to reset the access point is remotely with SSH.
- Connect to the access point over SSH (using PowerShell for example)
- Enter the following command to factory reset the AP:
set-default
You can reconnect to the access point after the Clearing CFG (configuration) is done.
With the Access Point reset you can now check if you can adopt the access point in the controller.
Method 2 – Check IP Address of the Access Point
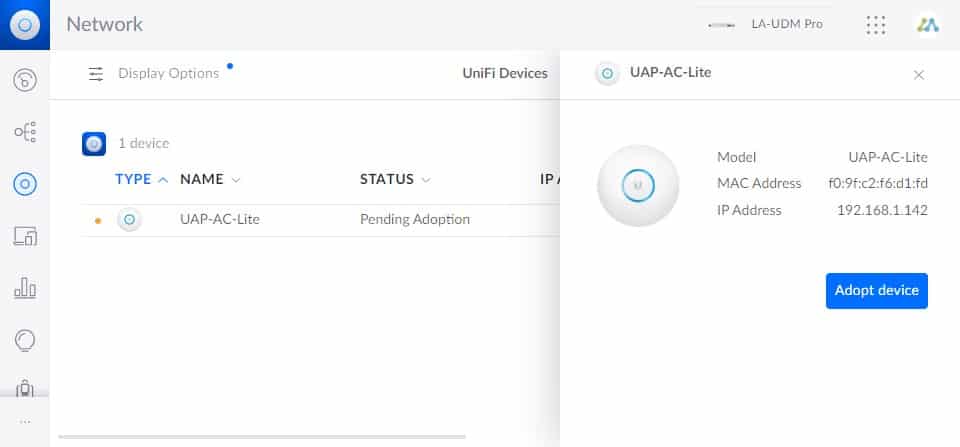
After you have factory reset the access point, you should at least see the access point in the controller. If you don’t see it at all, then it’s possible that the IP range of the access point doesn’t match with the controller.
They both need to be in the same IP Range to be able to communicate with each other. You can use the Unifi Discovery Tool to scan your whole network for the access point. This way you can determine which IP Address the access point has got.
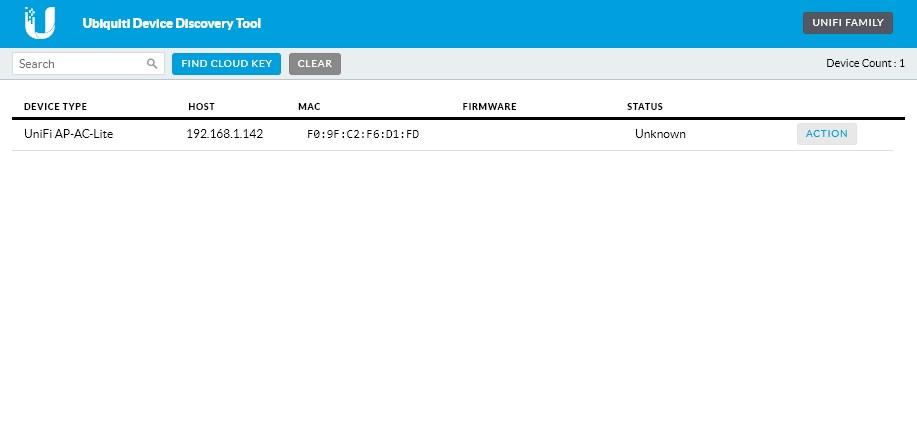
You might need to click the Unifi Family button in the top right corner to switch to the correct view.
If the access point is in a different IP range, then double-check your router and Unifi Controller to be sure that only one them has DHCP enabled. Another good option is to connect the access point to the same switch as the controller.
Method 3 – Update the Unifi Controller
Before we update the firmware of the access point, we are first going to make sure that Unifi Controller is up-to-date.
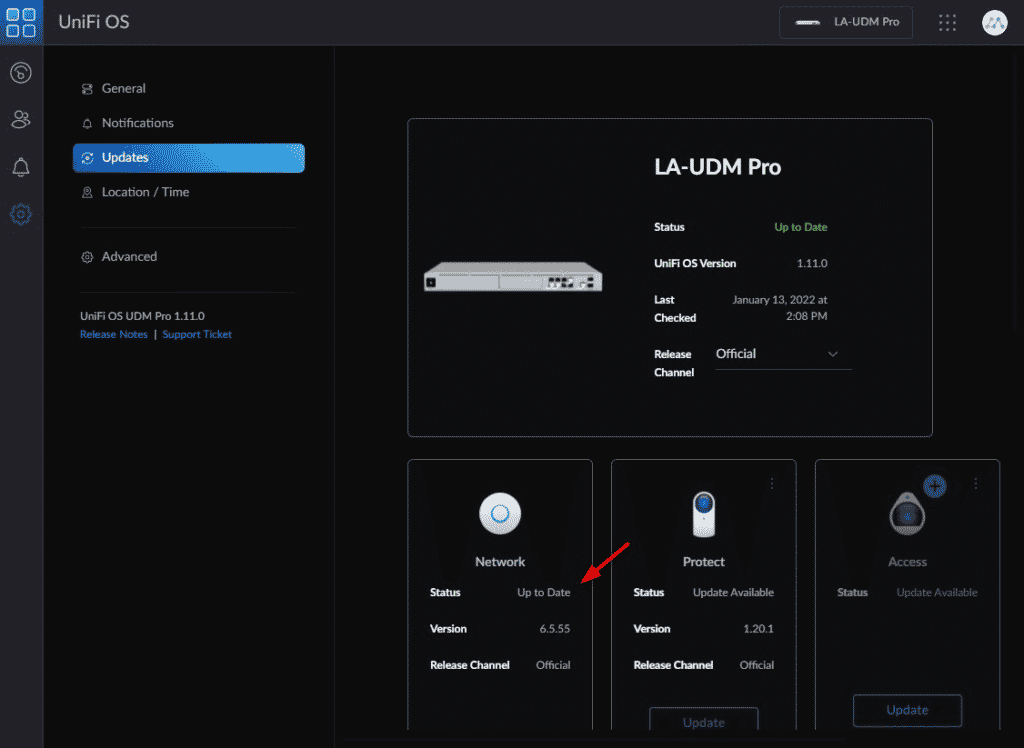
If you have a Cloudkey or UDM (Pro)
- Open your Unifi OS
- Go to Settings > Updates
- Check the Network application is up-to-date
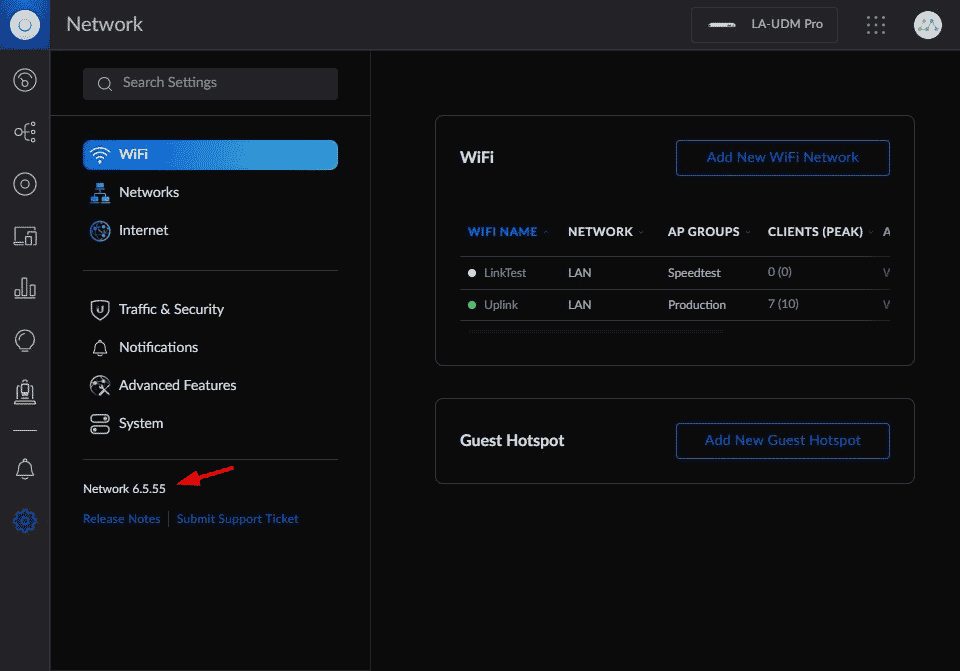
If you are running the controller in a Docker container or on Windows then check the version that you are running in the settings screen:
- Open the network controller
- Click on Settings
- Note the version and check the latest available version here https://www.ui.com/download/unifi/
After you have updated the Unifi Controller, try again to adopt the Access Point.
Method 4 – Update the firmware on the Access Point
If the firmware on the access point is outdated, then you also won’t be able to adopt the access point in the Unifi Controller. Normally you update the firmware through the controller, but there is another option.
We can manually download the Unifi firmware on the access point directly. To do this we are going to connect to the access point over SSH. You will need to know the IP Address of the access point, if you don’t see the IP Address in the controller, then use Advanced IP Scanner to look it up.
- Press Windows Key + X (or right-click the startmenu) and choose Windows PowerShell
- Connect to your access point. Replace the IP Adres below with the address of your access point:
# Connect to the access point, with username ubnt
ssh [email protected].1.142
# type yes on the following warning:
The authenticity of host ‘192.168.1.142 (192.168.1.142)’ can’t be established.
RSA key fingerprint is SHA256:dR0P62KnusGClIgPM1pfsx1QlH6HzrgTLxz0wDk2D4k.
Are you sure you want to continue connecting (yes/no/[fingerprint])? yes
- Enter the password ubnt
- We now need to find the correct firmware URL. Open the Unifi download page and find the firmware for your access point.
- Click Download and accept the terms.
- Click Copy URL
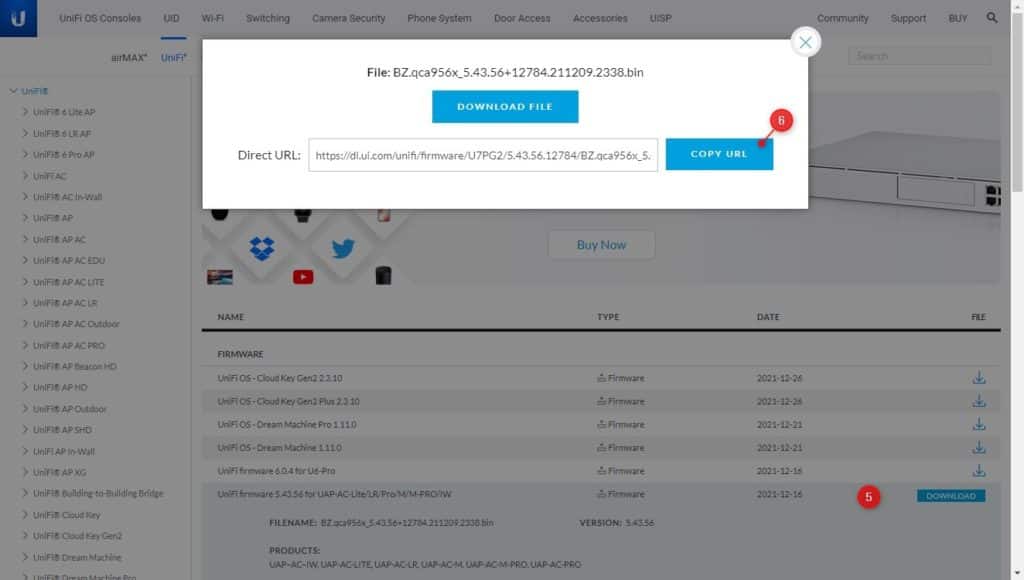
- In the PowerShell Windows, type upgrade and paste the URL that we just copied:
upgrade https://dl.ui.com/unifi/firmware/U7PG2/5.43.56.12784/BZ.qca956x_5.43.56+12784.211209.2338.bin
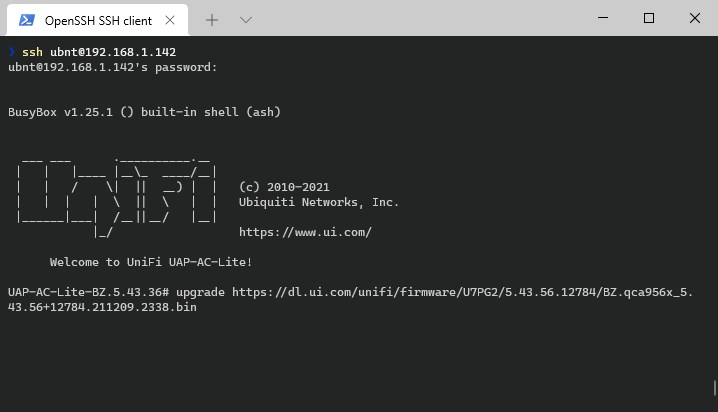
The access point will download the firmware and upgrade it. During the upgrade, you won’t be able to connect to the access point. It can take a couple of minutes to complete.
You should be able to adopt the Unifi Access point when the upgrade is completed and the status light is solid white.
Wrapping Up
I hope this article helped you to fix the Unifi adoption failed issue. A factory reset is most of the time needed and make sure that you check your firmware versions. If you are running the controller in a docker container, then make sure that the appropriate ports are forwarded.
In docker, it can help to add the --net=host flag to the docker run command.