Source: https://adamtheautomator.com/install-phpmyadmin/
Do you manage MySQL servers and databases Linux and agree that command-line management is not for everyone? Wouldn’t having a front-end management GUI be nice for a change, not spending more time figuring out MySQL commands? To install phpMyAdmin would be an excellent solution for you. Read on to learn how to install phpMyAdmin!
phpMyAdmin is a web-based interface on top of MySQL, making database management convenient and only a few clicks away. And in this tutorial, you will learn how to install and configure phpMyAdmin to help you get started.
Your accidental database table dropping days are over by the end of this tutorial! Come on, and let’s figure out how to save your job!
Prerequisites
To follow along with this guide, you will need to have the following resources:
- You’ll need an Ubuntu Server 18.04 (or higher).
Related:How to Install Ubuntu 20.04 [Step-by-Step]
- Root or sudo access on the server.
- The server must have the Linux, Apache, MySQL, PHP (LAMP) stack installed. Refer to How to Install a LAMP Stack on Ubuntu 18.04.
- Another computer with a Secure Shell (SSH) client includes putty, Bitvise, or Chome SSH Extension. This tutorial will be using the out-of-the-box SSH client on Windows 10 (
ssh.exe).
Related:How to Set up the SSH Google Chrome Extension
Installing phpMyAdmin
There are several ways to install phpMyAdmin on Ubuntu. The quickest and most common installation method is via the default advanced package tool or apt. Proceed with the following steps to install phpMyAdmin.
1. Open your SSH client and log in to the Ubuntu server.
ssh username@server_name_or_IP
Copy
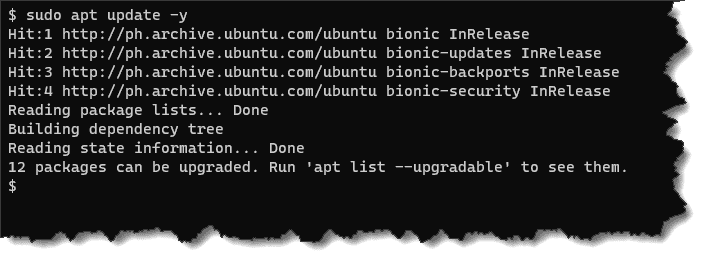
2. Next, run the following command to update your server’s package repository sources cache. Doing so ensures that you’ll be installing the latest available versions of the software later.
sudo apt update -y
Copy
Depending on your server’s internet connection and system load, the update command might take several minutes to complete.
3. Next, run the apt install command below to install the phpmyadmin package along with php-mbstring and php-gettext packages.
sudo apt install phpmyadmin php-mbstring php-gettext -y
Copy
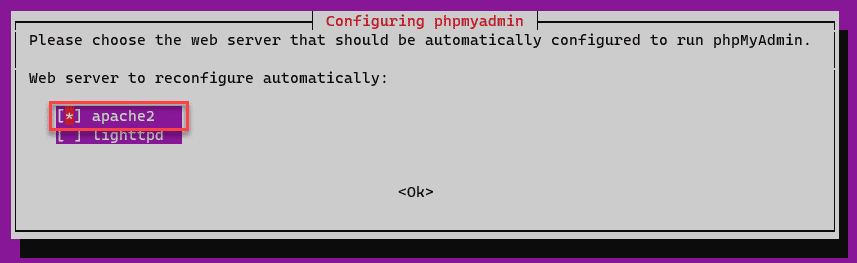
4. While you install phpMyAdmin, the setup will ask you a series of questions necessary for the phpMyAdmin configuration.
Press the arrow keys on the webserver configuration screen to move the cursor to apache2 and press the SPACE bar to select. You should see an asterisk [*] character appear next to your selection. After making the selection, press Enter.
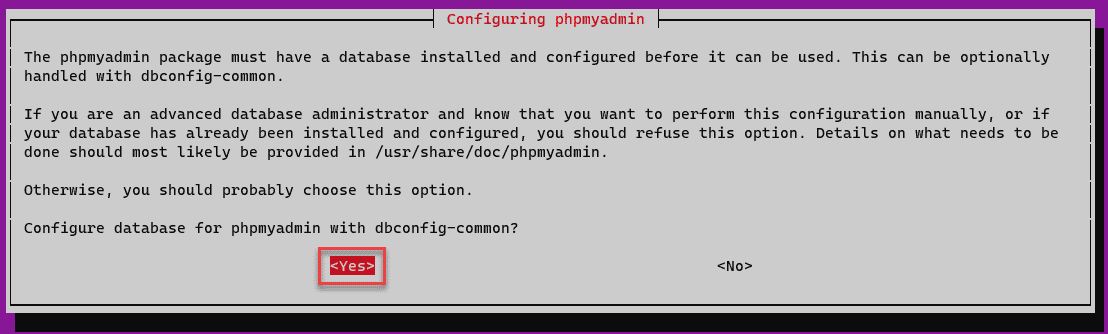
5. The next screen asks you to install and configure the phpMyAdmin database, make sure that <Yes> is highlighted, and press Enter to confirm.
6. The install process automatically creates a new MySQL user account named phpMyAdmin, type in the new account password on the password prompt, and press Enter. For security, consider using a strong password.
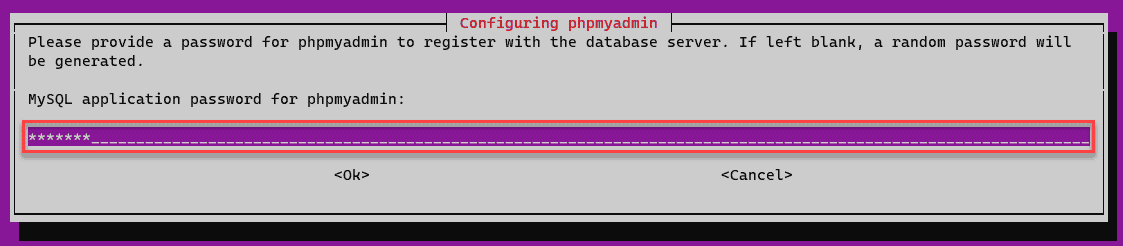
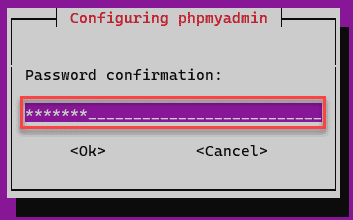
7. On the following Password confirmation prompt, re-type the phpMyAdmin password and press Enter. Wait for the configuration to complete and for the command prompt to return.
8. After the installer finishes, run the command below to confirm that the phpMyAdmin Apache configuration file /etc/apache2/conf-enabled/phpmyadmin.conf exists.
ls /etc/apache2/conf-enabled/
Copy
The phpmyadmin.conf file contains the phpMyAdmin settings, including the installation location and which database server to use. In most cases, you don’t need to edit this file manually.

9. To ensure that the webserver can adequately interpret the phpMyAdmin configuration, run the below command to enable the mbstring PHP extension.
sudo phpenmod mbstring
Copy
10. For the changes to take effect, restart the webserver service by running the following command.
sudo systemctl restart apache2
Copy
Related:Controlling Systemd services with Ubuntu systemctl
11. Finally, confirm that the webserver runs by running the below command.
sudo systemctl status apache2
Copy
You will get an output similar to the screenshot below. As you can see, the Apache webserver service status is active (running).

Creating a Dedicated phpMyAdmin Privileged Account
As you install phpMyAdmin, the setup process automatically creates a default MySQL user account called phpmyadmin. But this account only has privileged access to the phpMyAdmin database itself and does not have global administrator capabilities.
Instead of elevating the default user’s privilege, creating a new privileged account with a custom username is more practical. Why? Because bad actors typically target default user accounts to hack.
To create a new dedicated privileged management account, proceed as follows.
1. Enter the MySQL shell from the terminal by running the below command.
sudo mysql
Copy
Or, to enter MySQL as the root user:
sudo mysql -u root -p
Copy
2. On MySQL> prompt, run the CREATE USER statement below to create a new user with the name ata and the password is pa$$word. Feel free to replace the username and password as you see fit.
CREATE USER 'ata'@'localhost' IDENTIFIED BY 'pa$$word';
Copy
The screenshot below shows the user creation was successful.

3. Next, run the GRANT ALL PRIVILEGES statement below. This command will grant the user ata full access to all databases. Appending the WITH GRANT OPTION clause gives this user the capability to grant privileges to other users too.
GRANT ALL PRIVILEGES ON *.* TO 'ata'@'localhost' WITH GRANT OPTION;
Copy

4. Now that you’ve created the user and granted the privileges exit the MySQL shell.
exit
Copy
Logging In to the phpMyAdmin Web Portal
After all the installation and configuration tasks you have performed so far, now’s the time to test whether everything works as you expected.
1. Open a new browser window on your computer.
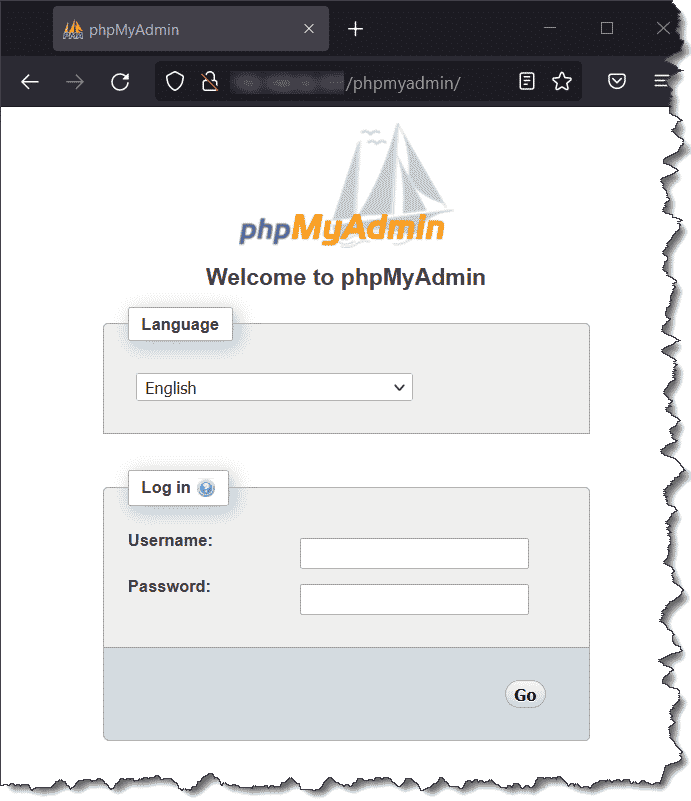
2. Navigate to http://your_domain_or_IP/phpmyadmin, where your_domain_or_IP is the IP address or the DNS record pointing to your phpMyAdmin server.
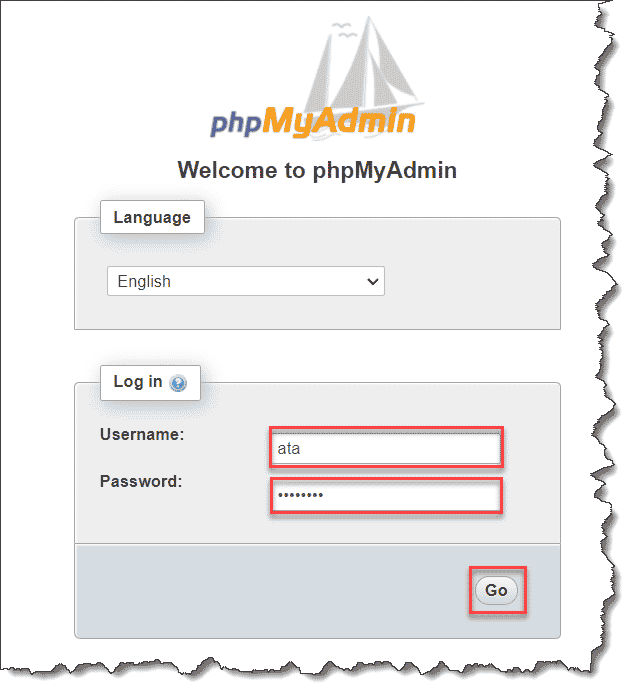
3. On the Welcome to phpMyAdmin page that loads, type in the username and password you created from the previous section and click Go.
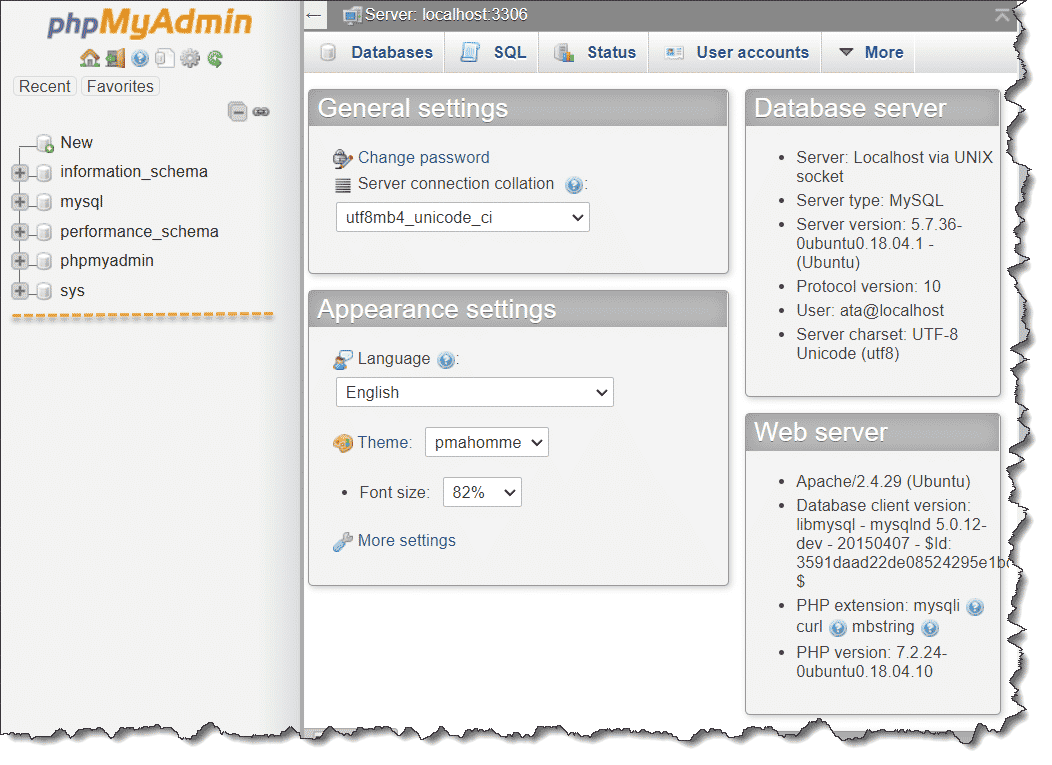
Once you’ve logged in, you should now see the phpMyAdmin portal, as shown below.
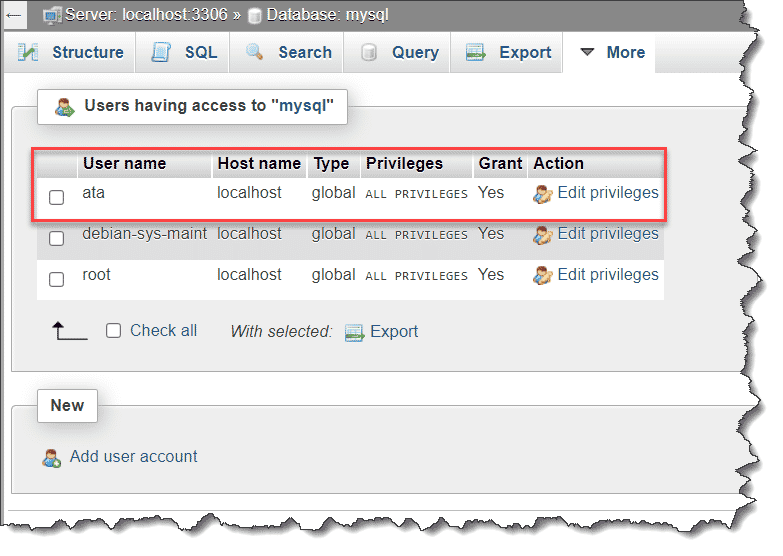
4. To test the account’s privileges, click the Database tab to list all the databases on the server. Next, click the Check privileges link on the right of any database name.
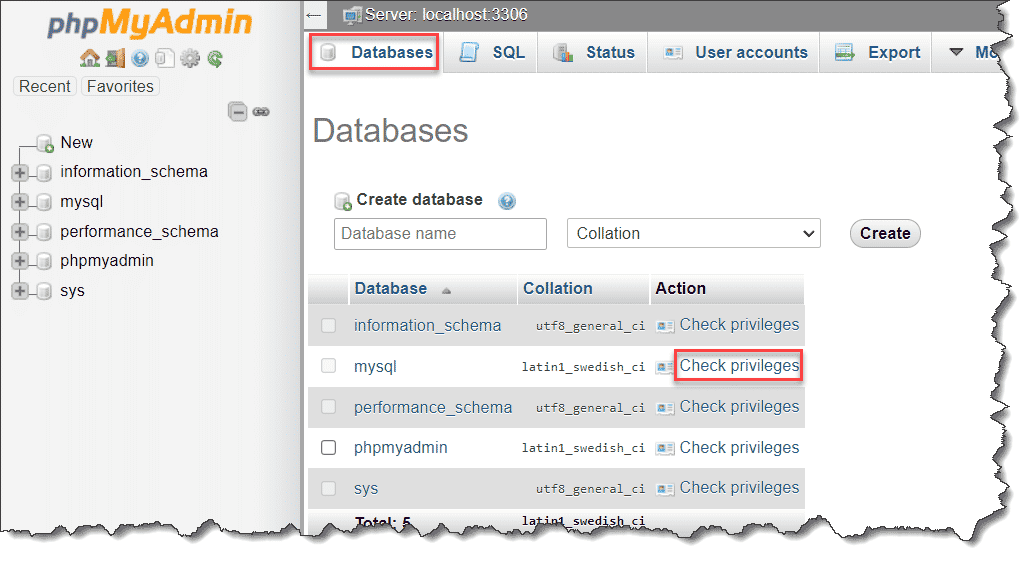
As you can see below, the ata account has all the privileges to this database. And because of that privilege, the Add user account function is also available to this user account, enabling you to grant privileges to other users.
Password-Protecting the phpMyAdmin Site
Because of its ubiquity, phpMyAdmin is a popular target for hackers. Putting in place some precautions to protect your installation is paramount.
One of the quickest ways of securing access to the phpMyAdmin installation is to place a gateway in front of the entire application. And doing so requires you to implement Apache’s built-in .htaccess authentication and authorization features with the AllowOverride directive.
Placing the appropriate directives in a .htaccess file further improves security by preventing non-existent users from accessing the phpMyAdmin page. To implement this security measure, proceed as follows.
1. Run the command below to start editing the phpMyAdmin configuration file on the terminal.
sudo nano /etc/apache2/conf-available/phpmyadmin.conf
Copy
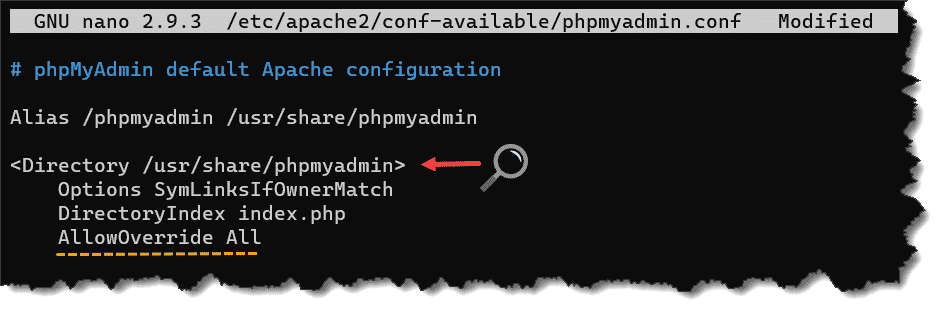
2. Next, find the <Directory /usr/share/phpmyadmin> section and insert the AllowOverride All directive. Once you do, the configuration would look similar to the image below.
Do not use tabs for indents. Use spaces instead.
3. Once you have added the directive, save and close the file by pressing Ctrl+X, Y, and Enter.
4. For the changes to take effect, restart the Apache webserver service.
sudo systemctl restart apache2
Copy
5. Now, create and edit the /usr/share/phpmyadmin/.htaccess file.
Creating the .htacces under the /usr/share/phpmyadmin directory applies the access restriction rule to the entire phpMyAdmin application
sudo nano /usr/share/phpmyadmin/.htaccess
Copy
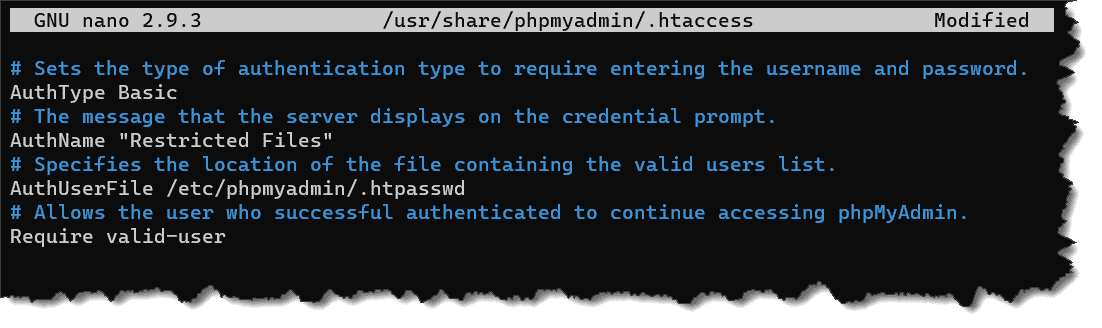
6. Copy the directives below and paste them into the .htaccess file. Editing the file, press CTRL+X, Y, and Enter to save and close.
# Sets the authentication type to require entering the username and password.
AuthType Basic
# The message that the server displays on the credential prompt.
AuthName "Restricted Files"
# Specifies the file's location containing the valid users and passwords list.
AuthUserFile /etc/phpmyadmin/.htpasswd
# Allows the user who successfully authenticated to continue accessing phpMyAdmin.
Require valid-user
Copy
Not all web browsers display the AuthName directive value during authentication prompts.
7. Now, run the command below to create a new authentication file (.htpasswd). Replace username with the username you want to add.
sudo htpasswd -c /etc/phpmyadmin/.htpasswd username
Copy
Type and re-type the new password while pressing Enter after each time.

To add subsequent users, run
sudo htpasswd /etc/phpmyadmin/.htpasswd additionaluserinstead, whereadditionaluseris the new username.
8. Finally, open your browser and navigate to your phpMyAdmin address (https://domain_name_or_IP/phpmyadmin) and enter the username and password you created in the previous step.
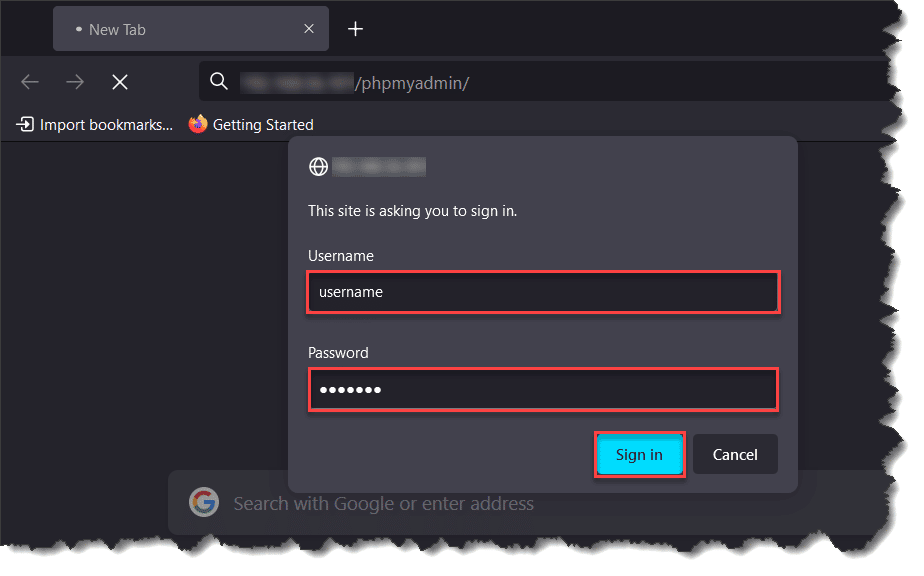
If you entered the correct username and password, you’d see the phpMyAdmin login page next.
On the other hand, if you fail the authentication, you’ll get an Unauthorized response as below.

Conclusion
Congratulations on reaching the end. You’ve learned how to install phpMyAdmin on Linux, configure, and secure the application. With phpMyAdmin in your arsenal, managing MySQL via the command line is now only another option, along with the new web portal you’ve installed.
Don’t stop here? This tutorial barely scratched the surface of what phpMyAdmin can do. Perhaps you can ramp up phpMyAdmin’s security even more with certificates, HTTPS access, and disabling the root login. Good luck!