If you are switching over to Office 365 you probably want to take your old email with you. The idea of an empty mailbox may be nice, but in the end, you probably need your old email as well. To get your mail into Office 365 we are going to Import a PST file.
Now there are multiple options to do this, each with its own use case. Small mailboxes can be done in Outlook self, for large mailboxes you are better off with an Import tool (Azure AzCopy). In this article, I will explain both methods for importing PST files into Office 365.
Import PST file with Outlook
So let’s start with the easiest option, using Outlook self to import the PST file. You can use this method if you only need to import a single or a couple of mailboxes. I assume you already have the PST file, if not further down this article I have explained you can create one from your current mailbox.
- Open Outlook and click on File
- Select Open & Export
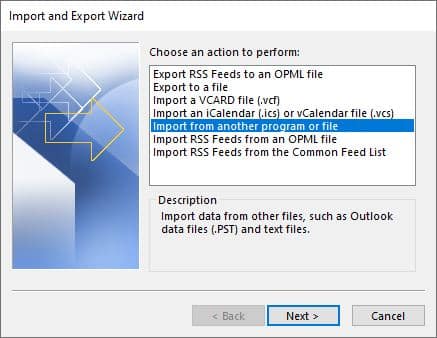
- Click on Import/Export
- Select Import from another program of file (default selected)
- Select Outlook Data File (.pst)
- Select the file you want to import
- On the next screen, you can select what you want to import and where.
- Click Finish to start importing
Depending on the size of your PST file it can take some time to import all the mail. Again, this method is quick and easy, but only use it for small and a single or couple of mailboxes. If you have to import big PST files or to a lot of mailboxes, then you can better use the free Azure services for this.
Import PST file to Office 365 with Azure AzCopy
If you need to import a lot of mailboxes you can either upload them to Azure storage or use the drive shipping service from Microsoft. The network upload is completely free, but uploading the files may take some time.
Drive shipping, on the other hand, will cost you around $2 per GB of data. So that can get pretty expensive but is a better option if you need to import a couple of hundred mailboxes or more.
Preparation
Before we can start importing you will need to assign the Mailbox Import Export role to the Global Admins in Exchange Online. Unfortunately, it can take up to 24 hours before this change is processed.
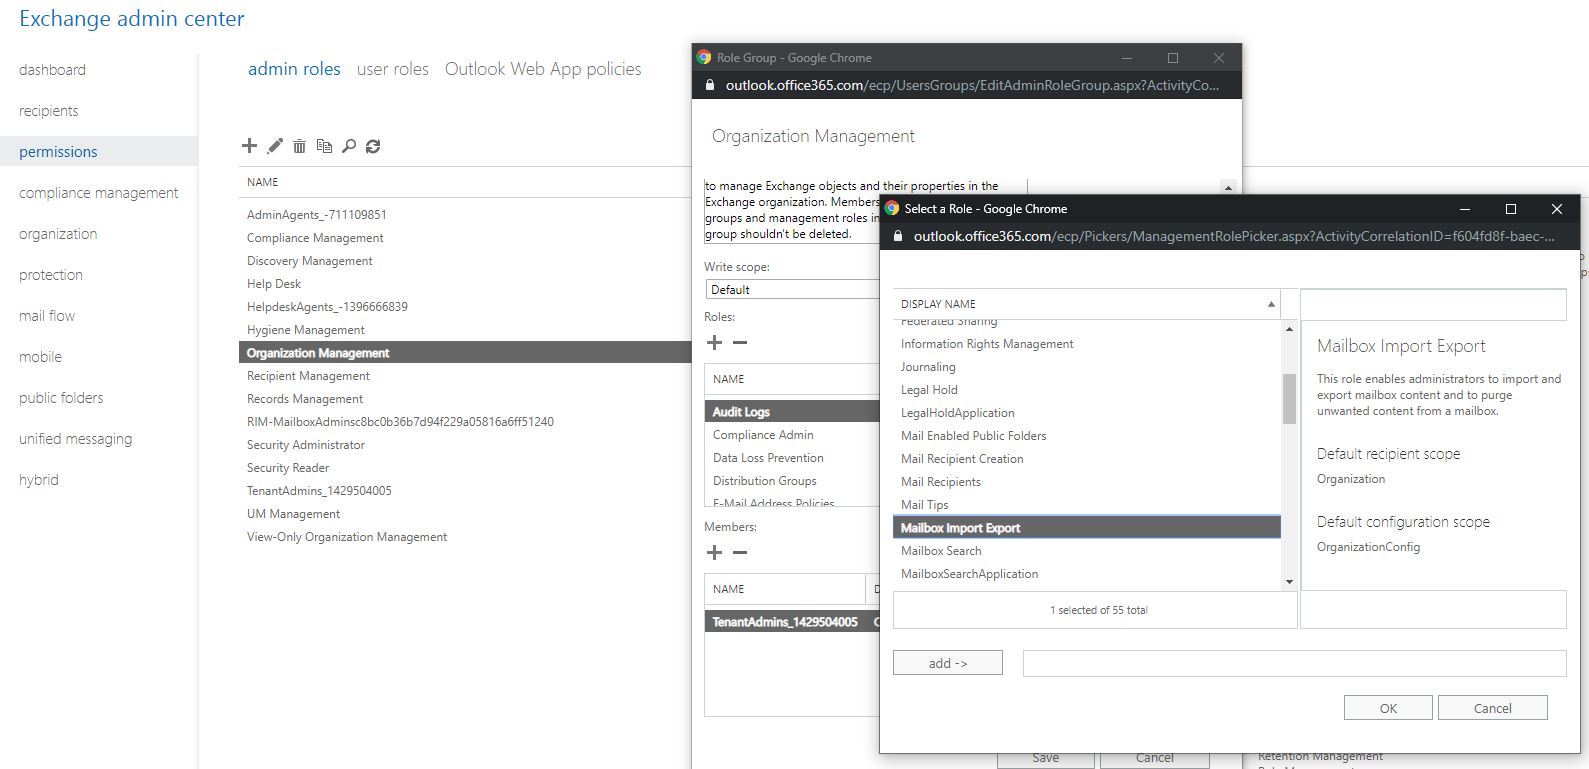
- Open the Exchange Admin Center, through https://admin.portal.com, and go to Permissions.
- In the admin roles open the Organisation Management role.
- Click on the plus to add a role
- Select the Mailbox Import Export role and click Save
Now Microsoft says it can take up to 24 hours before the change is applied, but in my case, I could create a new Import Job after 5 min. Simply log-out, close all Microsoft tabs, and log-in again.
Creating a New Import Job
So with the permissions set we can create a new Import Job. Go to https://protection.office.com and click on Information governance > import.
- Select Import PST Files
- Click on New Import Job
- Choose if you want to upload or ship your data. We are going to Upload it
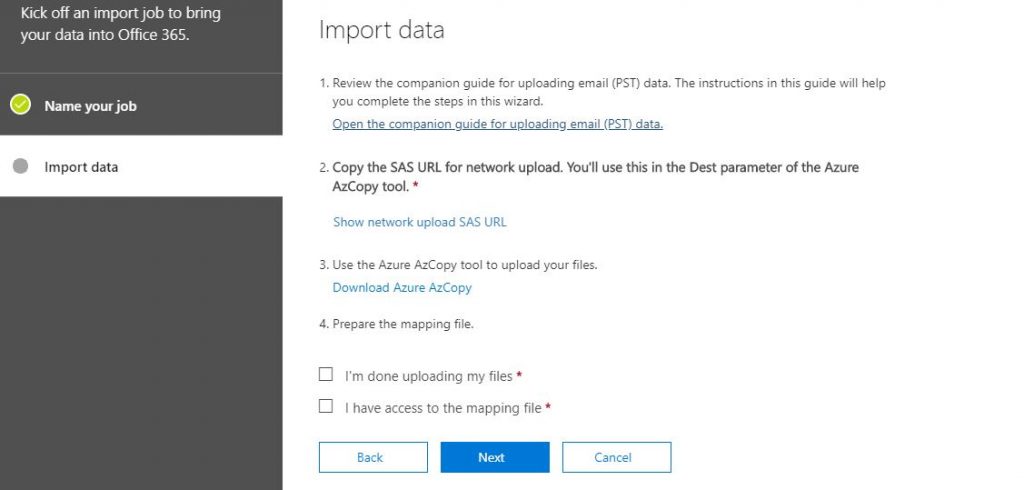
On the summary page, we will find the SAS URL that we need later and a download link to the latest version of the Azure AzCopy tool. Download and install the Azure AzCopy tool and copy the SAS Url.
Keep the SAS Url private because it gives you access to the Azure storage where all your PST files are uploaded.
You can leave the screen open or click Cancel and Continue later on.
Uploading the file with the Azure AzCopy Tool
After you have installed the Azure AzCopy tool you can open it. The tool is nothing more than a command-line tool to upload the files.
The upload tool will upload all the pst files in the source folder, it’s not possible to select a single pst file. So if you want to test it with one file, make sure you put it in a separate folder.
We are going to use the following command to upload the files.
AzCopy copy "/path/to/pstfiles" <SAS URL> --recursive=true
If your pst files are located in subfolders as well then you can use the --recursive=true switch to specify the recursive mode.
Make sure you use quotes around the source and dest paths, otherwise you will get an error that the syntax is incorrect.

Depending on the size of the files it will take some time to upload the pst files.
Checking the uploaded PST Files (optional)
After the files are uploaded you might want to check it your self if all the pst files are uploaded to the Azure Storage. Download the Azure Storage Explorer and install it.
After you opened the Storage Explorer you will need to add an account.
- Click on Add an account…
- Select Use a shared access signature (SAS) URI
- Pass the SAS URI that we got from the import job
- Click Next and Connect
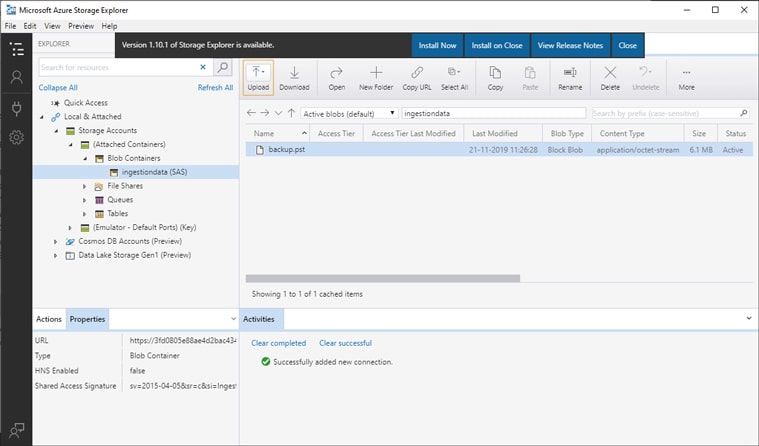
After you have verified the PST files you can close the Storage Explorer. Make sure you right-click the ingestiondata in the explorer and click Detach to disconnect. Otherwise, you will get an error the next time you want to open it.
Mapping the PST Files
The next step is to map the PST files to the mailbox in Office 365. You can use a CSV file this, a template for it can be downloaded here at Microsoft.
In the CSV file you will find a couple of columns/parameters:

- Workload – For pst import to the user’s mailbox, leave this on Exchange
- FilePath – If you only have pst file in the root folder, then you can leave this empty. If you have used subfolders, then enter here the name of the subfolder.
- Name – If the name of the pst file self
- Mailbox – The mailbox you want to import to
- IsArchive – You can import the pst file to the user’s online archive folder. Set it to true or false.
- TargetRootFolder – If you leave this blank, then the files will be imported to a new folder named Imported in the user’s mailbox. If you want to merge the data with the existing folders (like inbox and sent items) then use only a /
You can ignore the other fields, just leave them empty.
Completing the import job
After you have mapped all the pst files we can complete the import job. Go back to protection.office.com and open the import job.
- Select I’m done uploading my files and I have access to the mapping file
- Click Next and select the mapping file (csv file)
- Click on Validate to validate the csv file
- Click on Save when the validation is complete
Your new import job will be analyzed before you can actually start importing. Again, depending on the size this can be done a couple of minutes or longer. Just click refresh to check the status.
After the analyze is completed we can actually import the pst file into Office 365.

Click on ready to import to Office 365 to start the import. On the next screen, we will have to click again on Import to Office 365.
You can now filter the data, like only the mail from x years old or exclude all mail where the user is in the CC. When you are done filtering, or if you just want to import everything, simply click on Import data to start the import job.
The import job self may take some time, for this article, I used a 6mb pst file and even after 30 minutes the status was still on “import in progress”. The great thing is that you don’t have to wait on it, you can simply close the screen and check back later.
Using a migration tool
There are also third-party tools available to import PST files into Office 365. One of those tools is SysTools Import PST to Office 365. Now I am not going to do a full review of this tool, but what is great about these kinds of tools is that they give you more control and feedback about the migration.
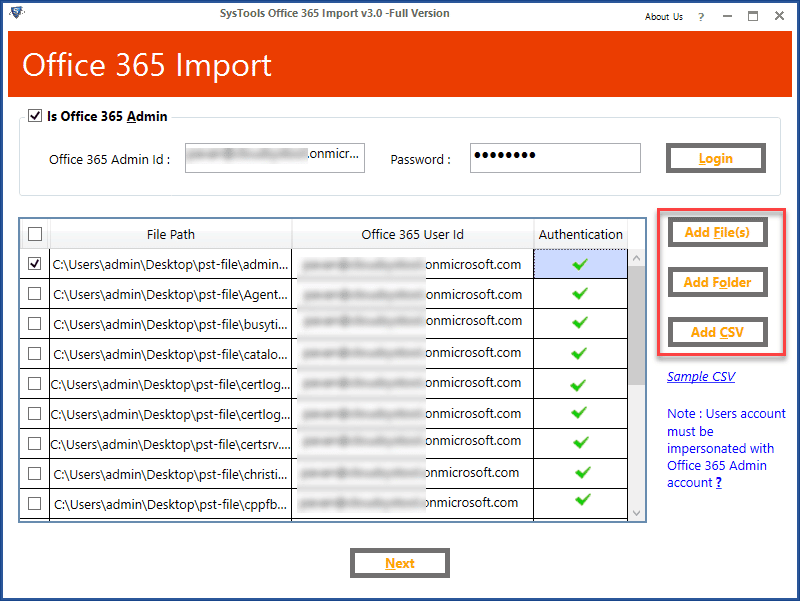
For a single mailbox is this overkill, but if you have to migrate 100 mailboxes, existing of probably multiple PST files per mailbox then this tool is a real-time-saver. It makes the migration a lot easier and one of the best parts, it comes with incremental import.
So you do an initial import during the normal office hours, prep everything for the users. And do a final migration with only the last changes (mails) at the weekend.
Export Gmail to PST
Not all mail providers support the ability to create PST files. For example with Gmail, you can’t export it to PST. The only option is to export it to a mbox file and use a converter to create a pst file from it. But that isn’t really convenient.
For Gmail, and other mail providers that don’t support PST export, the easiest option is to add the mailbox first to Outlook. You can open pretty much any mailbox in Outlook. Once opened in Outlook you can simply export it to a PST file (or move the files to your new mailbox)
Open Gmail in Outlook
To add Gmail or another mailbox to Outlook, simply go to Gile and click on Add Account. Enter the email address that you want to import, for Gmail it will come with a Google Login screen and for other mailboxes, you can use POP or IMAP.
Once you connected the mailbox it may take a couple of minutes to download all the mail from the mail server to your Outlook profile.
Creating a PST file in Outlook
Once all the emails are downloaded you can export it to a PST file:
- Click on File and choose Open & Export
- Click Import/Export
- Select Export to a file
- Choose Outlook Data File (.pst)
- Select the folder(s) you want to export
- Enter a file location and click Finish
After the pst file is completed you can import it with one of the methods above.
Wrapping up
So I hope this article helped you with the import of pst files into Office 365. If you are going to import a lot of mailboxes make sure you take a look at the import tool from Kernel.
No matter which method you use, always test it with a small pst file and a test mailbox. This way you can check if everything works as planned and estimate how long your migration is going to take.