Installing Home Assistant on Promox
1. Open your Proxmox instance by navigating to IP_Address:8006 from your main PC
2. You will get a warning message Your connection is not private
3. Click Advanced and click Proceed to IP_Address
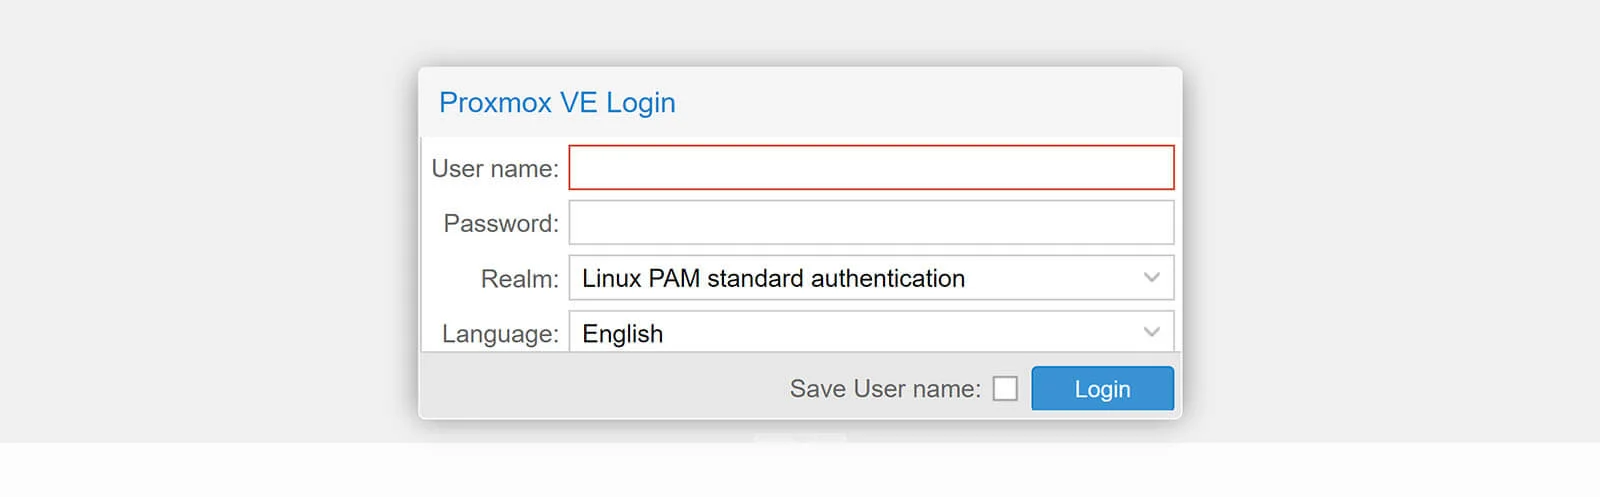
4. On the Promox login screen login with the credentials:
– Username: root
– Password: password you set during installation
5. You will get a message saying you do not have a valid subscription
– This is showing up because you don’t have a valid enterprise license
– We will clean this up with a script too
6. Before we deploy Home Assistant, we need to update Proxmox packages
7. On the left side of the screen, select your VM and click Updates
8. Click Refresh and click Upgrade
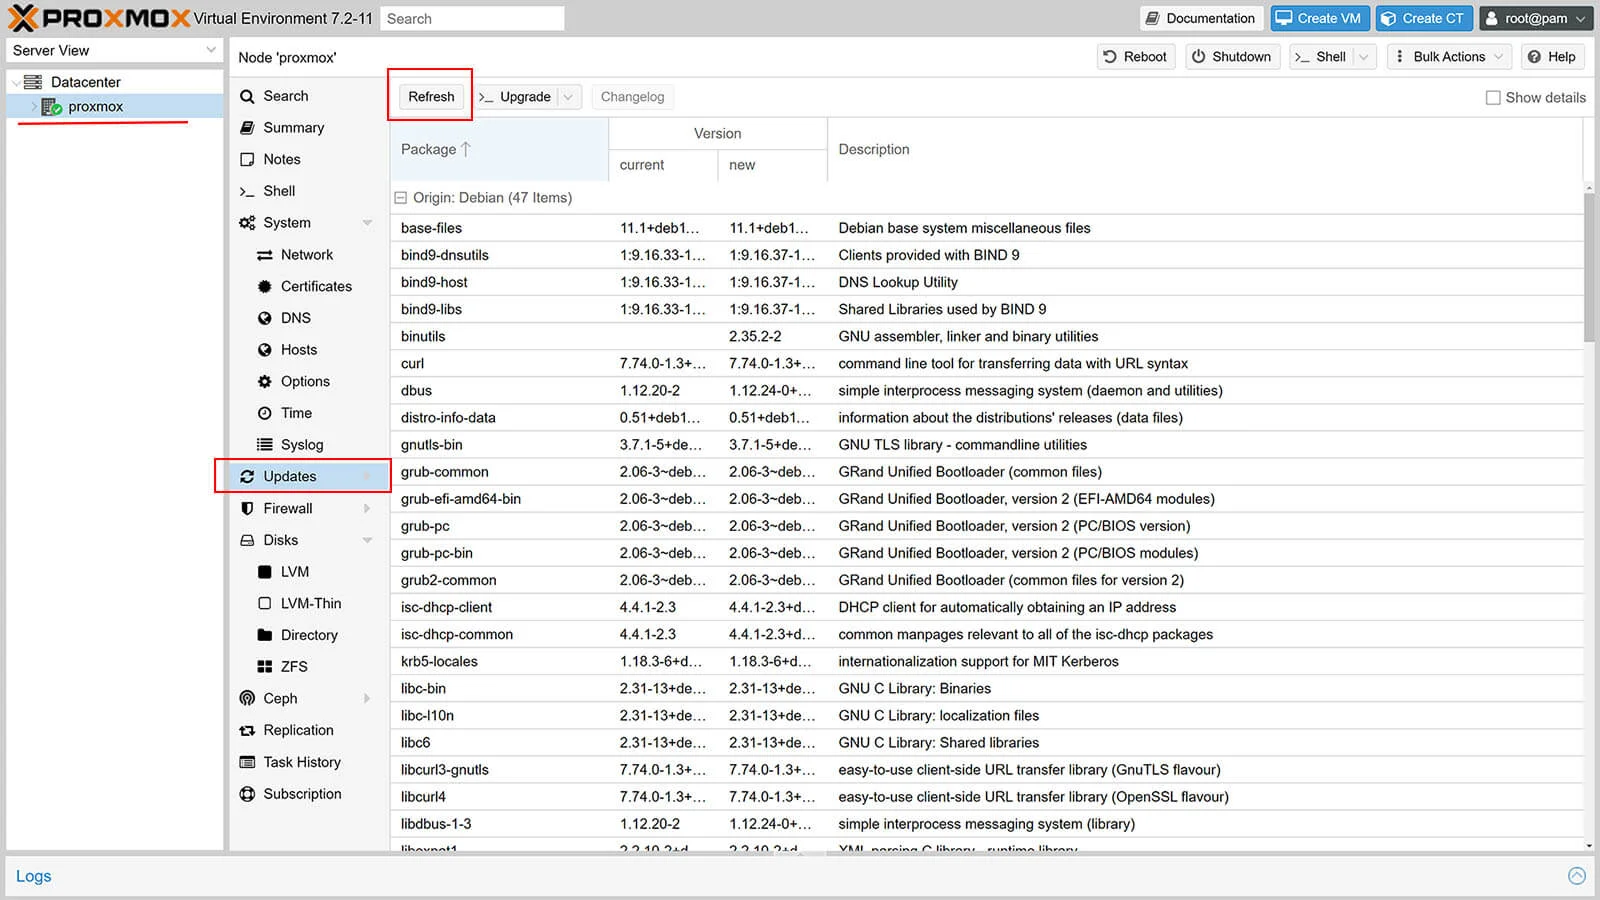
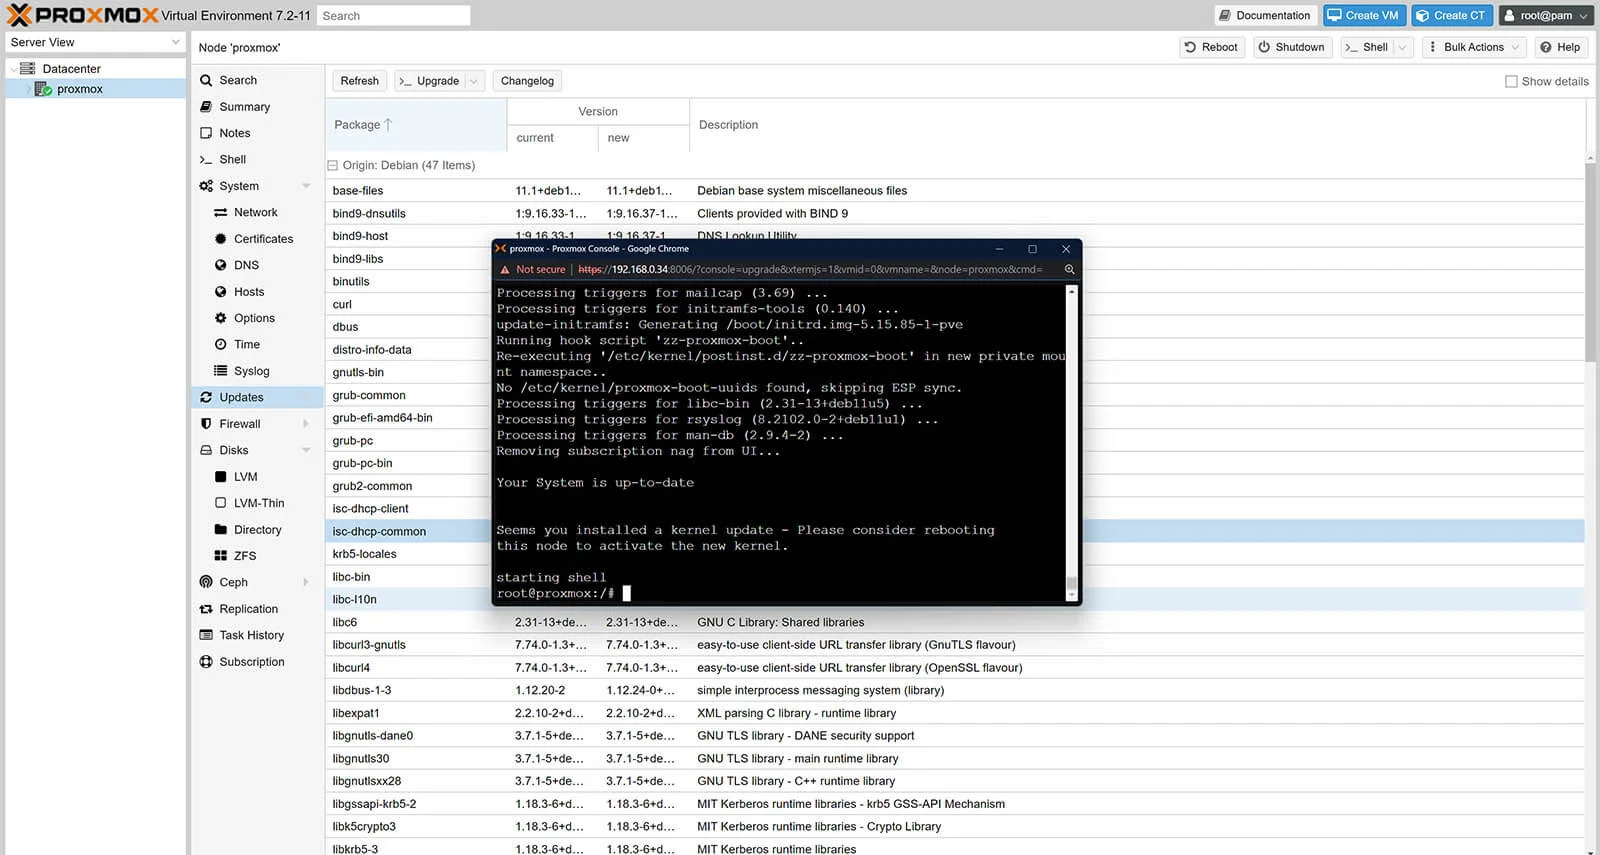
9. A dialog window will popup, going through the available package updates
10. You may get another license warning, just ignore it
11. If you get a confirmation dialog, type in “y” and hit enter
12. If you get a dialog asking the Keyboard encoding select UTF-8 and English
13. You will get a your system is up to date message
14. Close the window and you are done
15. If you click Refresh again, the package list should disappear since you already updated them
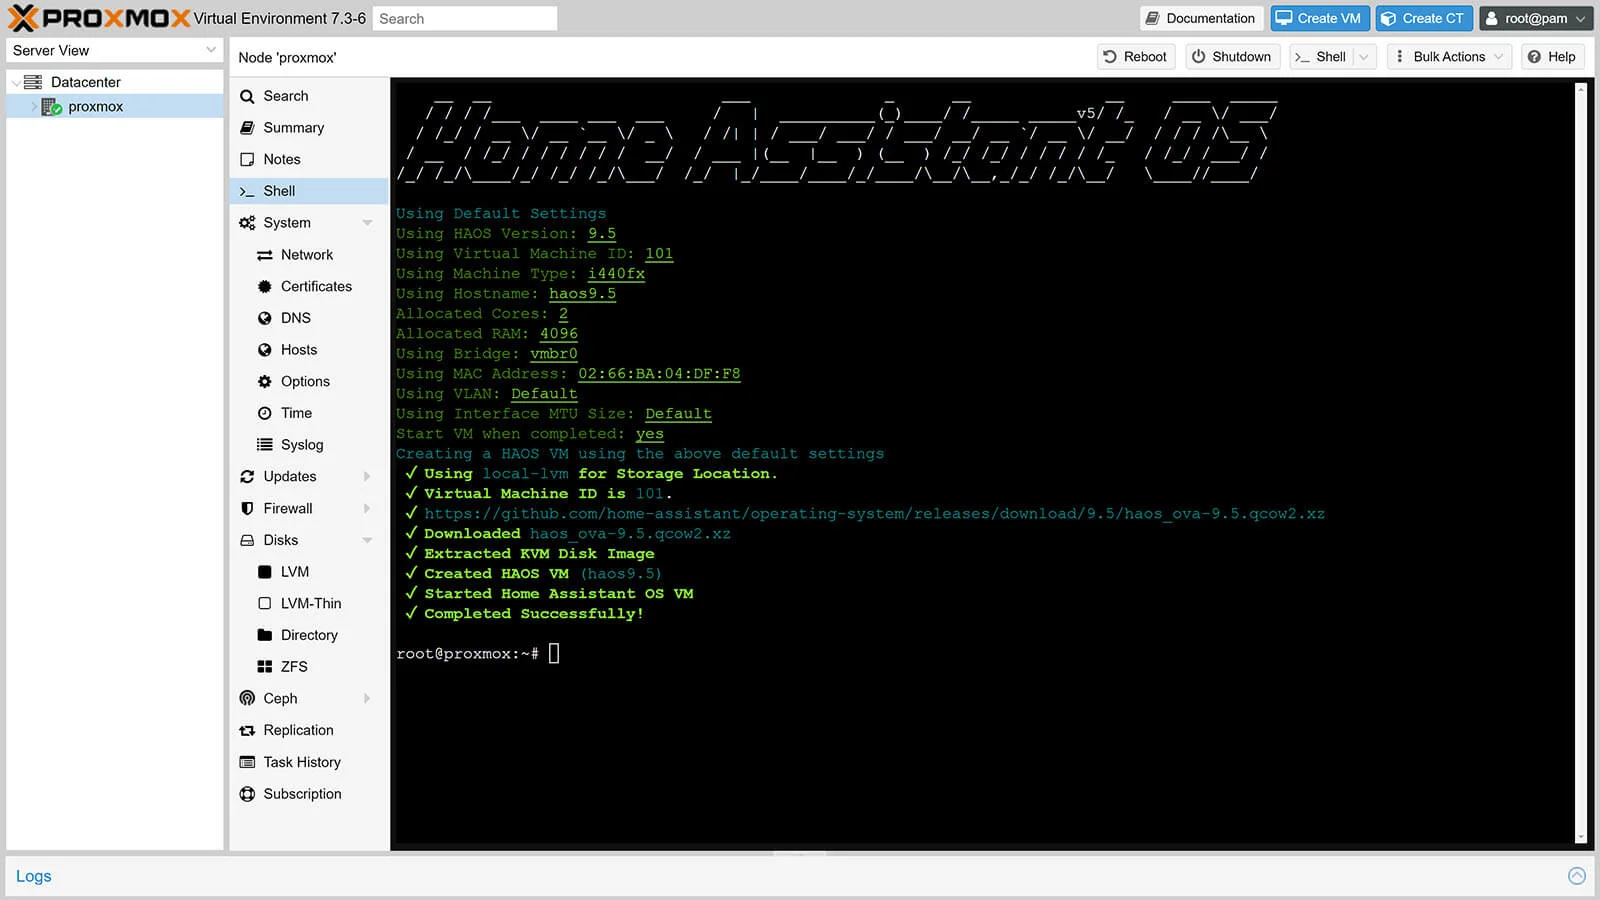
16. To Install Home Assistant, we are going to use a script by tteck which will automate the process significantly
17. Running this script will:
– Find, download and extract the official KVM (qcow2) Home Assistant OS image
– Define user settings, import and attach disk, set boot order and start the VM automatically
– Install the VM with Default Settings: 4GB RAM, 32GB Storage and 2vCPU cores
– Settings can be tweaked during installation
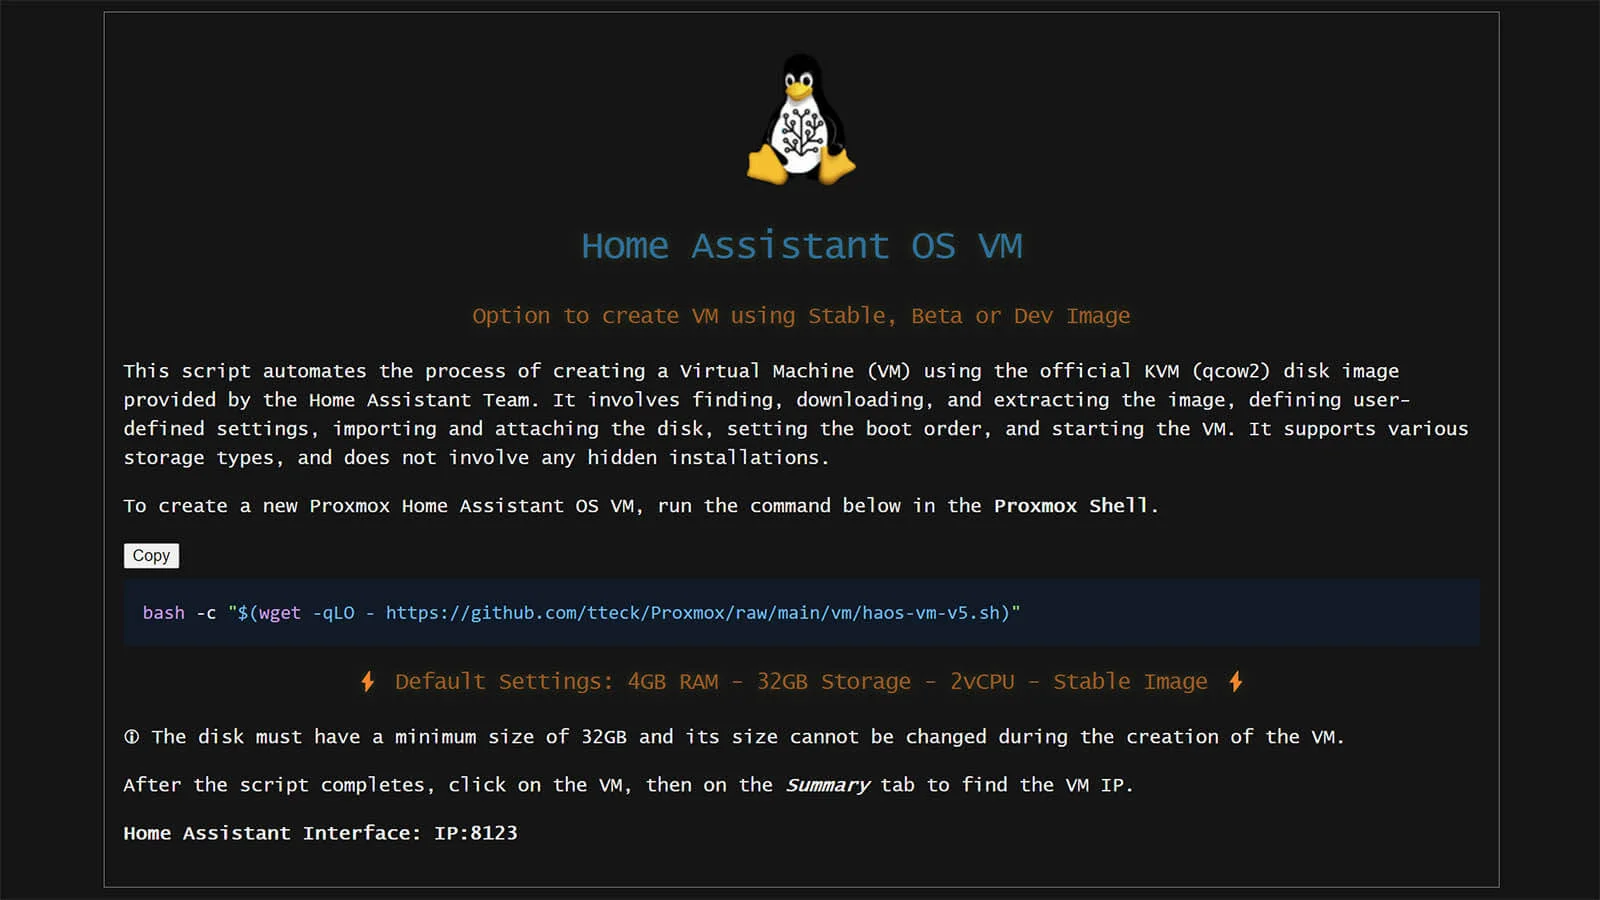
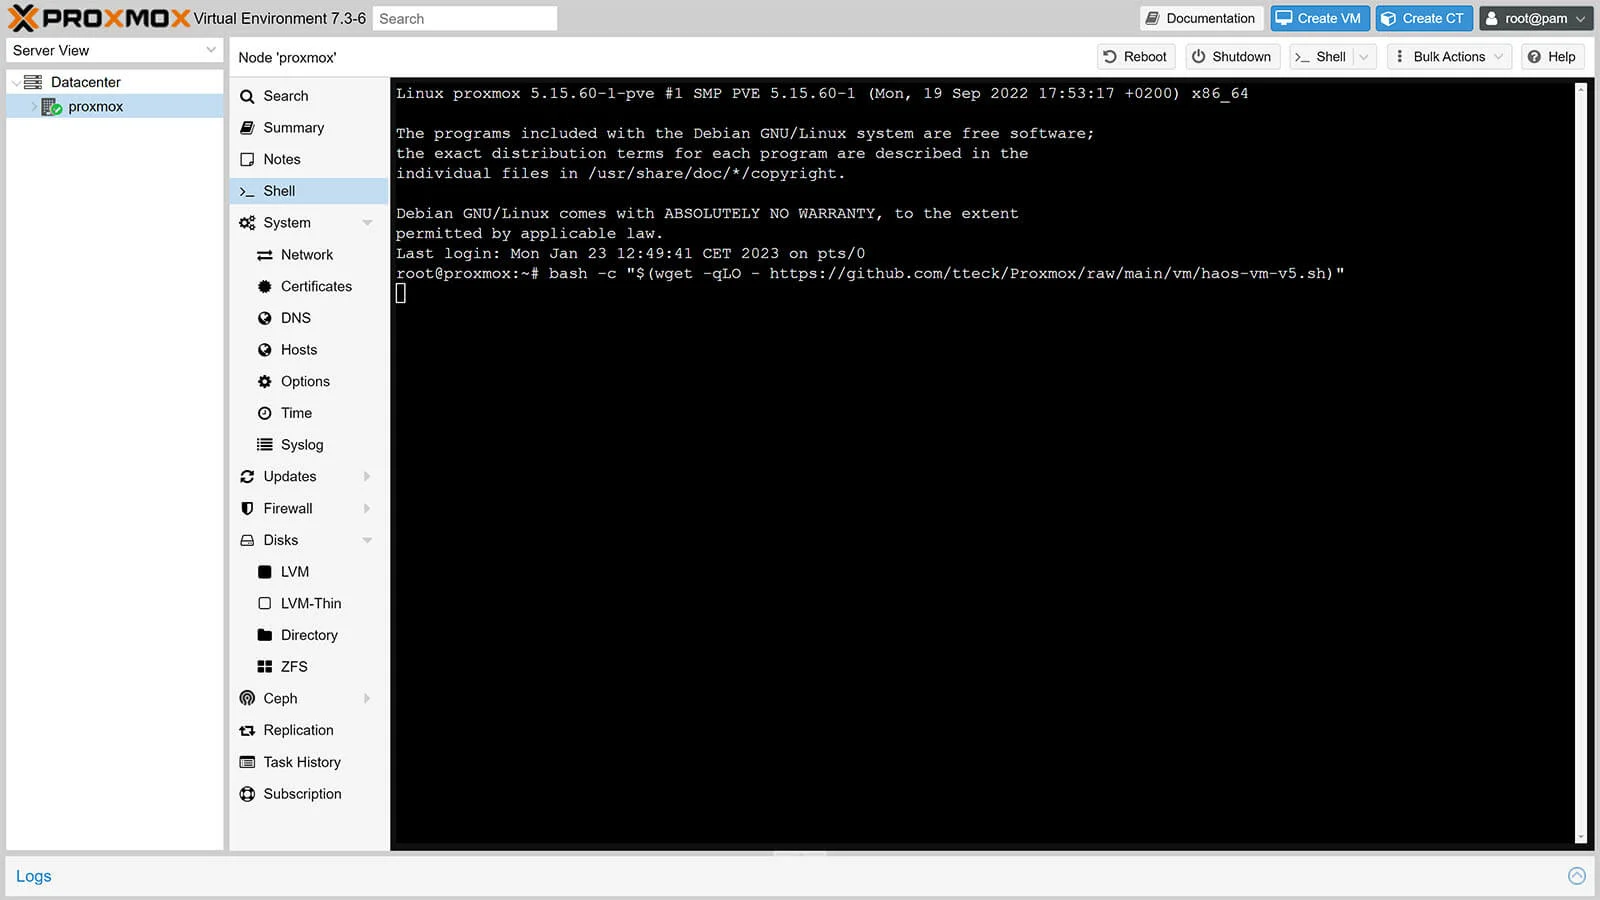
18. Click your VM on the left and select Shell
19. Copy the following command to run the script and hit enter:bash -c "$(wget -qLO - https://github.com/tteck/Proxmox/raw/main/vm/haos-vm.sh)" YAML
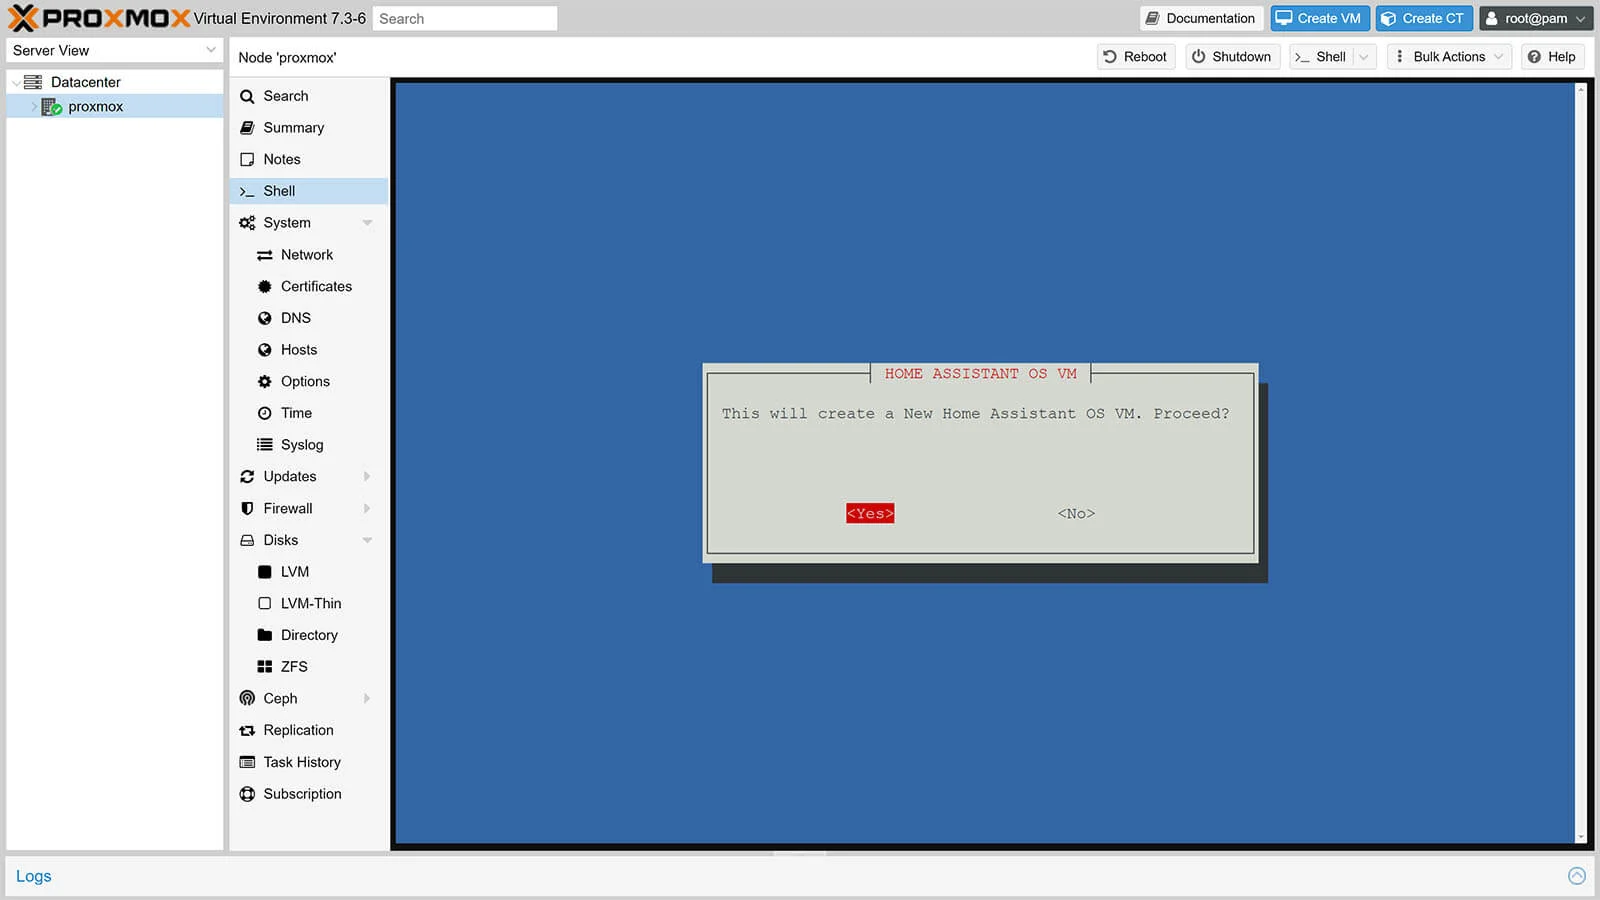
20. The wizard will ask you to confirm that you want to create a Home Assistant OS VM
21. Select Yes and click confirm
22. On the next screen, choose either Default settings or Advanced
– Default settings are fine for a Home Assistant OS install, but you can assign more RAM and Storage if you need to
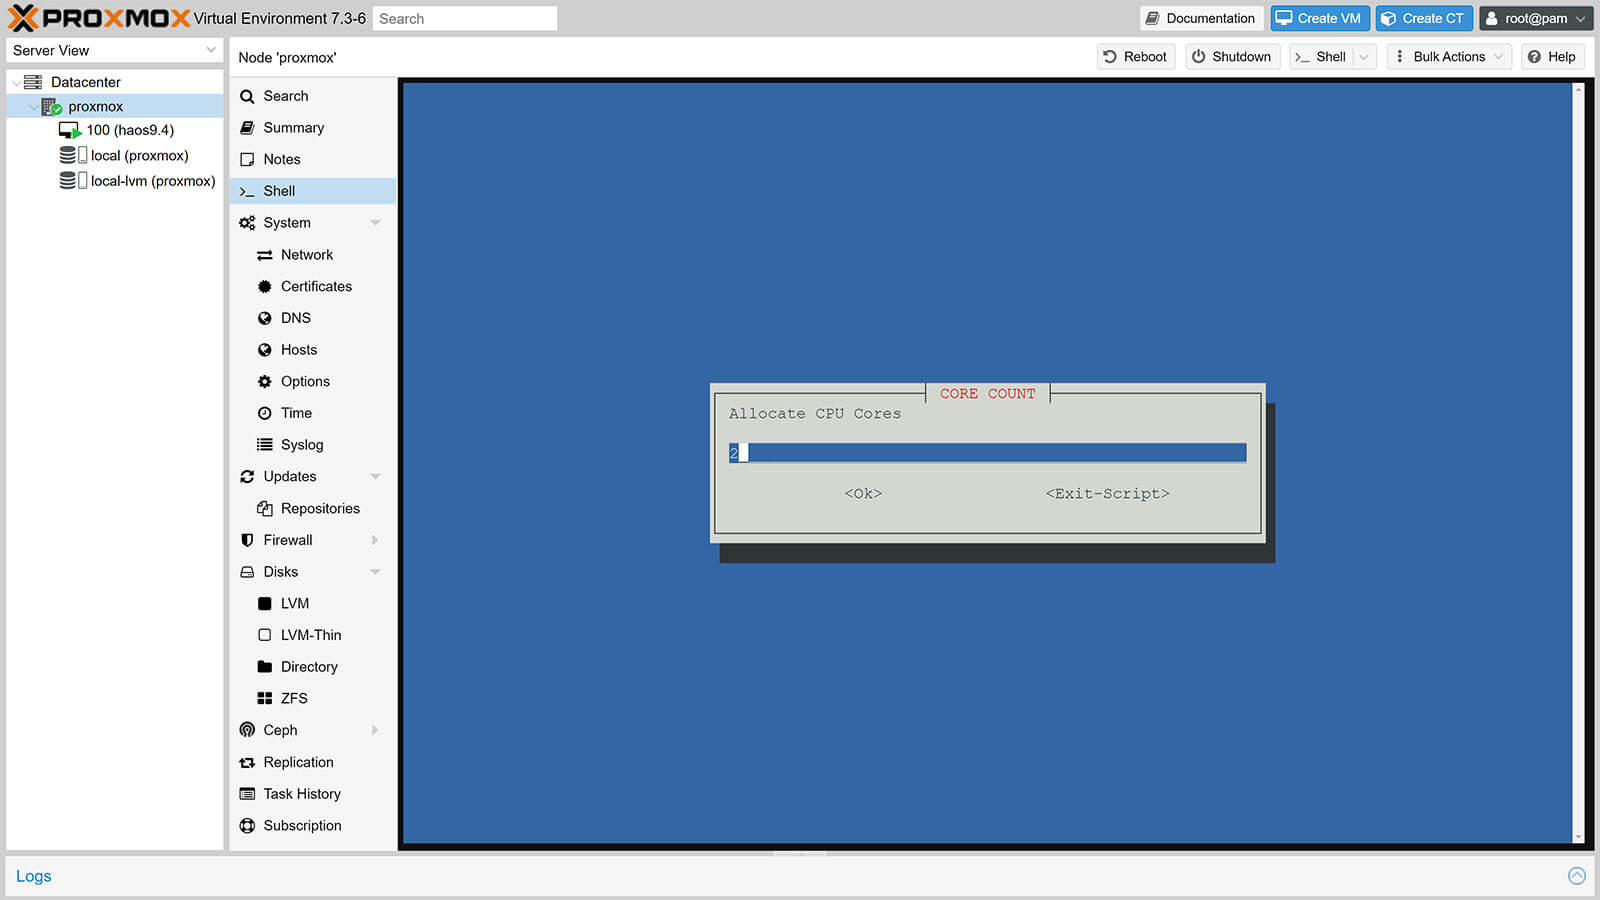
23. If you choose Advanced Settings, you will be prompted to choose:
– Home Assistant OS Version (Stable, Beta)
– Hostname (cannot contain underscore ‘_’)
– VM Machine ID
– Machine type
– Allocated CPU Cores
– Allocated RAM Memory

24. Select the final Yes to confirm
25. Wait for the script to download, extract and install the latest KVM image of HA OS
26. Once you get a Completed Successfully message, HA is installed
27. To see the IP address your router assigned to your Home Assistant VM instance, click your node on the left
28. Select your newly created Home Assistant VM
29. The IP address is displayed in the middle
– Use it to access Home Assistant in your web browser 192.168.xxx.xxx:8123
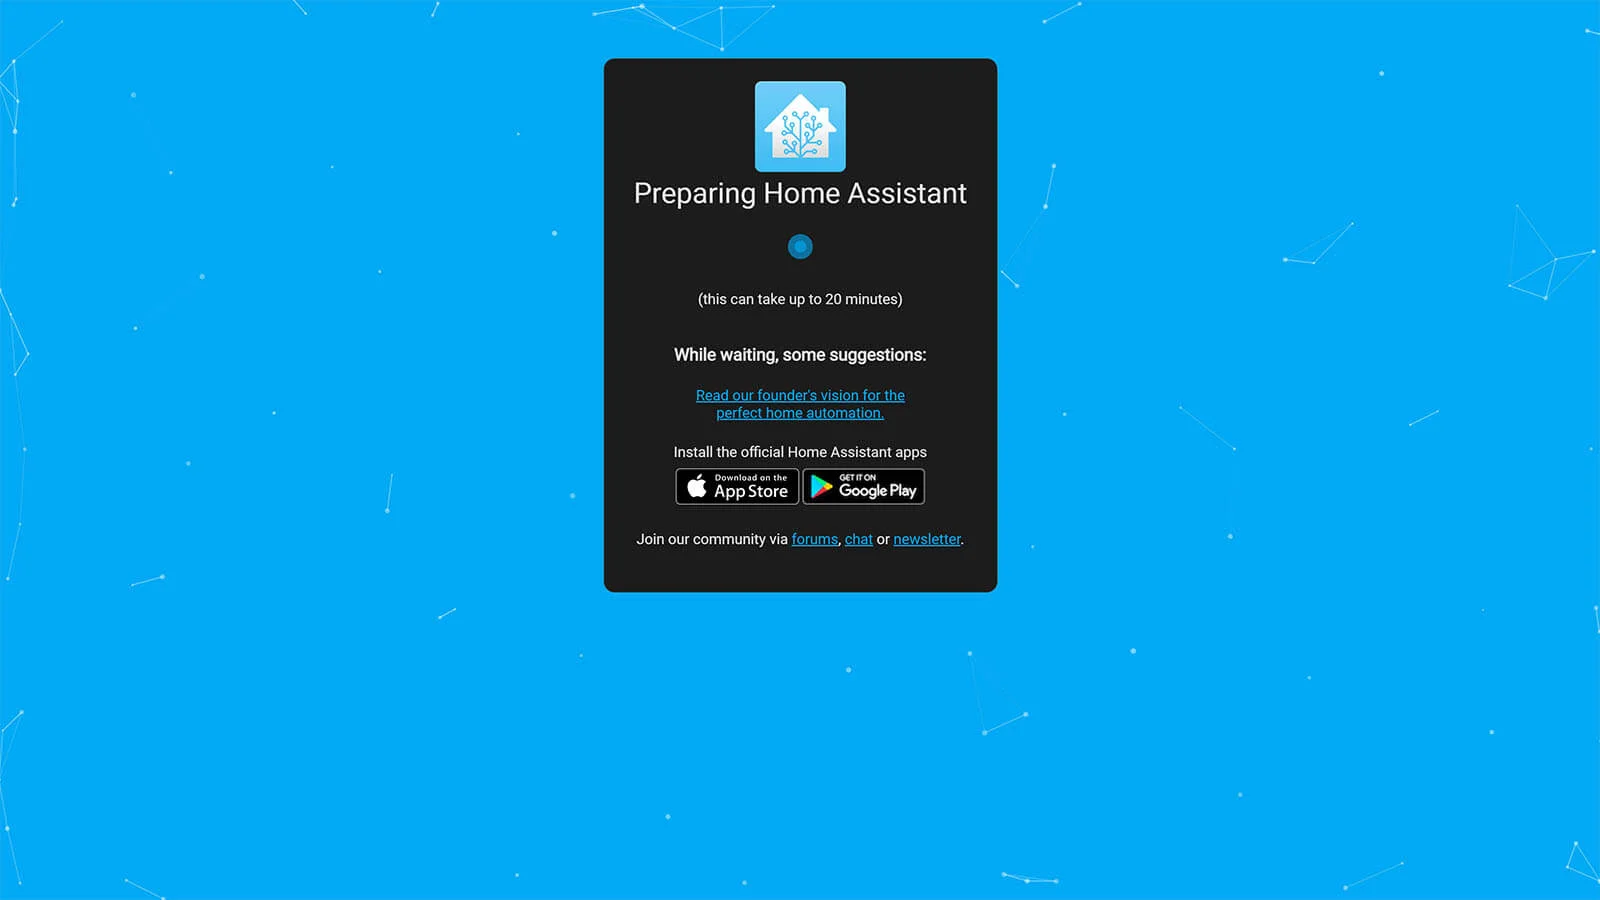
30. Finished, you’ve just install HA OS on Proxmox!
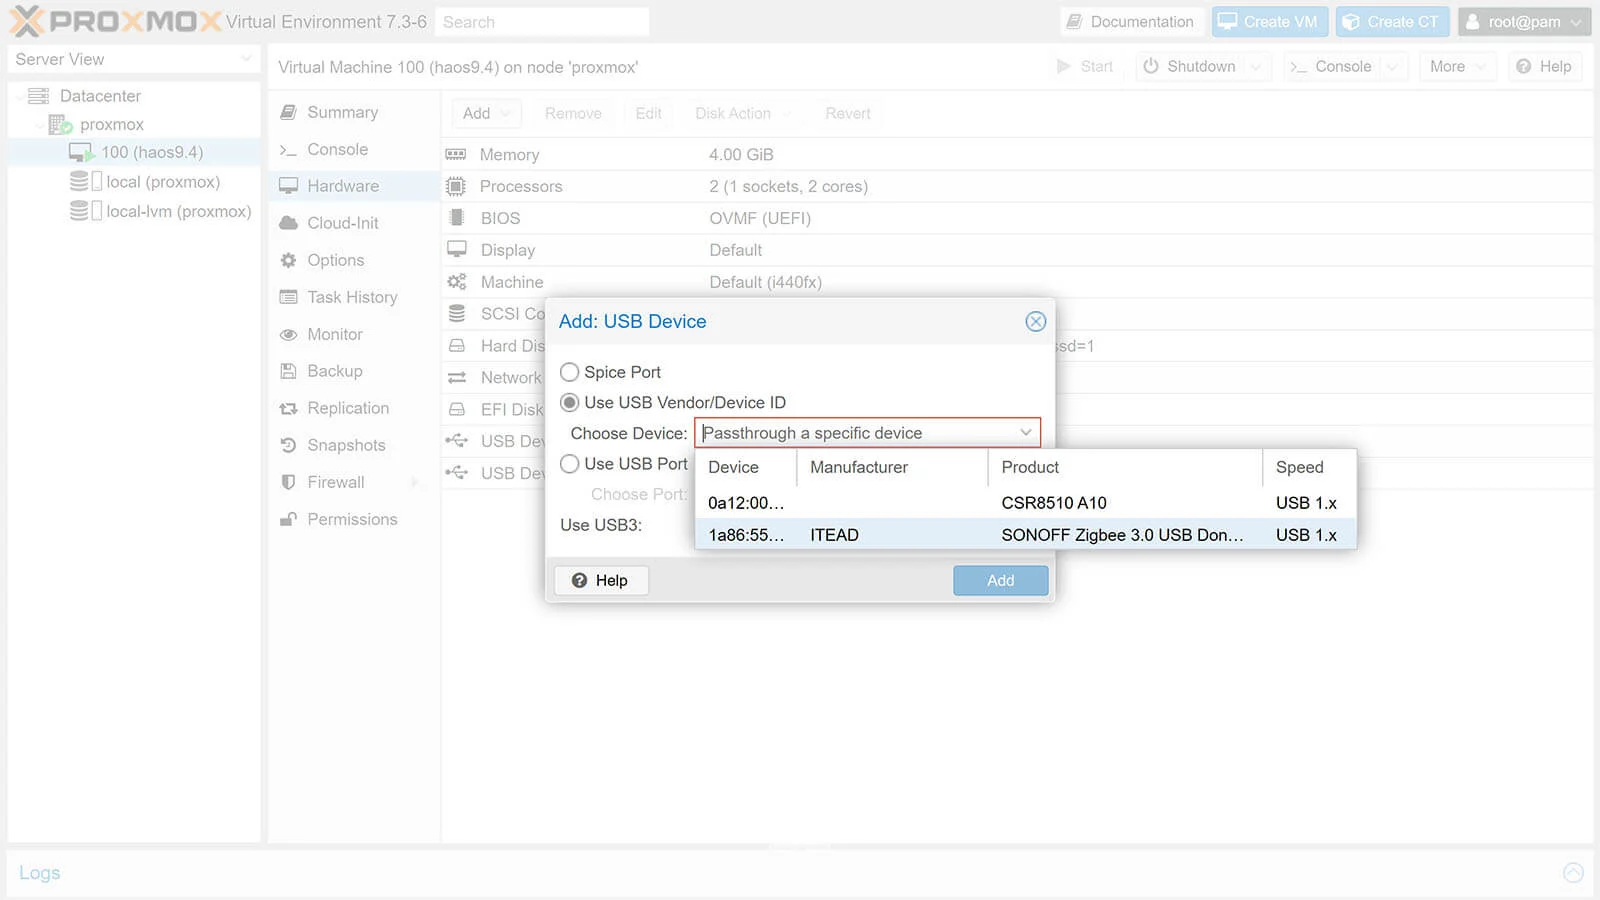
(Optional) USB Passthrough to Home Assistant VM
If you use a Zigbee or a Z-Wave dongle, there is one additional step you must do in order to allow the Home Assistant VM to read your attached USB device.
1. Attach your USB Device (Zigbee dongle) to your Mini PC
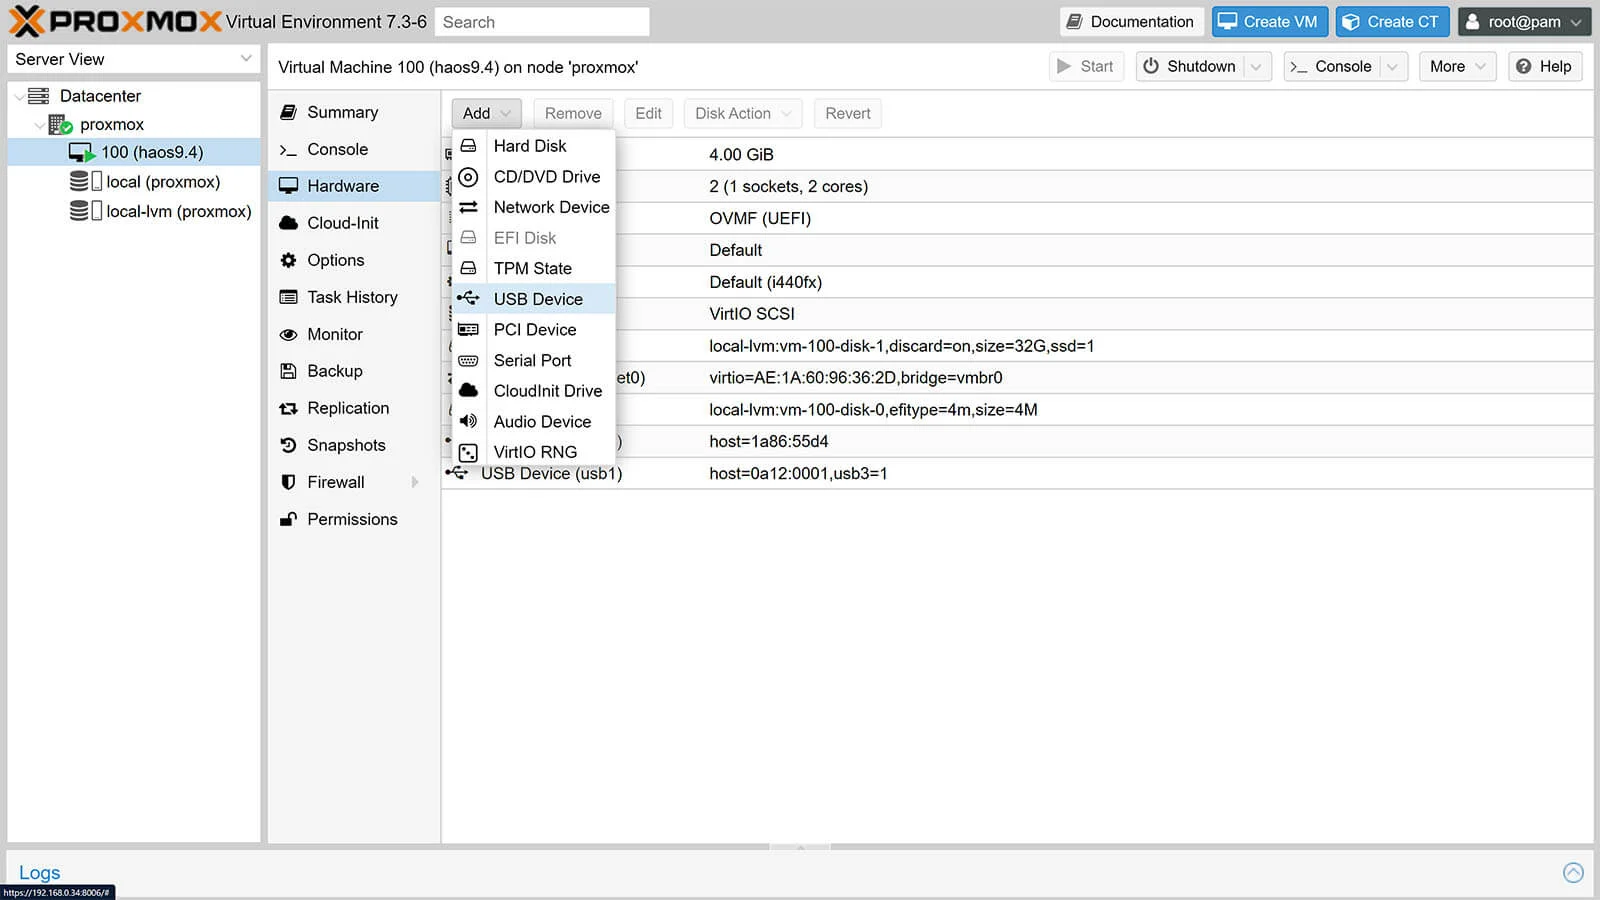
2. Select your Home Assistant VM on the left
3. Select Hardware from the Menu
4. Click Add at the top bar
5. Select USB Device
6. Select Use USB Vendor/Device ID from the menu
7. Select your USB Device (Zigbee/Z-Wave Dongle)
8. Click Add
8. At the top corner, press the small arrow next to Shutdown
9. Choose Reboot and confirm to restart the VM
10. If you navigate to Home Assistant, you USB dongle will be auto-discovered