- VNet Name: TestNetwork
- Address Space: 10.10.0.0/16
- Subnets:
- Primary: 10.10.10.0/24
- GatewaySubnet: 10.10.0.0/24
- Resource Group: TestResourceGroup
- Location: West US
- DNS Server: Azure Default
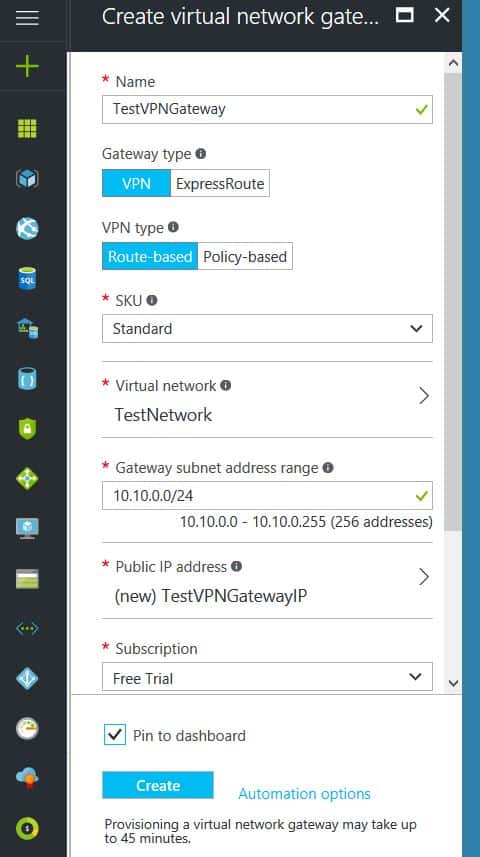
- Gateway Name: TestVPNGateway
- Public IP: TestVPNGatewayIP
- VPN Type: Route-based
- Connection Type: Site-to-site (IPsec)
- Gateway Type: VPN
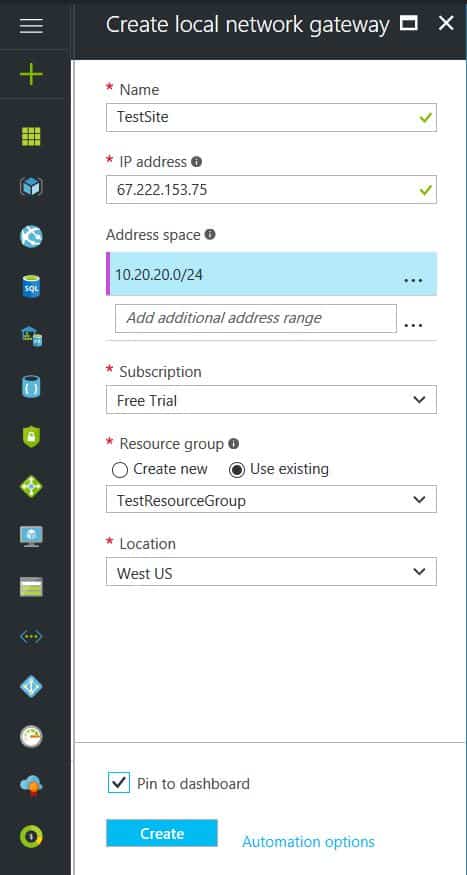
- Local Network Gateway Name: TestSite
- Local Subnet: 10.20.20.0/24
- Connection Name: VPNtoTestSite
Configure an Azure VPN gateway
This part takes the longest, so it should be done first:
- Click on the “+” icon at the top left hand side of the Resource Manager, then search for “Virtual Network Gateway” and click on the “Create” button.
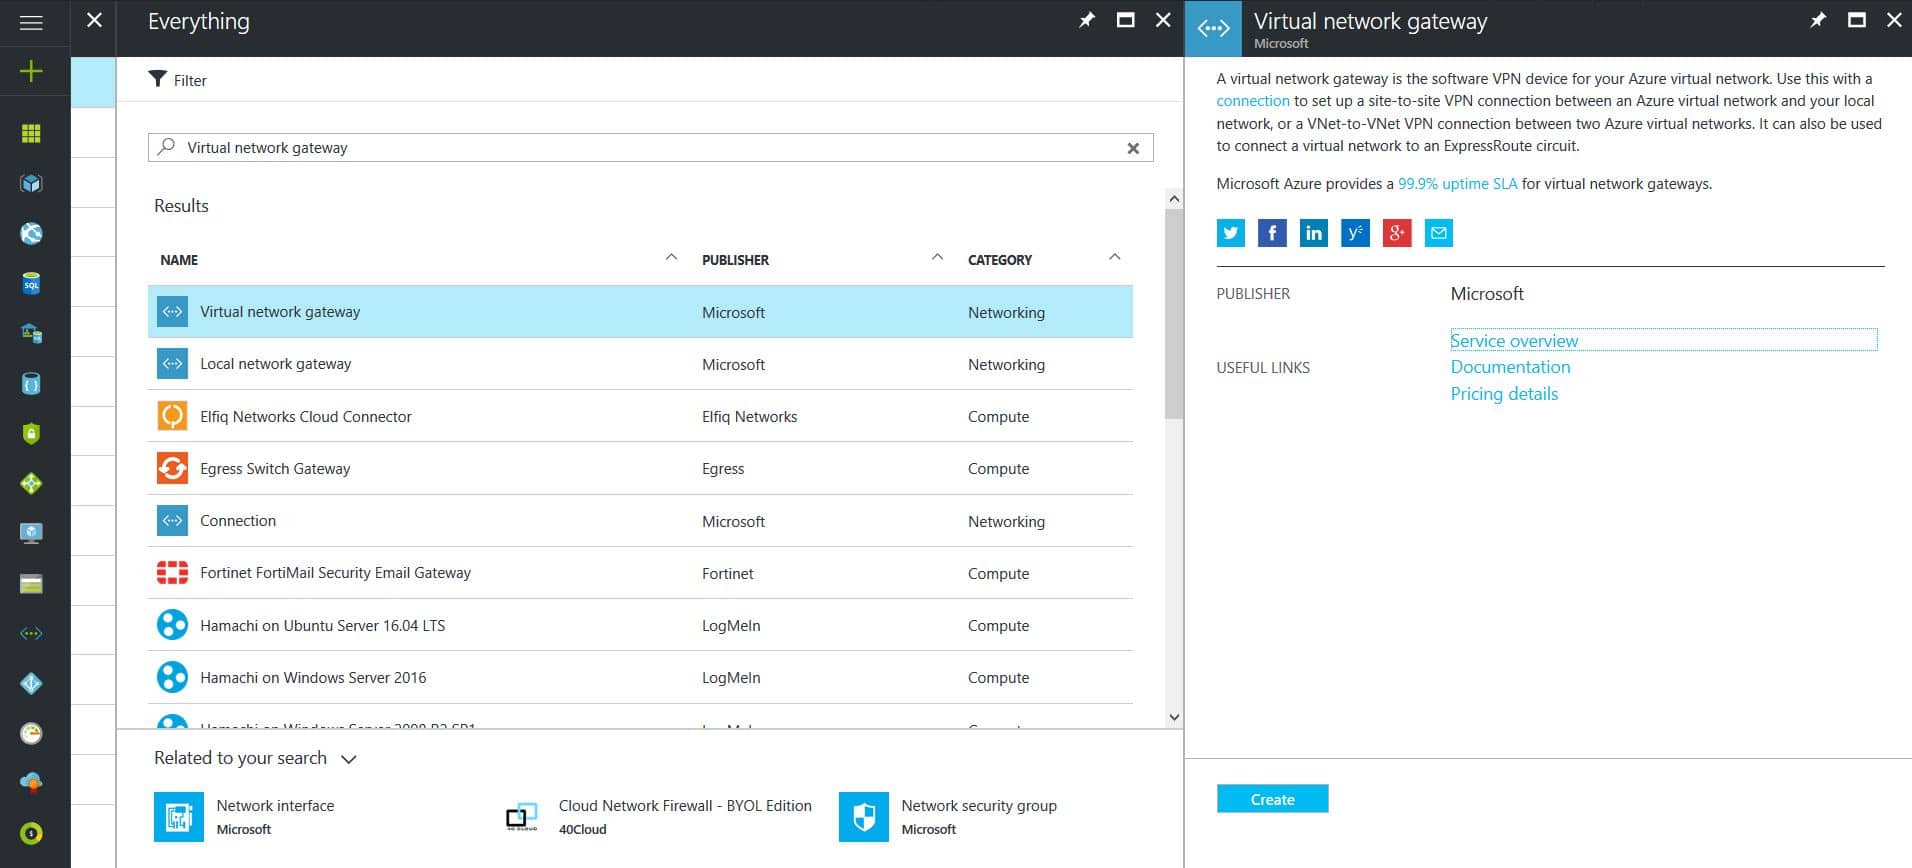
- Give the Virtual Network Gateway a name, leave Gateway & VPN type the defaults, choose or create a local network (not covered here), choose or create a Public IP Address, leave the remaining values as their defaults and then click the “Create” button. (Please note the reminder that this takes 45 minutes to create!)
Configure an Azure Local Network Gateway
This is a reference to your on-premise network so that subnets can pass traffic:
- Click on the “+” icon at the top left hand side of the Resource Manager, then search for “Local Network Gateway” and click on the “Create” button.
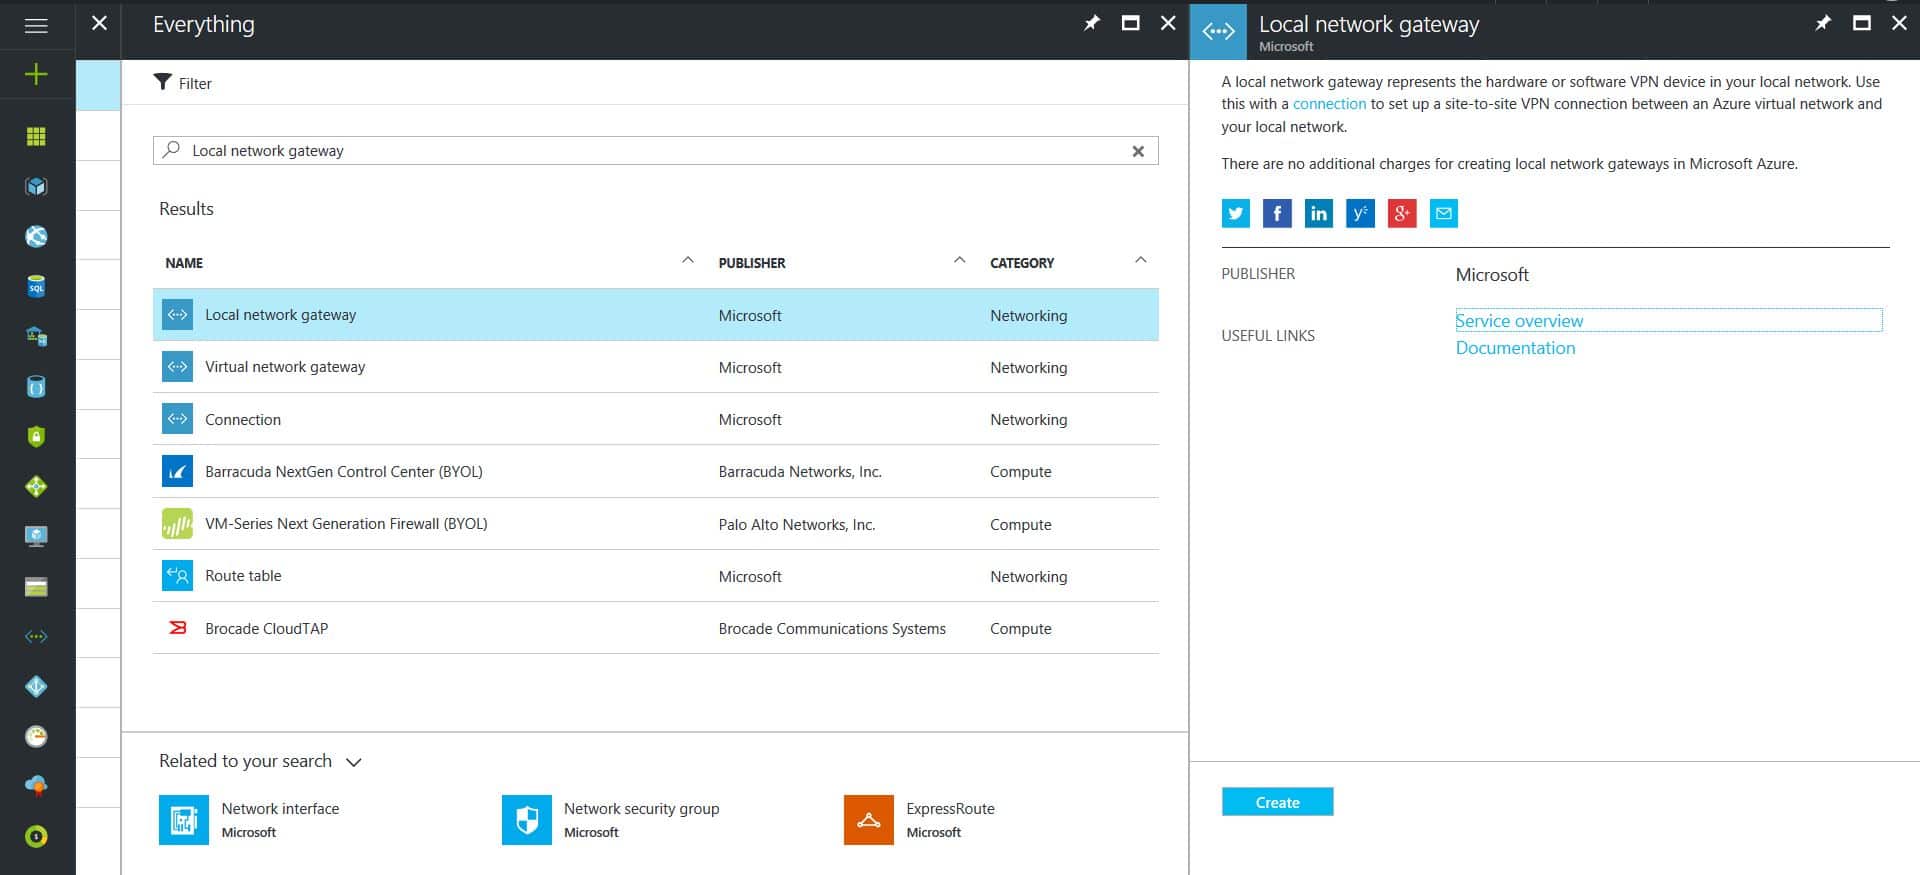
- Give the Local Network Gateway a name, specify the external IP address of the on-premise site, specify the on-premise address space (subnet), leave the remaining values as their defaults and then click the “Create” button.
Configure an Azure VPN Connection
This will create the tunnel from Azure to the on-premise site:
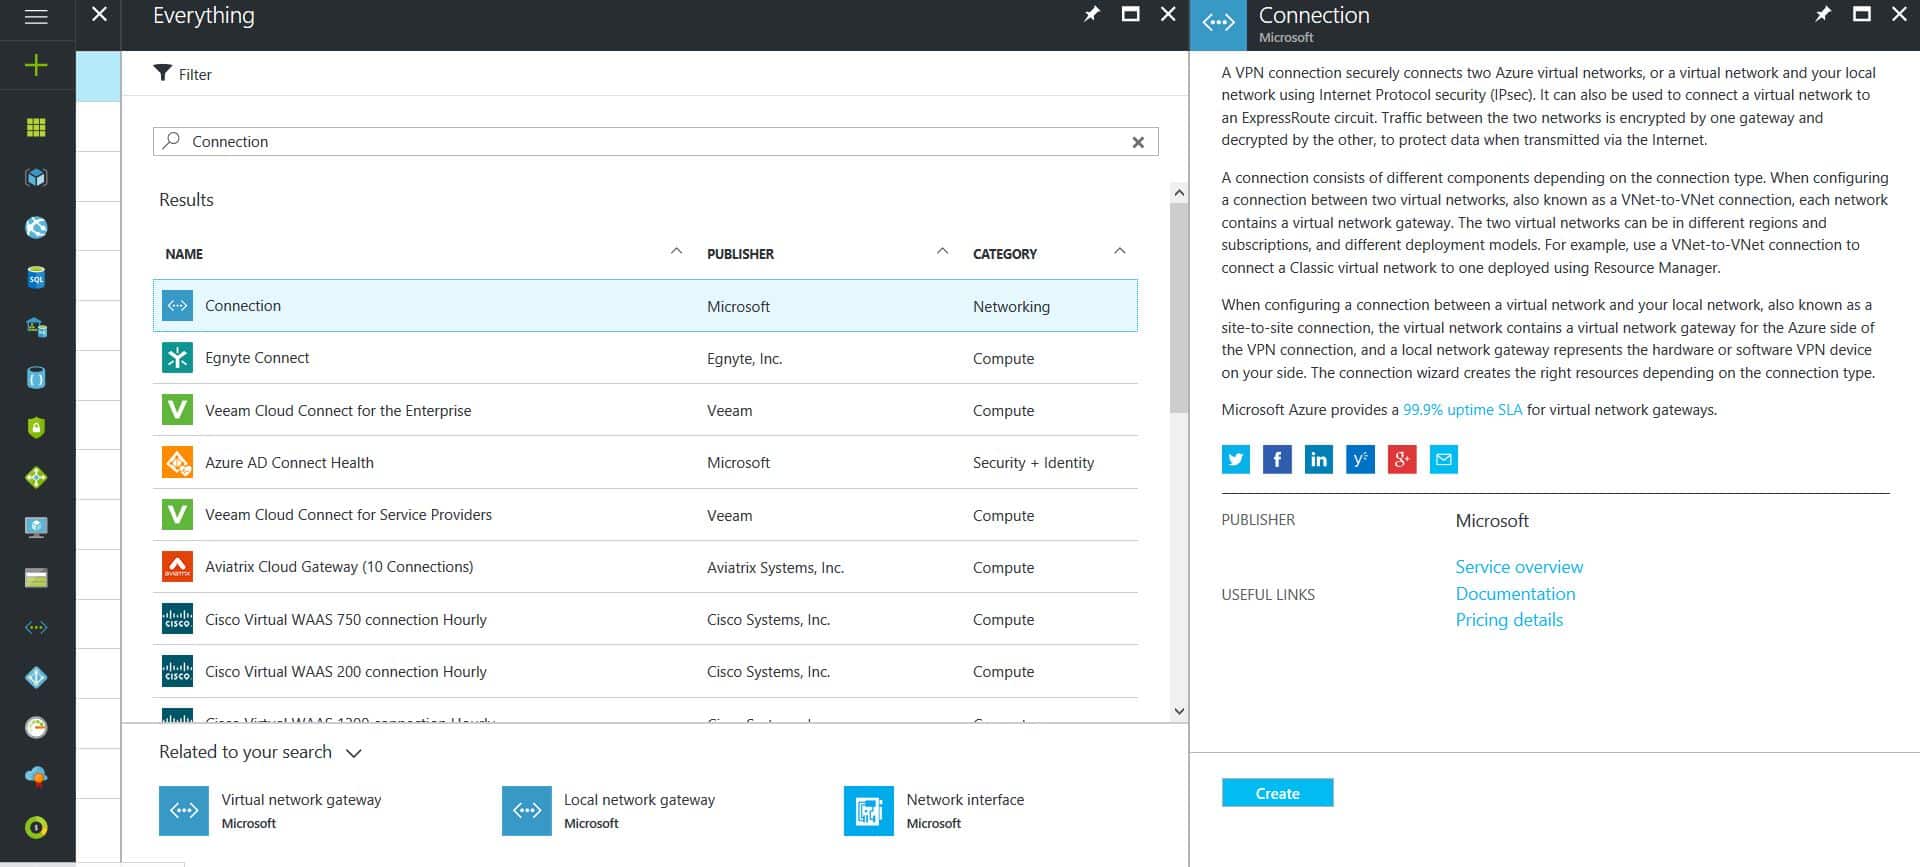
- Click on the “+” icon at the top left hand side of the Resource Manager, then search for “Connection” and click on the “Create” button.
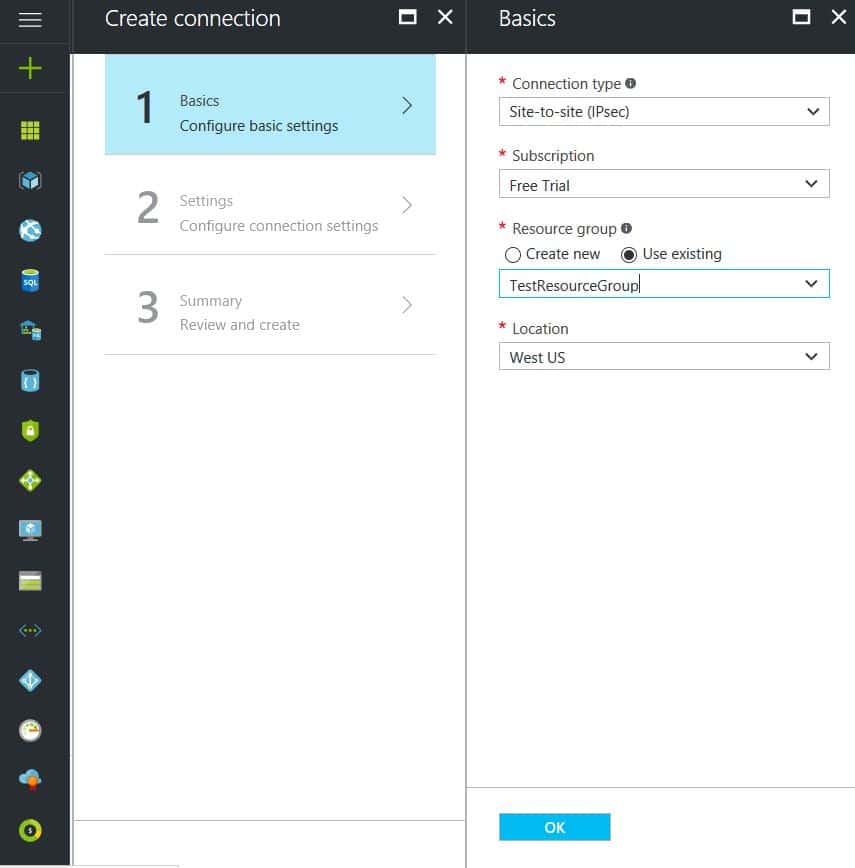
- Choose “Site-to-site (IPSec)” as the connection type, leave the remaining values as their defaults and then click the “OK” button. On the summary screen click on the “OK” button to create the connection.
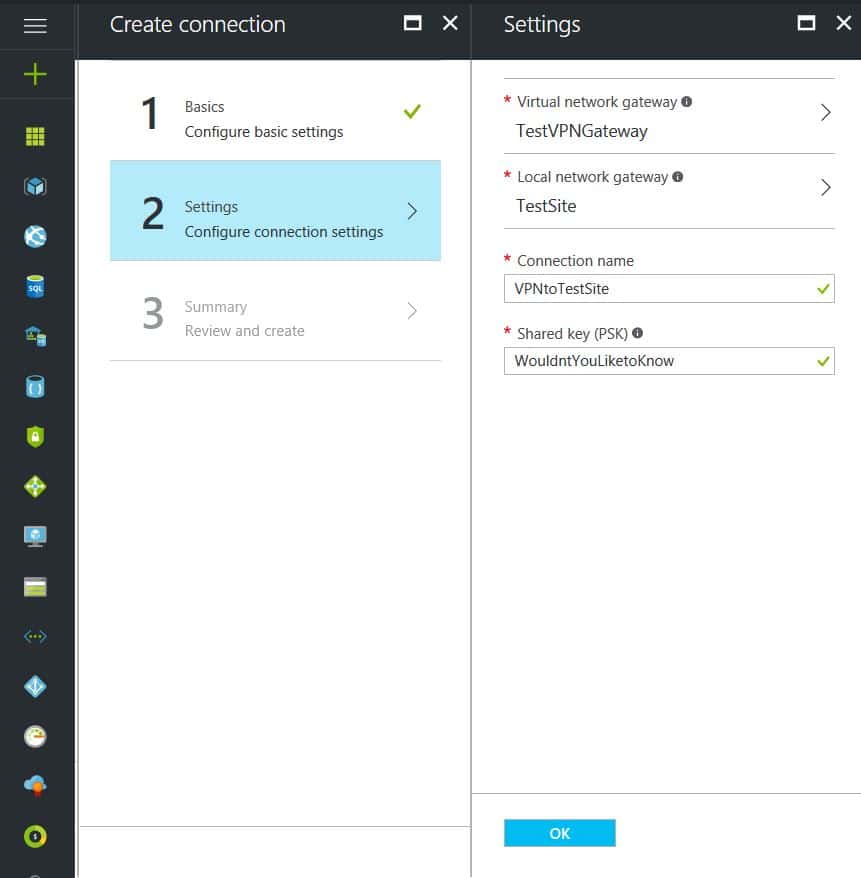
- Choose the newly created Virtual Network Gateway, choose the newly created Local Network Gateway, give the connection a name, specify a shared key and click the “OK” button.
This completes the setup of the Azure side of the VPN tunnel. Now to work on the Ubiquiti USG side.
Configuring an Ubiquiti USG VPN Network
This is a fairly simple process but it has to be precise:
- Choose the Current Site from the top right hand side of the portal.
- Click on the Settings gears down on the bottom left side of the portal.
- Click on Networks then on the “Create New Network” button.
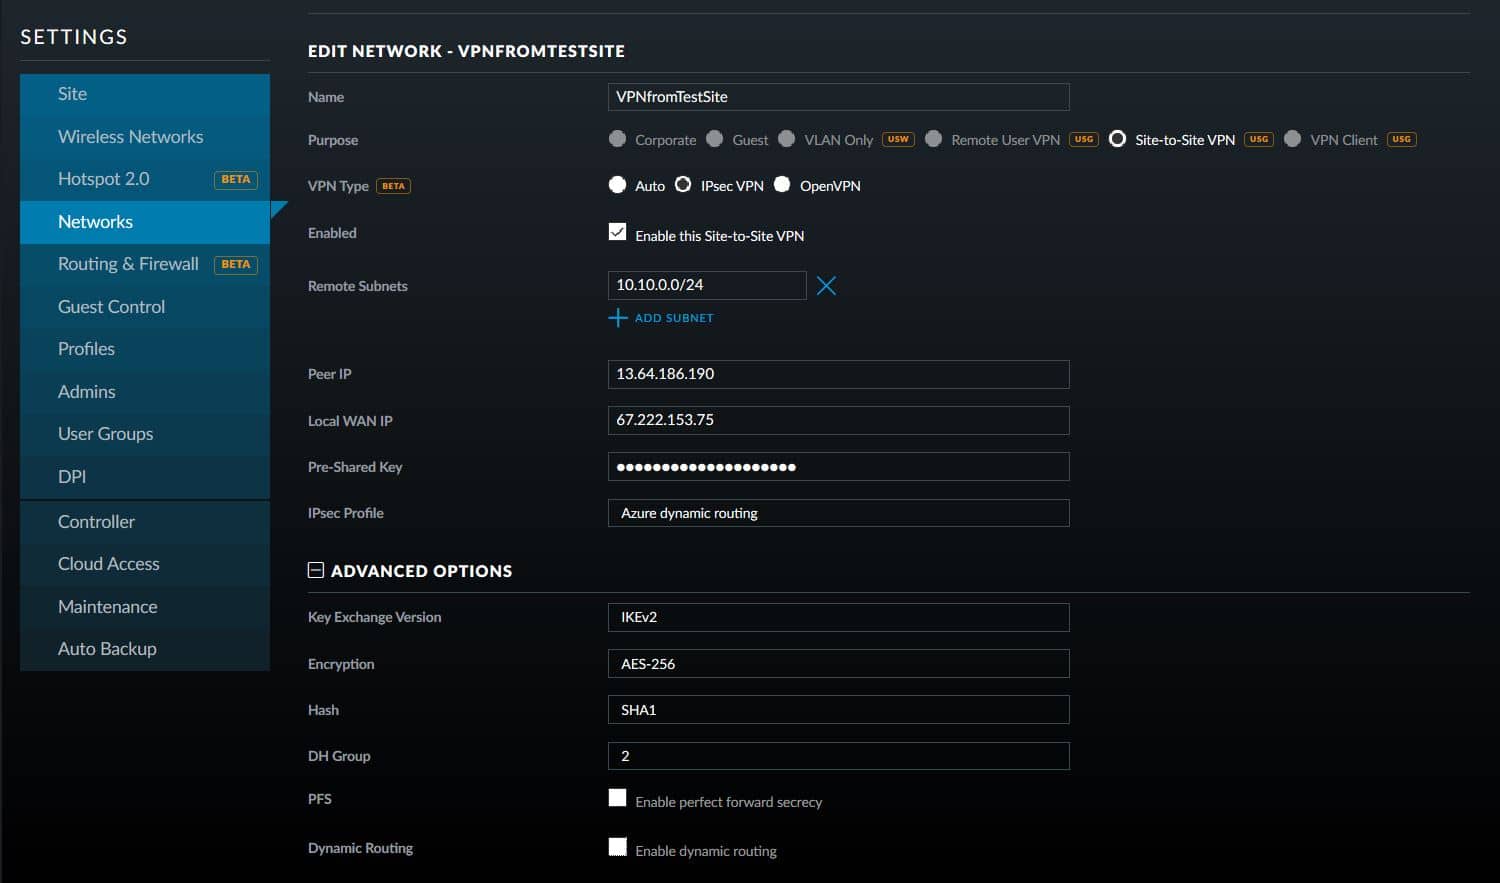
- Give the connection a name, choose “Site-to-Site VPN” as the Purpose, choose “IPSec VPN” as the VPN Type, choose to Enable this Site-to-Site VPN, add the Azure subnet under Remote Subnets, get the newly created Virtual Network Gateway IP address from Azure for the Peer IP, enter the on-premise external IP address for Local WAN IP, enter the same shared key as used in the Azure VPN Connection for the Pre-Shared Key, choose “Azure Dynamic Routing” as the IPSec Profile, expand Advanced Options, leave Key Exchange Version, Encryption, Hash & DH Group as default and uncheck the PFS & Dynamic Routing boxes.
That is all there is to it. If you have any difficulties with connection then delete and re-create the Ubiquiti USG side first (those two check boxes at the bottom of the Advanced Options will check themselves again, but don’t be fooled by this quirk in the software). If your company is currently using either Microsoft Azure or Ubiquiti USG routers and would like a VPN created, then contact us for assistance.