Hello World,
It has been some time since our last post about the MDT technology. We have been discussed quite a lot about how to use it effectively and how to set it up in a custom (and standard) configuration. You can have a look to our section called Deployment technics where you can find back information about MDT technology and some tips and tricks we have provided.
Today, we will briefly explain how to integrate Windows updates during the deployment Process. You will see this is quite easy and fast to implement and quite useful. Note that they are multiple ways to deploy Windows Updates on a system ranging from manual installation, adding updates into your MDT infrastructure or using WSUS Server infrastructure.
In this post, We want to demonstrate that you can deploy or create up to date images with a minimum of effort.So, Let’s go !
Updates and MDT
The problem we are trying to solve
You have setup your MDT server and create the perfect task sequence that does everything for you. However, you have received complains from the user community. When they start there newly delivered workstations, they still have to wait between 30 to 60 minutes before they can effectively work. Why ? Because when the system is joined to the domain, it connects to the patch management infrastructure which enforce the deployment of windows patches.
This is annoying but MDT Team has thought about that. Yes, you read it correctly, there is a way to obtain and install updates on the fly while performing the MDT Deployment activities.
Depending on your situation/infrastructure and the way you are performing the deployment activities, you might need to adapt your infrastructure accordingly. You can have two situations :
- situation 1 : your MDT/WDS infrastructure is part of the domain and you have access to the patch management infrastructure from where you can get the patches.
- situation 2 : you are working in a staging area where you do not have access to the patch management infrastructure. You are in a standalone configuration.
Whatever the situation you are, the principle and concept remains the same. In my scenario; let’s assume that I have access to the Patch management infrastructure (i.e. WSUS). To integrate windows updates into my MDT infrastructure, I would need to perform two easy actions
- Step 1 – Configure the MDT Rules to have the MDT server knowing where to get the patches
- Step 2 – Modify one of the Task sequence steps to allow Post-Updates actions on the system
That’s it ! You do not need more than this. Let’s see how to do this in the next section
Configure MDT To deploy updates
Step 1 – Adding WSUS Server in the MDT Rules
As mentioned earlier, you have to tell the MDT server where to find the WSUS server where the patches will be available. To do that, you will simply need to modify the MDT Rules you have configured. The MDT rules are basically stored in the CustomSettings.ini file. In this file, you will need to append the following line
WSUSServer=http://YourWSUS_Server_Name:8530
Note :
In the WSUS server, you should put the FQDN url used by your wsus server. Because we are using a WSUS 2012 R2 server, the port used is set to 8530. You might have changed this port or you are still using an wsus server hosted on a windows 2003 or 2008 server which use the port 80 by default.
So, to modify the customsettings.ini file, perform the following actions
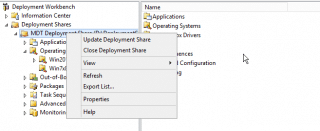
- In the deployment workbench, right-click your MDT Share and select properties
Click on Picture for Better Resolution
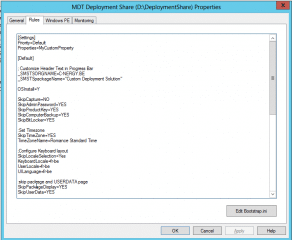
- In the MDT Deployment Share Properties, go to the tab Rules. On this screenshot, you can see that no Wsus Servers have been inserted.
Click on Picture for Better Resolution
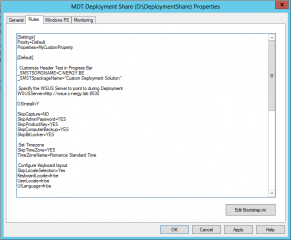
- In the Default section ([Default]), Append the line WSUSServer=http://url_path:port. Again, on the screenshot, you can see that we now have added the WSUSServer option in our CustomSettings.ini file.
Click on Picture for Better Resolution
- Press Apply and OK to close the dialog box and you have completed the first part of the process
Step 2 – Modify the Task sequence to perform Windows Updates
You do not need to create any scripts or command line for that. In fact, MDT 2013 offers out of the box the possibility to perform windows updates via the standard Client Deployment Task.
If you open your task sequence, expande the State Restore Node, you will see that there are steps related to Windows Updates
Click on Picture for Better Resolution
You have two steps available to you. You have
- Windows Updates (Pre-Applications Installation)
- Windows Updates (Post-Applications Installation)
These two tasks are disabled by default. The question you might have is which one to choose. This would depend on your requirements but most of the time I would recommend using the Post-Applications installation. Why ? Simply because I’m assuming that you are deploying office 2013 (or 2010) on the system so you might need patches and updates for this software as well. So, it probably better to install all the applications you need (which certainly contains Microsoft ones) and patch your system afterwards. This way you can ensure that all the patches have been deployed and users will not have much to complain about.
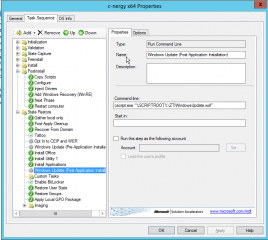
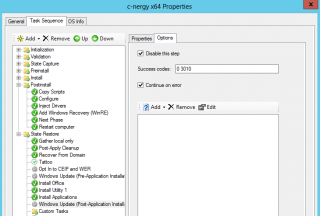
As I said these two tasks are disabled by default. In my scenario; I want to enable the Windows Updates (Post-Applications Installation). So, if you click on the step, and in the right pane, you click on the Options tab, you should see something like this
Click on Picture for Better Resolution
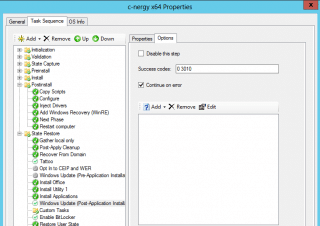
Uncheck the box, Disable this step, to have MDT perform Windows updates deployment actions.
Click on Picture for Better Resolution
How do you know this is working ?
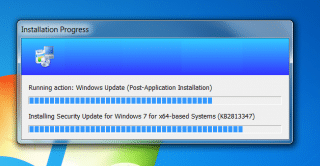
If everything has been configured correctly, while MDT finalize implementing settings on the operating system, in the installation progress bar, you should see information about the Windows Update process. If you look at the screenshot below, you can see that in the Installation progress bar, you see information about the Windows Update step which is running and you can see that some patches are getting installed
Click on Picture for Better Resolution
If you are wondering how MDT is performing the updates, simply have a look at the vbs script used to perform this steps. In a few words, the script will configure the registry key needed to have the Windows Update service configured accordingly based on the information provided in the CustomSettings.ini file. That’s it. Once the install is completed, these registry keys will be deleted.
This is important to know. If you have your machine joined to the domain during the MDT Deploy and that the machine is receiving GPO, the MDT updates process might fail. The Domain GPO will override the settings configured by the MDT Server. A simple solution for that would be to have the machines joining the domain located under an OU where no gpos are applied. At the end of the deployment, you could then move the computer accounts into the final OU
Final Notes
In this post, we have quickly explained how to configure the MDT to deploy windows Updates on the target machines. This is a great feature because it allows you to deliver up to dates systems to your customer. On the other hand, the deployment process take more time as you have to install additional patches.
For the records, If you look at your MDT task sequence, you will see that there is also another option called Apply Patches. This option as you have guessed can be used to update your windows image as well. The downside of this approach is that you need to manually download and import the Windows Updates into your MDT Share (OS Packages node). This would requires you much more time (to prepare,configure and maintain) that the solution presented above. Obviously, you would need to ensure that your WSUS is up to date, and patches have been approved and downloaded which also represent some work to be done (but far less than the manual process)
I hope this tip would be useful to you
Till next time
See ya
