Source: https://adamtheautomator.com/how-to-reduce-docker-image-size-in-docker-containers/
Is your Docker image taking too long to build and deploy? Is it taking hours to export? Stop wasting time and speed up these processes by developing a smaller image. In this tutorial, you will learn three tricks to reduce your Docker image size.
Let’s get started!
Prerequisites
This tutorial will be a hands-on demonstration. If you’d like to follow along, be sure you have the following:
- Docker Desktop or Engine. There are Docker versions available for Linux, Windows, and macOS. This tutorial uses Docker version 20.10.8 build 3967b7d on an Ubuntu 18.04 LTS computer.
Related:How to Set Up Docker for Mac
Related:How to Set Up Docker in WSL [Step-by-Step]
- Node.js. This tutorial uses Node.js version 10.10.0 but should work with newer versions, too.
- You’ll need a code editor such as Visual Studio Code, vim, and nano. This tutorial uses nano.
Related:What You Need to Know about Visual Studio Code
Creating a Docker Image
You probably already have a Docker image laying around that you want to shrink. Don’t. In this tutorial, you’ll start fresh by creating a Docker image for your testing.
You’ll begin by building a container for a Node.js application The Node.js application you will be using is the Hello World Express.js example which displays the text “Hello World!” in your browser.
1. First, open a terminal session and create a directory where you’ll create your Docker image and associated files. For this example, the working directory will be ~/docker_demo.
# Create the project directory
mdkir ~/docker_demo
# Change the current directory to your working directory
cd ~/docker_demo
Copy
Next, create three files in your working directory. These files are:
- index.js – the starting point for your sample application.
- package.json – contains your application’s metadata.
- Dockerfile – contains the instructions for building your Docker image.Run the command below in the terminal to create all these files at once.
touch index.js package.json Dockerfile
Copy
3. Open index.js in your code editor, fill it with the code below, and save.
const express = require('express')
const app = express()

app.get('/', (req, res) => res.send('Hello World!'))

app.listen(3000, () => {
  console.log(`Example app listening on port 3000!`)
})
Copy
4. Next, open the package.json file for editing, copy and paste the code below, and save.
{
  "name": "hello-world",
  "version": "1.0.0",
  "main": "index.js",
  "dependencies": {
    "express": "^4.16.2"
  },
  "scripts": {
    "start": "node index.js"
  }
}
Copy
5. In the same manner, edit the Dockerfile to populate the code below and save the file.
# use the Node.js parent image
FROM node:8

# set a directory for the app
WORKDIR /app
# copy all the files to the container
COPY . .
# install dependencies
RUN npm install
# define the port number the container should expose
EXPOSE 3000

# run the application
CMD ["npm", "start"]
Copy
6. Execute the following docker build command to build your Docker image. The optional -t flag tags your image with a name to make it identifiable. This example uses the name ‘my_app.’
docker build -t my_app .
Copy
7. When Docker completed building the image, execute the following command to view your image tagged with ‘my_app.’
The
grepcommand is only available on Linux, but to view your image on other operating systems, run the commanddocker imagesand look for the image with the tag ‘my_app.’
docker images | grep my_app
Copy
Related:How to Use PowerShell’s Grep (Select-String)
As shown in the following image, the Docker image size is 904MB.

8. Now verify your image is working correctly. Execute the following docker run command. This command will use your Docker image to create a container where your application will run.
docker run -p 3000:3000 -ti --rm --init my_app
Copy
If the application starts correctly, the message ‘Example app listening on port 3000!’ will be printed in your terminal.

9. To verify your application works, open your browser and navigate to http://localhost:3000/. The text ‘Hello World!’ should be displayed as shown in the following image.
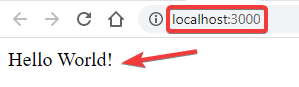
10. To terminate the application and return to the terminal prompt, press CTRL+C.
Reducing a Docker Image Size
Now that you have a Docker image, it’s time to learn how to reduce your image’s size! The following sections cover three methods to make your Docker image size smaller.
Method 1: Applying Multi-Stage Builds
Having separate Dockerfile files for development and production was common practice.
The development Dockerfile contained everything necessary to build the application, while the production one included what the application needed to run. This method produces the final production image with the optimum size. But managing two Dockerfiles is unnecessarily complicated.
Since the introduction of multi-stage builds in version 17.05, developers now only need one Dockerfile containing multiple FROM instructions to separate the development and production build stages. Thus, selectively copying artifacts from one build stage to another.
Now it’s time to use multi-stage builds in your image!
1. Open your Dockerfile in the code editor and replace its content with the following code. This new Dockerfile code has two build stages as indicated by the two FROM lines.
By default, build stages do not have names, and your code can only reference them as the integer in the order they appear (starting at zero) in the Dockerfile. You can append the
as <name>to theFROMline to assign a name to the build stage for better identification.
# the develop build stage using the node parent image
FROM node:8 as develop

# set a directory for the app
WORKDIR /app
# copy all the files to the container
COPY . .
# install dependencies
RUN npm install

# the production build stage using the node parent image
FROM node:8

# Copy only the build artifact from the first (develop) build stage
# Any intermediate artifacts used to build your application are not included in the final image.
COPY --from=develop /app /

# define the port number the container should expose
EXPOSE 3000

# run the application
CMD ["npm", "start"]
Copy
2. Build your new image with the name my_app_multi_stage_builds by executing the following command.
docker build -t my_app_multi_stage_builds .
Copy
3. After the build, view the updated image size by executing the following command.
docker images | grep my_app_multi_stage_builds
Copy
The sample application is small and only has a few intermediate artifacts. But there is still a reduction of 1MB compared to the previous Docker image build.

Method 2: Using a Lightweight Parent Image
Unless you build a Docker image from scratch (using the FROM scratch directive), every Docker image has a parent image. The Dockerfile files in the previous sections use node:8 as the parent image during the build.
If your application does not require a specific operating system version to run, consider swapping your parent image with one more lightweight. If you are using Linux, the most lightweight image in Docker Hub is Alpine.
Now it’s time to learn how to replace the parent image with Alpine!
1. Edit your Dockerfile and replace the second FROM node:8 line with FROM node:8-alpine. This new FROM instruction, Docker, will be using node-8-alpine as the parent image. Now your final image will run on Alpine instead of Node.
# the first build stage using the node parent image
FROM node:8 as build

# set a directory for the app
WORKDIR /app
# copy all the files to the container
COPY . .
# install dependencies
RUN npm install

# the second build stage using the node-8-alpine parent image
FROM node:8-alpine

# copy the required artifacts to from the first build stage
COPY --from=build /app /
# define the port number the container should expose
EXPOSE 3000

# run the application
CMD ["npm", "start"]
Copy
2. Run the command below to build the Docker image with the name my_app_alpine.
docker build -t my_app_alpine .
Copy
3. Finally, view the updated image size by executing the following command.
docker images | grep my_app_alpine
Copy
The final Docker image size is now only 75.2MB. A significant reduction of 827.8 MB!

Method 3: Creating a .dockerignore File
Docker is a client-server application consisting of the Docker client or CLI and the Docker daemon, which manages Docker images (and containers, networks, and volumes).
The CLI compiles a build context consisting of the files to include in the image to build. The CLI also searches for a .dockerignore file which lists the files to ignore before sending the build context to the Docker daemon. As a result, copying fewer files reduces the Docker image size.
Now it’s time to apply a .dockerignore file into your build!
1. First, create a new empty file called .dockerignore.
touch .dockerignore
Copy
2. Next, create a dummy file that you will make Docker ignore during builds. In this example, create a dummy README.md file that is 2MB large.
If on a Linux computer, execute the fallocate command below to create the file.
fallocate -l 2MB README.md
Copy
If on a Windows computer, run the fsutil command instead.
fsutil file createnew README.md 2000000
Copy
3. Next, build your new Docker image by executing the following command. Since the README.md file is on the same directory, expect this dummy file to be part of the resulting Docker image.
docker build -t my_app_readme .
Copy
4. View the updated image size by executing the following command.
docker images | grep my_app_readme
Copy
As expected, with the inclusion of the README.md file, the final Docker image size increased by 2MB.

5. Now, exclude all files with the .md extension from the image build. To do so, edit the .dockerignore file and fill it with the following code.
# ignore markdown files
.md
Copy
Markdown files (.md) typically do not affect an application’s functionality and are generally safe to exclude from builds. Other files you can exclude are build logs, test scripts, your repository’s .git folder, and any files that include sensitive information (such as passwords).
6. Now that you’ve updated the ignore file, re-run the Docker image build command as shown below.
docker build -t my_app_dockerignore .
Copy
7. Lastly, run the command below to view the new Docker image size, including the README.md file.
docker images | grep my_app_dockerignore
Copy
Now that the README.md file is out of the new build, the Docker image size is down to 75.2MB!

Conclusion
In this tutorial, you learned the different methods to reduce your Docker image size. You learned how to use multi-stage builds, build from a smaller parent image, and exclude non-essential files.
Next time Docker takes too long to build and deploy, don’t hold back and apply your knowledge to optimize your Docker image size. Which method do you think you will use most?