Source: https://msendpointmgr.com/2022/01/03/install-network-printers-intune-win32apps-powershell/
In this post I will show you how to easily install Printer Drivers and Printers, from Intune, using Win32 apps and PowerShell.
Background
My affinity to, and admiration for, Win32 apps has probably not gone unnoticed recently. Win32 apps are very versatile and I often use them for customers to do other things besides installing applications.
Recently, a customer asked if it was possible to install network printers, on Azure AD Joined Windows 10 devices, using Microsoft Intune. My eyes lit up. There are many ways to skin this cat and what made it more challenging was the Printer Driver was packaged in the dark ages (putting it politely).
Many app developers are slowly coming around to the idea that admins need to be able to install applications silently and autonomously. As an app packager, you may be reading this and choking on your coffee – we have a long way to go until every vendor is on the same hymn sheet. In my experience, drivers and firmware often fall behind of this utopian vision of autonomous application installations.
Spending time nudging these legacy installers in the right direction can become tiresome. Often, when we focus on Printer Drivers, the app installer is just a fancy wrapper and the ultimate payload is always the same – getting the printer driver installed in Windows.
With that in mind, we can bypass the installer entirely. We just need the relevant files to inject into the Driver Store. Once that is accomplished, we can use some basic scripting to create a Printer Port, install the install the Printer Driver and add the Printer to Windows. In this post we will cover:-
- Identify the Printer Driver source files required
- Staging the Driver into the Windows Driver Store
- Create a Printer Port
- Install the Printer Driver
- Add the Printer
To INF-inity … and beyond
A driver package includes all the required components to ensure your printer can be supported in Windows. Typically, any driver package contains the following components:
- INF file
- Catalog file
- Driver files
- Other files
The INF file is a text file that provides device and driver information, including the driver files, registry entries, device IDs, catalog files, and version information that is required to install driver packages in Windows.
We won’t spend much more time in this post understanding how drivers work. You can read more on this topic at https://docs.microsoft.com/en-us/windows-hardware/drivers/install/components-of-a-driver-package
The important information we need to be able to build a win32 app is what files are required in order to successfully install the Printer Driver. In this post we will use a Generic Canon Printer Driver. If you are testing this in a lab, grab the driver package from here:-
1 . Download and extract the Printer Driver Software from the manufactures website.
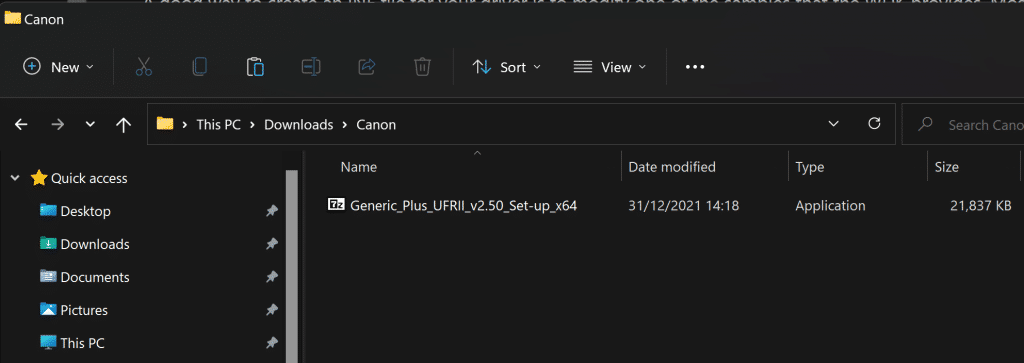
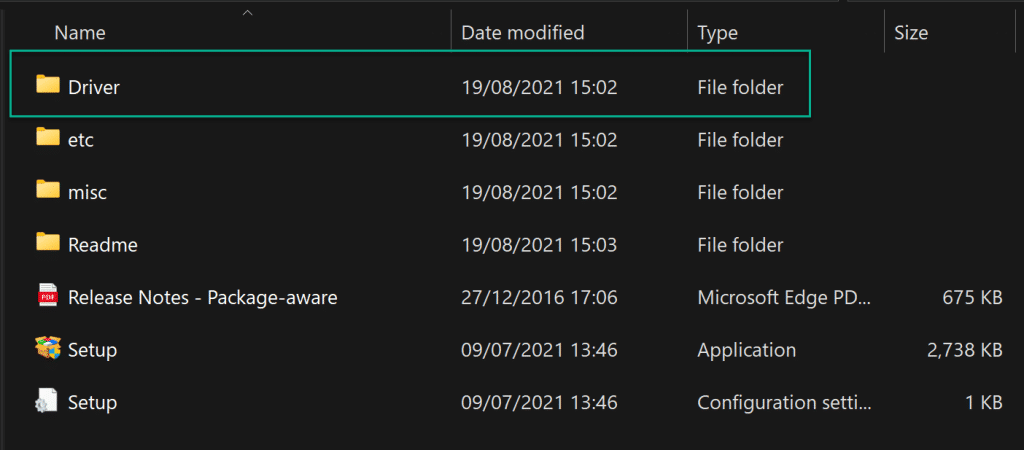
2 . Setup.exe is a simply an installer that guides the user through a UI to install the driver package. This particular installer cannot be run silently so we will navigate to the Driver folder in anticipation of installing the drivers using a PowerShell script.
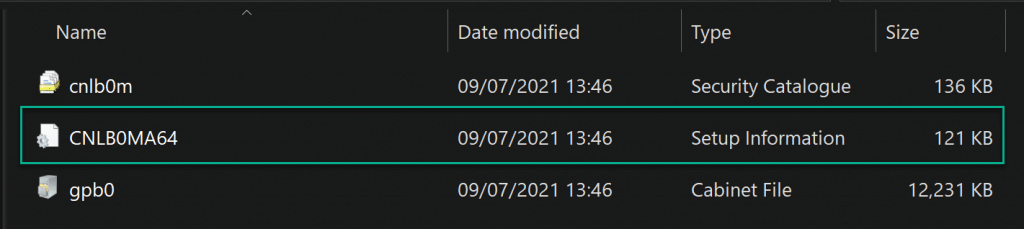
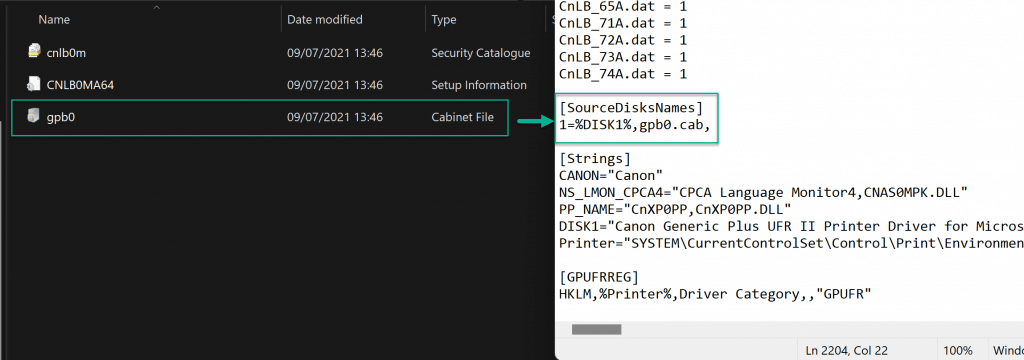
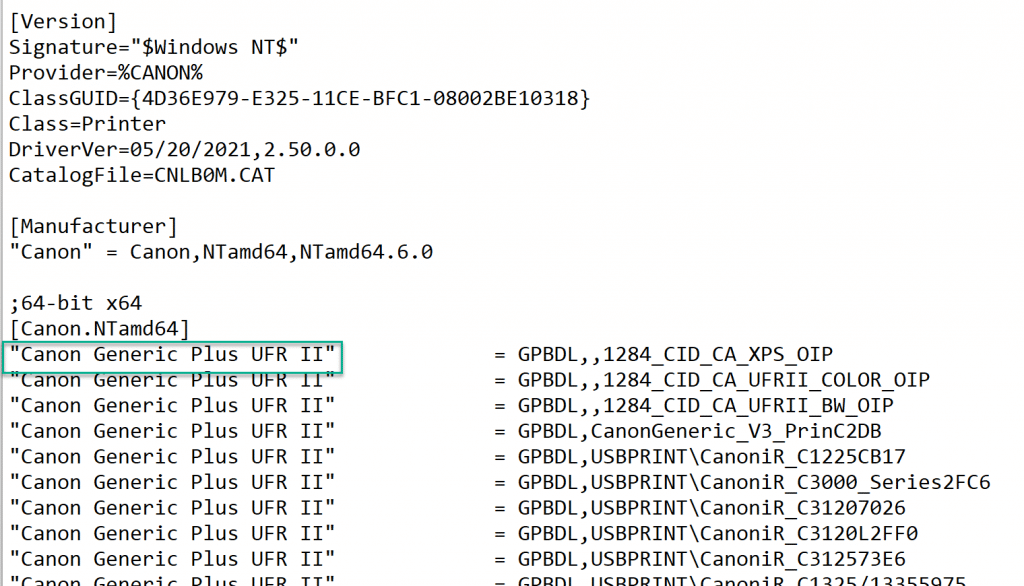
3 . Open the INF file
4 . The INF file indicates which files are required to install the driver. In this example, gpb0.cab is require
5 . As well as noting any source files required using the INF file, Windows needs to validate the files can be trusted – it does this by using a catalog file. The catalog file contains a cryptographic hash of each file in the driver package. Windows uses this information s to verify that the package was not altered after it was published. In our example, the driver catalog file is cnlb0m.cat.
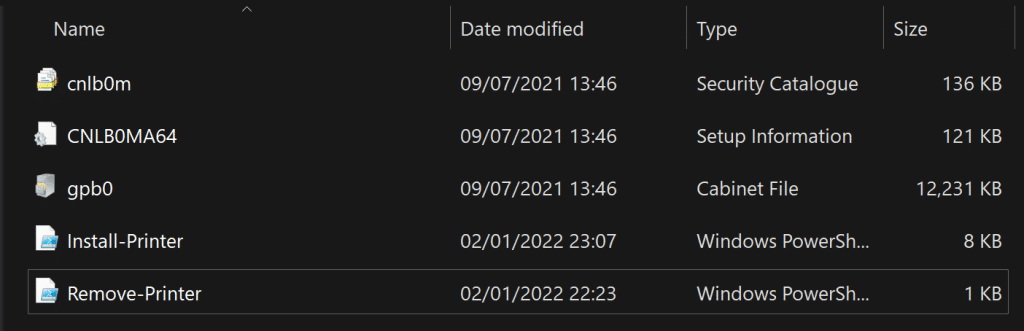
6 . We can summarise that the following files are going to be required to install this Canon Printer Driver:-
- cnlb0m.cat
- CNLB0MA64.inf
- gpb0.cab
Windows Driver Store
Windows maintains a collection of inbox and 3rd party driver packages in a secure location on the local hard disk called the Driver Store. Only the driver packages in the Driver Store can be installed on a device.
An in-box driver package is one which is included in the default installation of Windows
The INF file and all files that are referenced by the INF file will be copied to the Driver Store when a Driver Package is installed. The INF file must reference all of the required files for device installation so that they are present in the Driver Store.
If the INF file references a file that is not included in the driver package, the driver package is not copied to the store
The process of copying a driver package to the Driver Store is called staging. A driver package must be staged to the Driver Store before the package can be used to install any devices. As a result, driver staging and device installation are separate operations
One way of staging drivers to the Driver Store is by using pnputil
There are many commands that can be passed to the pnputil.exe command line tool. An example of using pnputil to stage the Canon printer driver to the Driver Store would be:-
/add-driver * <filename.inf | .inf> pnputil.exe /add-driver “CNLB0MA64.inf”

IMPORTANT
An important piece of information that we will need later is the Printer Driver Name. We will need this when we install our printer driver in Windows. This information is also contained within the INF file. The Driver name in our example will be Canon Generic Plus UFR II

Install a Windows Printer using PowerShell
Assuming we have staged the driver to the Windows Driver Store using pnputil, we can then use the common PowerShell cmdlets Add-PrinterPort, Add-PrinterDriver and Add-Printer to Install a printer in Windows.
Add-PrinterPort
As a reader of this post, my assumption is that you will be rolling out new Network Printers which means you need to create the Printer Port using the Add-PrinterPort cmdlet before running the Add-Printer cmdlet
The Add-Printer cmdlet requires both the DriverName and PortName parameters are passed. This means the Printer Port needs to exist or be created before printer installation is attempted
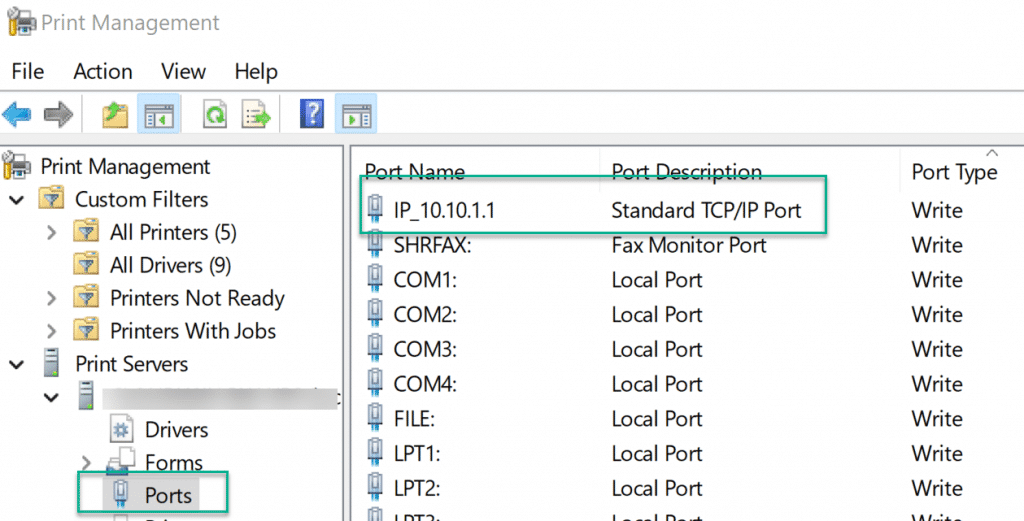
An example to add a new Printer Port would be:-Add-PrinterPort -Name “IP_10.10.1.1” -PrinterHostAddress “10.1.1.1”
Use printmanagement.msc to ensure the port has been created
Add-PrinterDriver
Before using the Add-Printer cmdlet to install the printer, we need to pass a make sure the Printer Driver is installed. Remember the INF file we looked at earlier? It contains the name of the Print Driver that will be installed in the Windows Driver Store. We must ensure we use the same Driver Name when we use the Add-PrinterDriver cmdlet.
As we saw previously, the Printer Driver name that we staged to the Driver Store using pnputil.exe was Canon Generic Plus UFR II
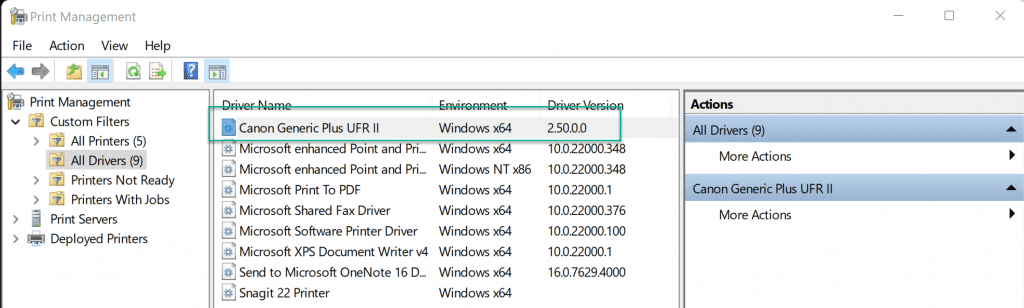
We can use the Add-PrinterDriver cmdlet to install the Printer Driver in Windows FROM the Driver Store. An example of using PowerShell to install the Printer Driver in Windows would be:-Add-PrinterDriver -DriverName “Canon Generic Plus UFR II”
Use printmanagement.msc to ensure the driver has been installed
Add-Printer
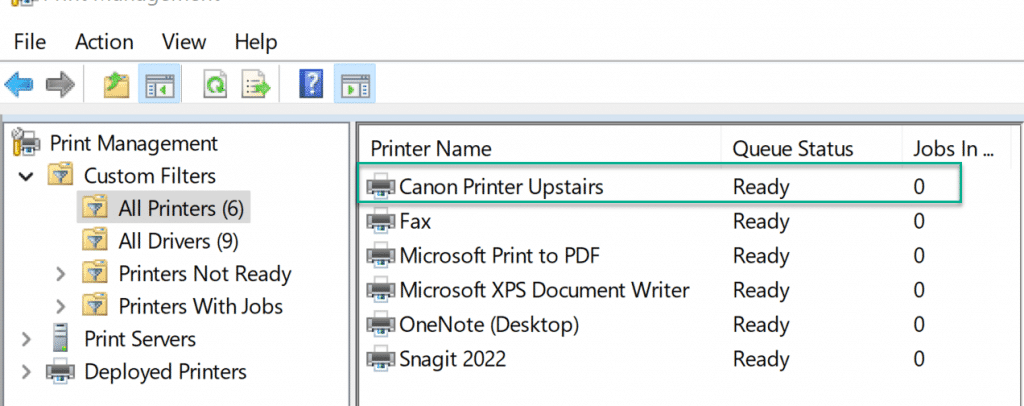
Once we have the printer driver installed and the printer port created, we can use the Add-Printer cmdlet to install the printer. An example of adding a new printer once the port exists or has been created would be:-Add-Printer -Name “Canon Printer Upstairs” -DriverName “Canon Generic Plus UFR II” -PortName “IP_10.10.1.1”
Use printmanagement.msc to verify the printer was installed
A better way – building the Win32 app
We should now have a high level appreciation of the steps required to add a printer to Windows. To summarise:-
- Identify the Printer Driver source files required to install the Printer (from the INF file)
- Identify the Printer Driver name (from the INF file)
- Use pnputil.exe to stage the Printer Driver to the Windows Driver Store
- Use the Add-PrinterPort cmdlet to create a Network Printer port in Windows
- Use the Add-PrinterDriver cmdlet to install the Printer Driver in Windows
- Use the Add-Printer cmdlet to install the Printer in Windows
The main focus of this post is to complete all these steps from a single PowerShell script that we can deploy, along with the driver package source files, as a Win32 app from Intune
We previously identified the source files required to build a win32 app:-
- cnlb0m.cat
- CNLB0MA64.inf
- gpb0.cab
When creating a Win32 app, as well as needing the driver package source files, we also need to specify an install and uninstall command. The 2 PowerShell scripts can be found below.
Install Command
Intune/Install-Printer.ps1 at master · MSEndpointMgr/Intune (github.com)
Several parameters are mandatory to be passed to the script:-
- PortName Specify the name of the port to create
- PrinterIP The network IP address of the printer
- PrinterName The name of the printer to create (The PrinterName is also used in the Detection Method)
- DriverName The name of the printer driver to install (as referenced by the INF file)
- INFFile The name of the INF file for the printer driver
Example:-
1powershell.exe -executionpolicy bypass -file Install-Printer.ps1 -PortName “IP_10.10.1.1” -PrinterIP “10.1.1.1” -PrinterName “Canon Printer Upstairs” -DriverName “Canon Generic Plus UFR II” -INFFile “CNLB0MA64.inf”
2
Uninstall Command
Intune/Remove-Printer.ps1 at master · MSEndpointMgr/Intune (github.com)
A single parameter is required to be passed to this script:-
Example:-
1powershell.exe -executionpolicy bypass -file Remove-Printer.ps1 -PrinterName “Canon Printer Upstairs”
Detection Method
The Win32 app also requires a detection method. The Printer has a registry key that can be used for detection. The name of the key will be the PrinterName we specify when we install the printer. They key is located at:-HKEY_LOCAL_MACHINE\SOFTWARE\Microsoft\Windows NT\CurrentVersion\Print\Printers
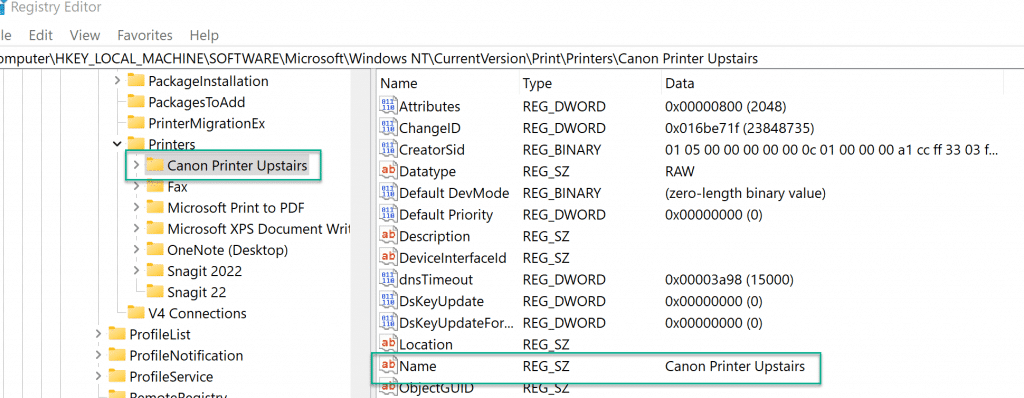
For our example, we will use the following values for our detection method
HKEY_LOCAL_MACHINE\Software\Microsoft\Windows NT\CurrentVersion\Print\Printers\Canon Printer Upstairs
Name = “Canon Printer Upstairs”
Create the .Intunewin file
1 . Copy the source files and scripts into a single folder.
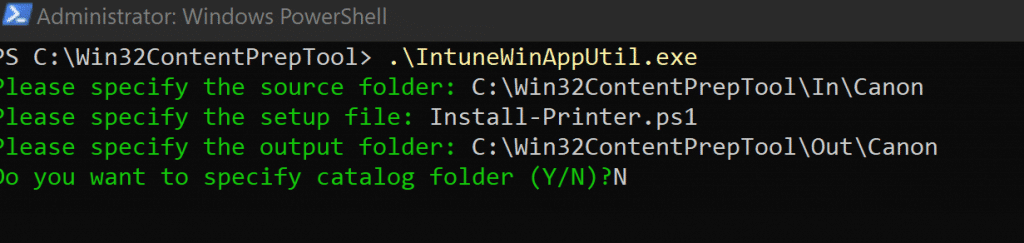
2 . Use the Win32ContentPrepTool to create the .intunewin file
3 . In the Microsoft Endpoint Manager admin centre, create a new Win32 app
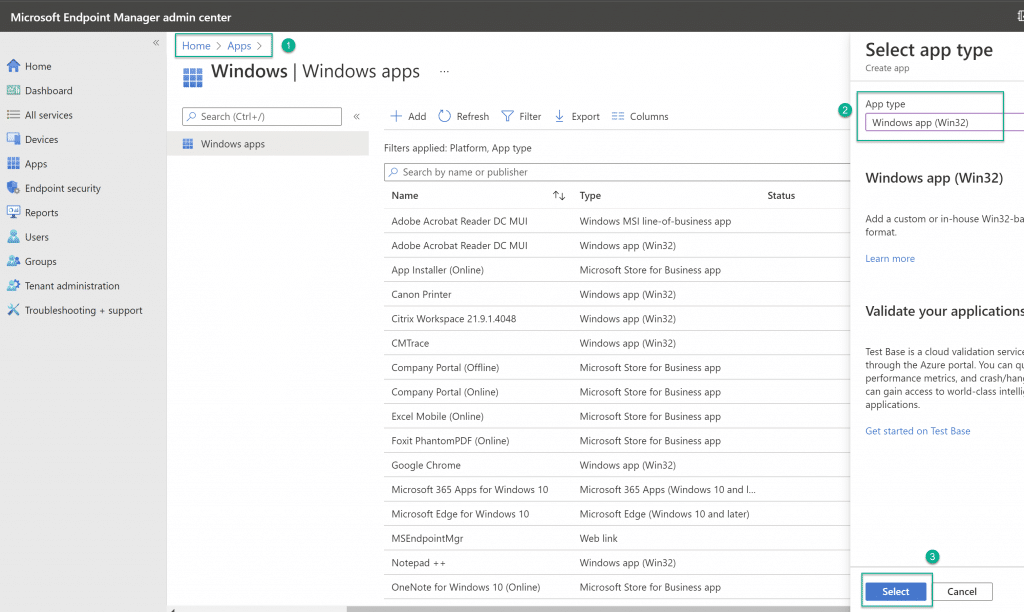
4 . Select the .intunewin file created in step 2
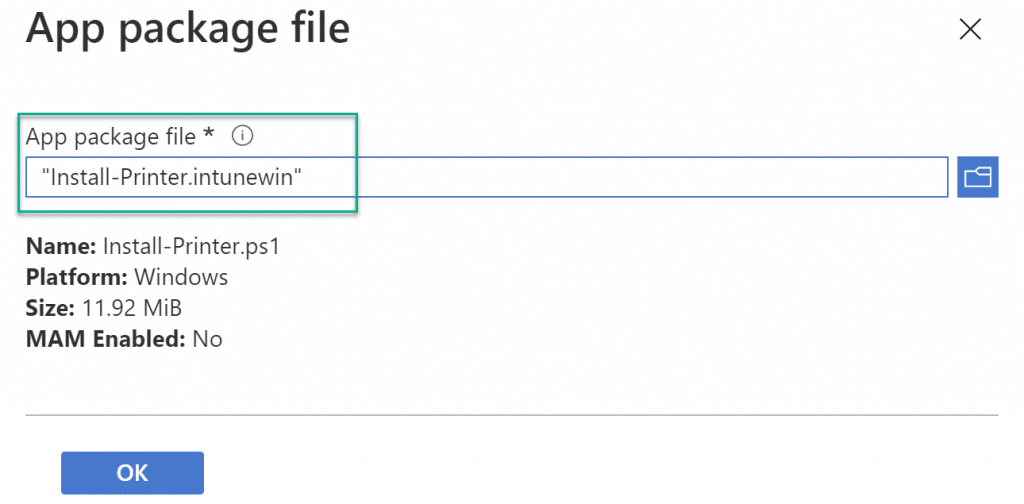
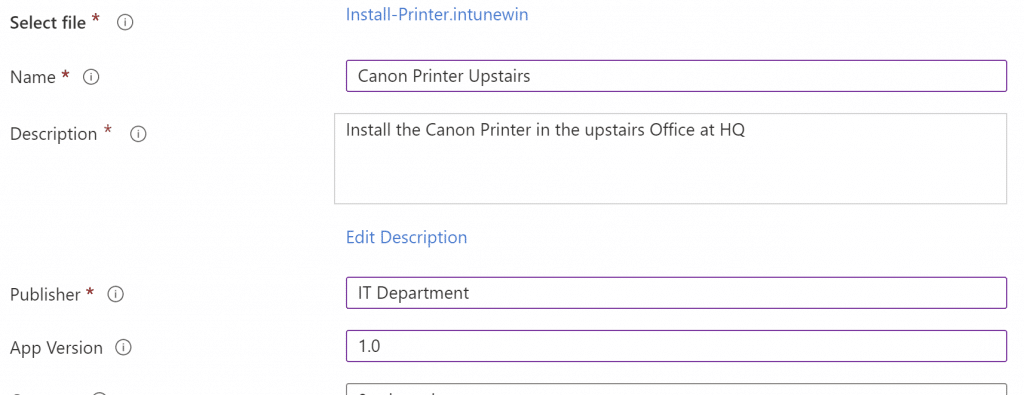
5 . Populate the app information. Don’t forget a logo!
6 . Add the Install and Uninstall commands
Install Command
1powershell.exe -executionpolicy bypass -file Install-Printer.ps1 -PortName “IP_10.10.1.1” -PrinterIP “10.1.1.1” -PrinterName “Canon Printer Upstairs” -DriverName “Canon Generic Plus UFR II” -INFFile “CNLB0MA64.inf”
Uninstall Command
1powershell.exe -executionpolicy bypass -file Remove-Printer.ps1 -PrinterName “Canon Printer Upstairs”
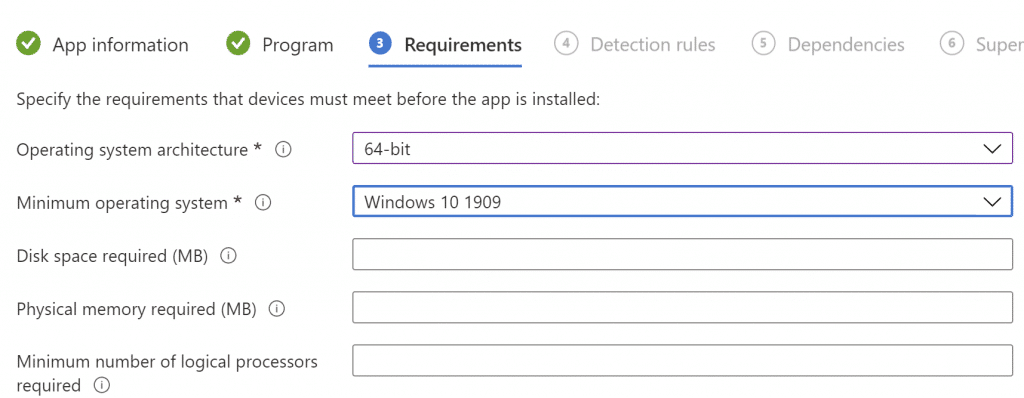
7 . Populate the app requirements
7 . Select Manually configure detection rules and select Add
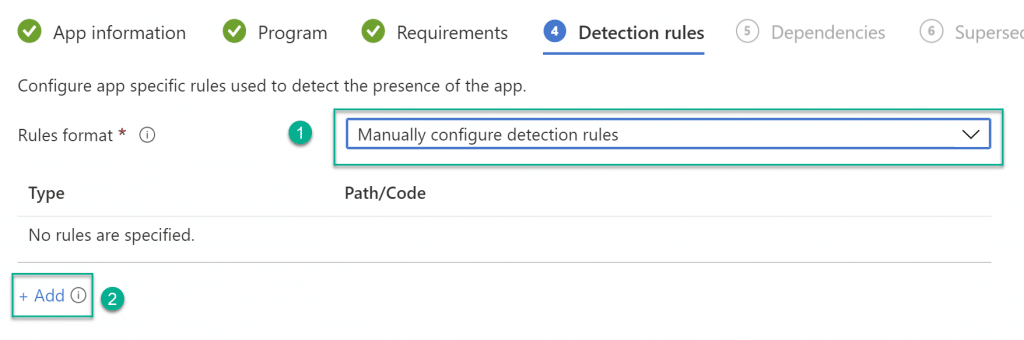
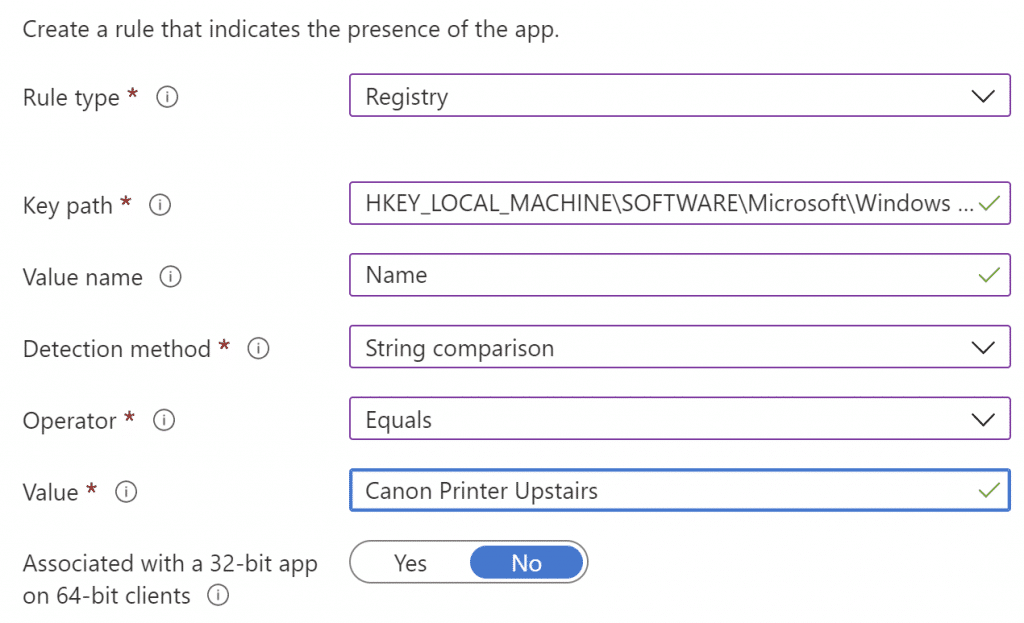
8 . Use the following values for the detection method – adjusting the Key/Name as appropriate
- Rule Type Registry
- Key path HKEY_LOCAL_MACHINE\SOFTWARE\Microsoft\Windows NT\CurrentVersion\Print\Printers\Canon Printer Upstairs
- Value name Name
- Detection method String comparison
- Operator Equals
- Value Canon Printer Upstairs
9 . Assign the app to the appropriate Users/Devices Group
Monitor the Installation
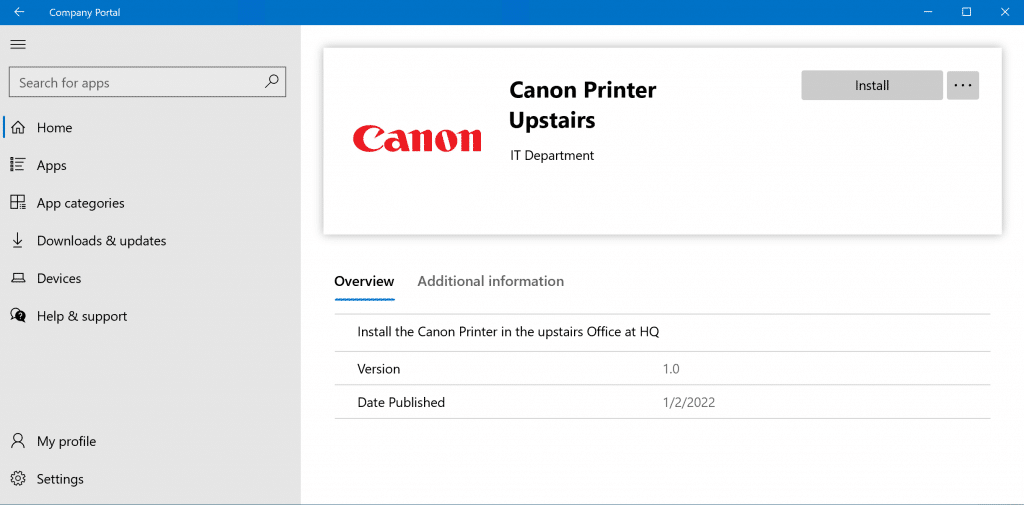
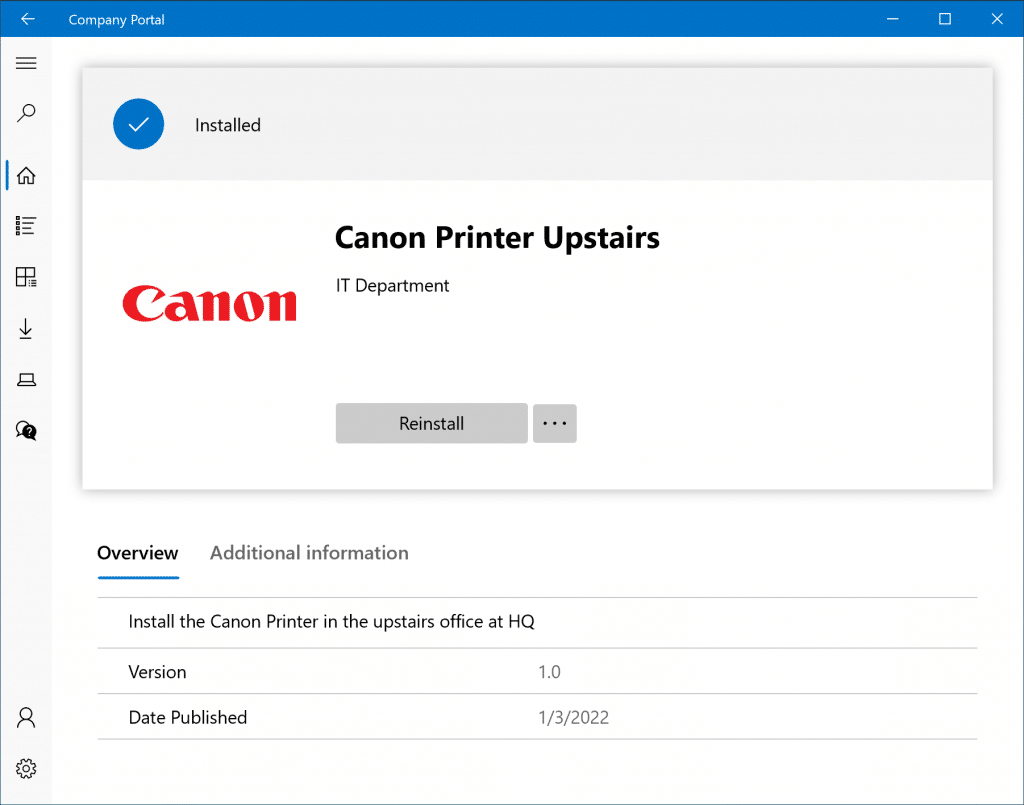
Install the win32 app from the Company Portal if you created an “Available” assignment for a User Group.
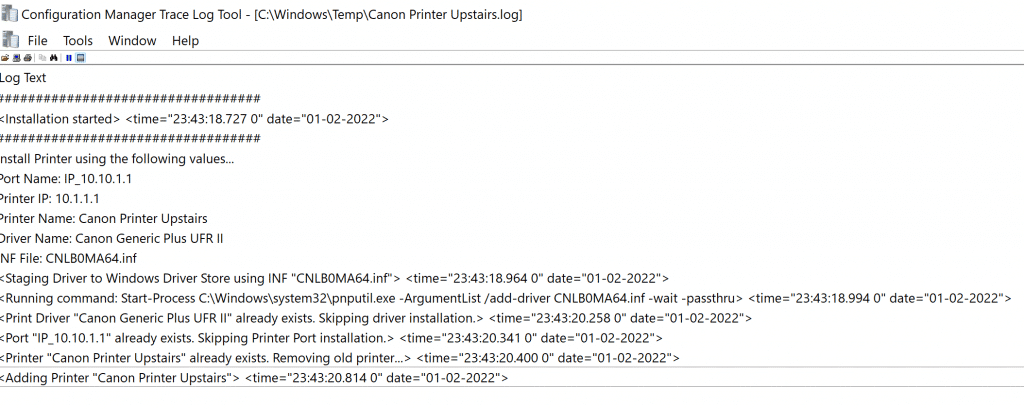
A log file is generated in the systemroot %temp% folder
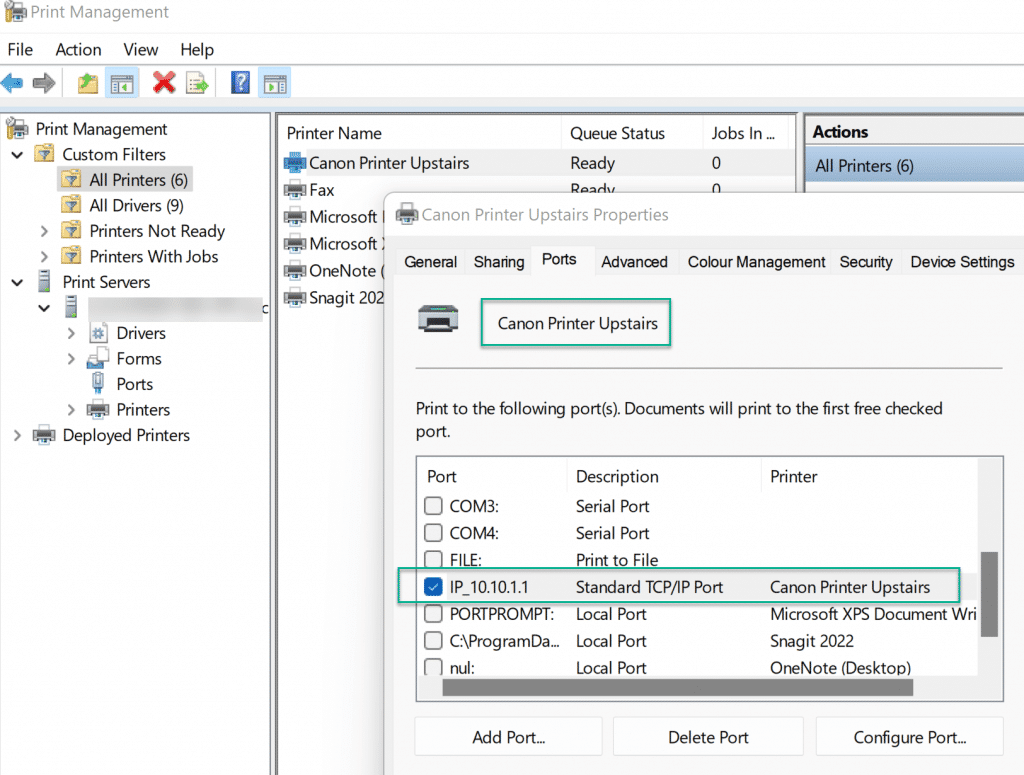
Use printmanagement.msc to verify the Printer, Driver and Port were all installed/created successfully.
Summary
There are many ways to install printers and print drivers. This solution installs both at the same time. The Remove-Printer.ps1 script uninstalls the printer but leaves behind the driver. Leaving the driver makes sense because users may have other printers on their device that use the same driver and you cannot remove a driver if a device is using it.