What is the Dragino LGT-92 GPS Tracker?
The Dragino LoRaWAN GPS Tracker LGT-92 is an open source GPS tracker based on a Ultra Low Power STM32L072 MCU and SX1276/1278 LoRa Module.
The Dragino LGT-92 includes a low power GPS module L70 and 9-axis accelerometer for motion and attitude detection. The power for both of the GPS module and accelerometer can be controlled by MCU to achieve the best energy profile for different applications.
The LoRa wireless technology used in LGT-92 allows the user to send data and reach extremely long ranges at low data-rates.It provides ultra-long range spread spectrum communication and high interference immunity whilst minimising current consumption.It targets professional tracking service.
LGT-92 series products include two major variants:
- LGT-92-LI: is powered by 1000mA rechargeable Li-on battery and charge circuit, which target for real time tracking with short tracking uplink.
- LGT-92-AA: Disable the charge circuit to get the lowest power consumption and power directly by AA batteries. This is designed for asset tracking where only need to uplink a few times every day.
LGT-92 is an open source product, it is based on the STM32Cube HAL drivers and lots of libraries can be found in ST site for rapid development.

The Things Network uses the community to deliver a free LoRaWAN network. You can connect your own gateway to let people connect with the network and ofcourse you can use your own nodes. However it is not nessecary to have your own gateway. The Things network has a growing number of gateways so the coverage is growing fast.
Adding the Dragino GPS Tracker to TTN
Adding the Dragino GPS Tracker to the things network was easy.
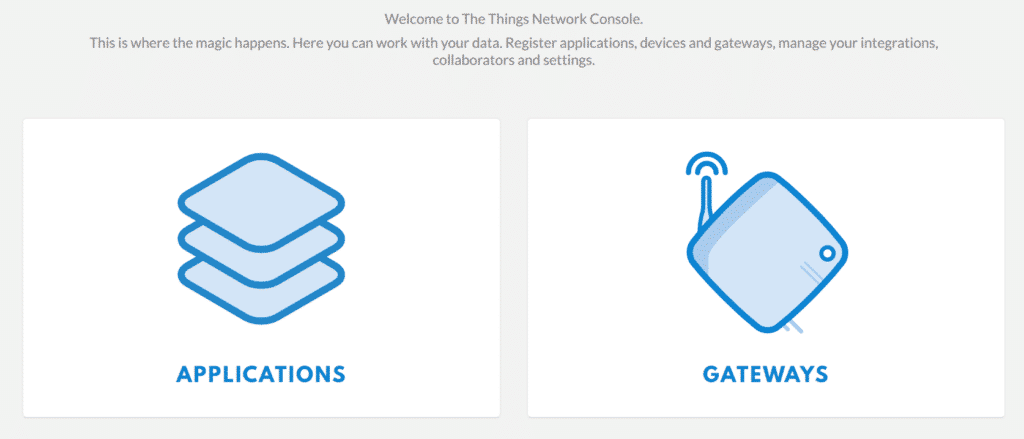
First you have to make an account with TTN. After you logged in you can add a application. Go to this url and click on APPLICATIONS
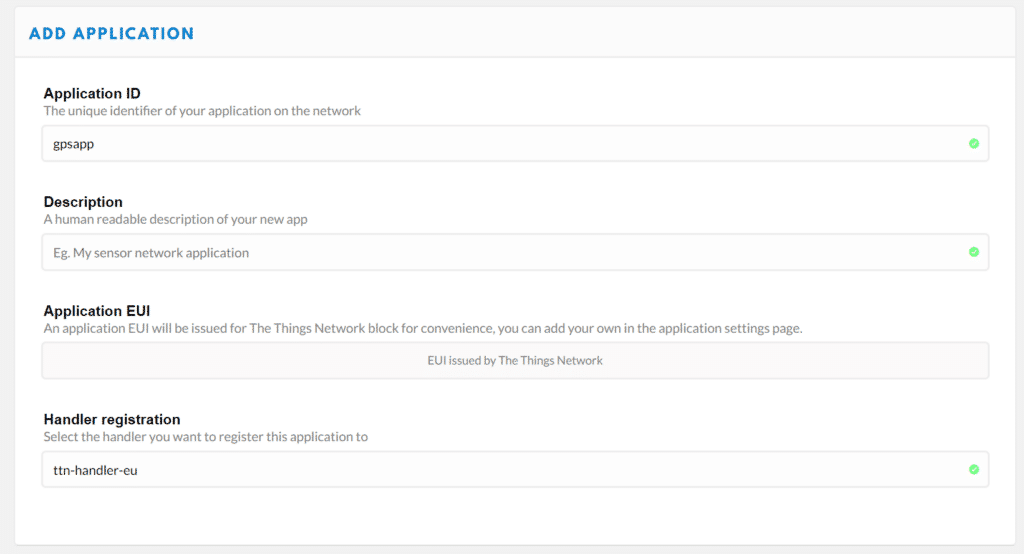
Click on Add Application and give it a id. I used “gpsapp”. You can select the nearest handler.
Now you have to enter some information from the label wich was inside the box of the Dragino Tracker.
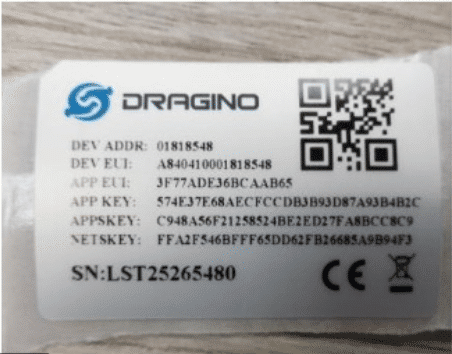
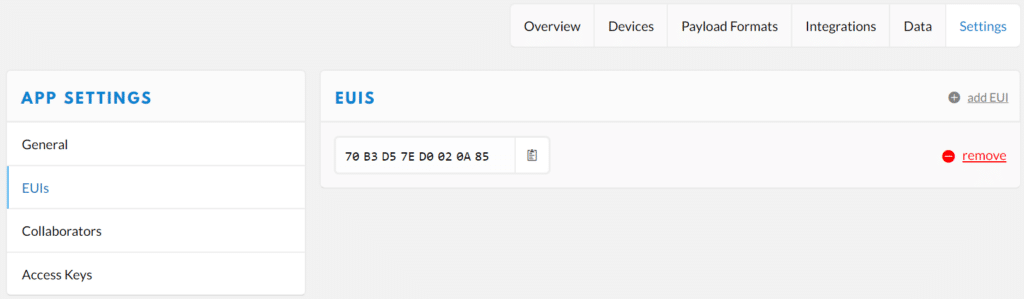
There is an auto-generated Application EUI. You first have to remove this and enter the one from the label.
Go to the devices menu and enter a descriptive Device ID. Fill in the Device EUI from the label and one of the tree App Keys. Klick on Register to finish the registration.
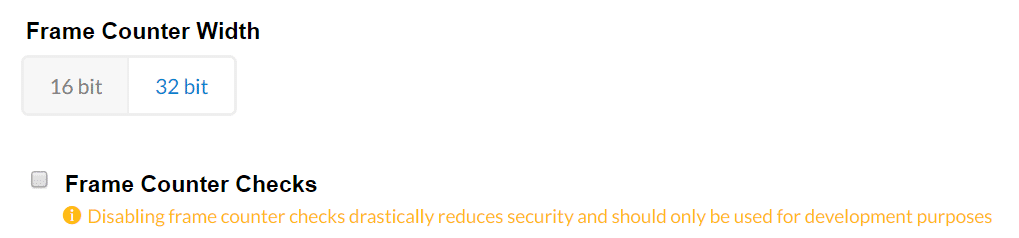
The last thing you have to do is to disable the Frame Counter Checks. This is a security mechanism that does not work well with this kind of devices. Go to the device settings and disable it.
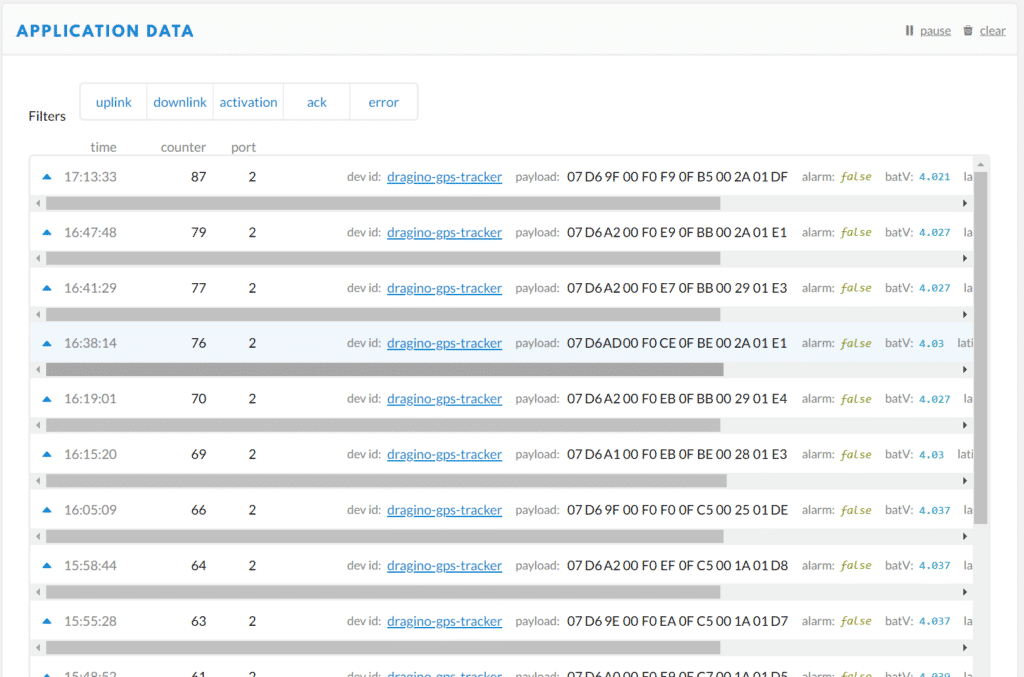
Now turn on the Dragino DPS Tracker and wait for it to connect to TTN. This can take a while to join and activate. You can follow this process in the Application data tab.
I was getting some information in the console. The information wich is displayed is the raw payload wich the tracker transmits. You can use a conversion to make it readable to us humans. To do this you have to make a custom payload format and put it in the console. Go to your application and click on Payload Formats. Enter the following code under Custom and click Save Changes.
function Decoder(bytes, port) {
 // Decode an uplink message from a buffer
 // (array) of bytes to an object of fields.
 var alarm=(bytes[6] & 0x40)?true:false;//Alarm status
 value=((bytes[6] & 0x3f) <<8) | bytes[7];
 var batV=value/1000;//Battery,units:Volts
 value=bytes[8]<<8 | bytes[9];
 if(bytes[8] & 0x80)
 {
 value |=0xFFFF0000;
 }
 var roll=value/100;//roll,units: °
 value=bytes[10]<<8 | bytes[11];
 if(bytes[10] & 0x80)
 {
 value |=0xFFFF0000;
 }
 var pitch=value/100; //pitch,units: °
 var json={
 roll:roll,
 pitch:pitch,
 batV:batV,
 alarm:alarm
 };
 var value=bytes[0]<<16 | bytes[1]<<8 | bytes[2];
 if(bytes[0] & 0x80)
 {
 value |=0xFFFFFF000000;
 }
 var value2=bytes[3]<<16 | bytes[4]<<8 | bytes[5];
 if(bytes[3] & 0x80)
 {
 value2 |=0xFFFFFF000000;
 }
 if (value == 0x0FFFFF && value2 == 0x0FFFFF)
 {
 //gps disabled (low battery)
 } else if (value === 0 && value2 === 0) {
 //gps no position yet
 } else {
 json.latitude=value/10000;//gps latitude,units: °
 json.longitude=value2/10000;//gps longitude,units: °
 }
 return json;
}
When this is done you can check the payload again. The Battery Status, GPS Coordinates Pitch and Roll and Alarm data is visible now
That’s it. Your done connecting the Dragino LGT-92 GPS Tracker to The Things Network LoraWan network.
You can read here how to plot the tracking info on a live map using Grafana.